This article explains how to use Power Automate to send OneBlink form submission data to SharePoint.
The examples below cover two common SharePoint integrations:
- Creating SharePoint list items from form submission data
- Creating SharePoint files from form attachments or generated submission PDFs
If you have not already read the Power Automate Integration article, start there before following this guide.
Creating a SharePoint List
Before creating the Power Automate flow, create the SharePoint list that will store your form submission data.
Step 1: In SharePoint, click Settings, then click Site contents.
Step 2: Click + New, then click List.
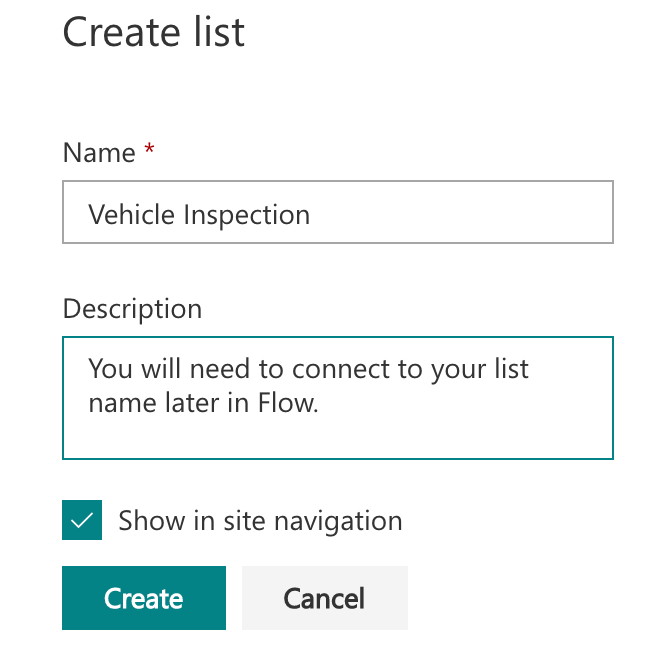
Step 3: Enter a Name for the list.
You can also add a Description if required.
Step 4: Click Create.
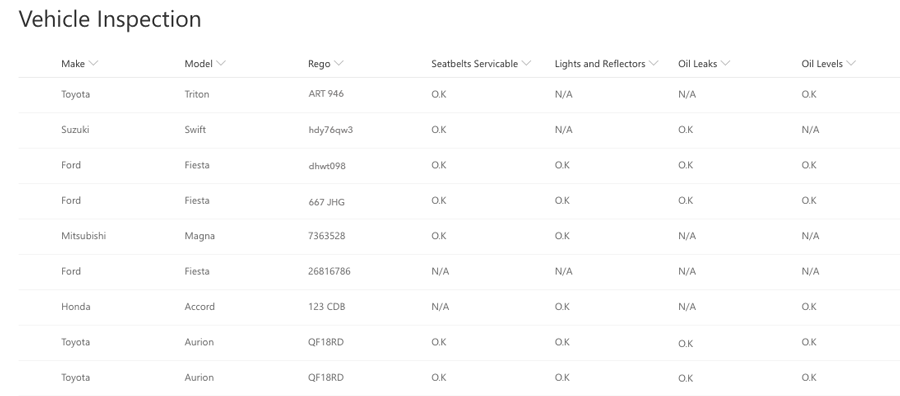
Step 5: Once the list has been created, click + or + Add column to add the columns that will store your form data.
Creating a SharePoint List Item
Once the SharePoint list and columns have been created, you can add a SharePoint action to your Power Automate flow.
Step 1: Open the flow created in the Power Automate Integration article.
Step 2: Add a new connector and search for SharePoint.
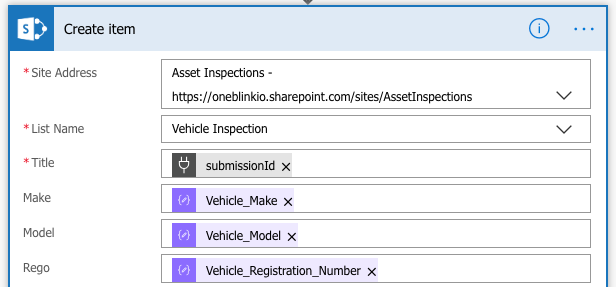
Step 3: Select the Create item connector.
Step 4: Add the Site Address.
The List Name field will populate based on the selected site.
Step 5: Select the List Name.
Once the list is selected, the list columns will become available in the connector.
Step 6: Map each OneBlink form element to the corresponding SharePoint list column.
Step 7: Save the flow and submit the form to test the integration.
You can check whether the flow ran successfully by opening the flow and reviewing the run history.
Creating a SharePoint File
SharePoint files can also be created from Power Automate using the Create File connector.
This can be used to upload files captured through a OneBlink form, such as supporting documents, photos and signatures. You can also use the OneBlink Generate PDF action to upload a PDF copy of the form submission.
Step 1: Open the flow created in the Power Automate Integration article.
Step 2: Add a new connector and search for SharePoint.
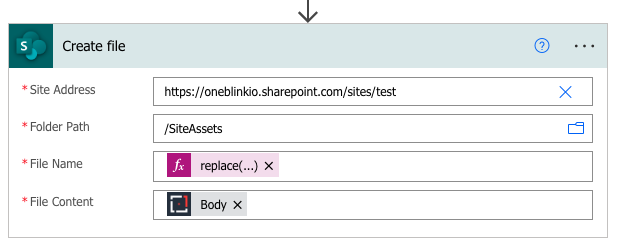
Step 3: Select the Create File connector.
Step 4: Add the Site Address, Folder Path, File Name and File Content.
Known Limitations
Some SharePoint configurations may not support new files that contain a hash (#) or percentage (%) character in the file name.
If the file name is taken from the form submission, make sure these characters are replaced before creating the SharePoint file. The expression below replaces any hash (#) or percentage (%) characters with an underscore (_):
replace(replace(items('Apply_to_each')?['fileName'], '#', '_'), '%', '_')
Getting Help
If you need any assistance with Power Automate SharePoint integrations, please reach out through the Report Issue menu or email support@oneblink.io.
Was this article helpful?
That’s Great!
Thank you for your feedback
Sorry! We couldn't be helpful
Thank you for your feedback
Feedback sent
We appreciate your effort and will try to fix the article