Power Automate allows you to connect OneBlink forms with third-party systems and create integration workflows for systems that are not available out of the box in the OneBlink platform.
Common Power Automate integrations include SQL Server, Power BI, SharePoint, Salesforce and Excel.
TABLE OF CONTENTS
- Getting Started
- Getting Your Power Automate Key
- Creating a OneBlink Flow
- Adding an Action
- Parse JSON
- Tips and Tricks
- Getting Help
Getting Started
To use the OneBlink connector, you will need a premium Power Automate account. You may already have a licence through your Office 365 account.
Once you have an account, you can find the OneBlink connector in the Power Automate connector list.
To use the connector, you will need an API key from the OneBlink Console.
Getting Your Power Automate Key
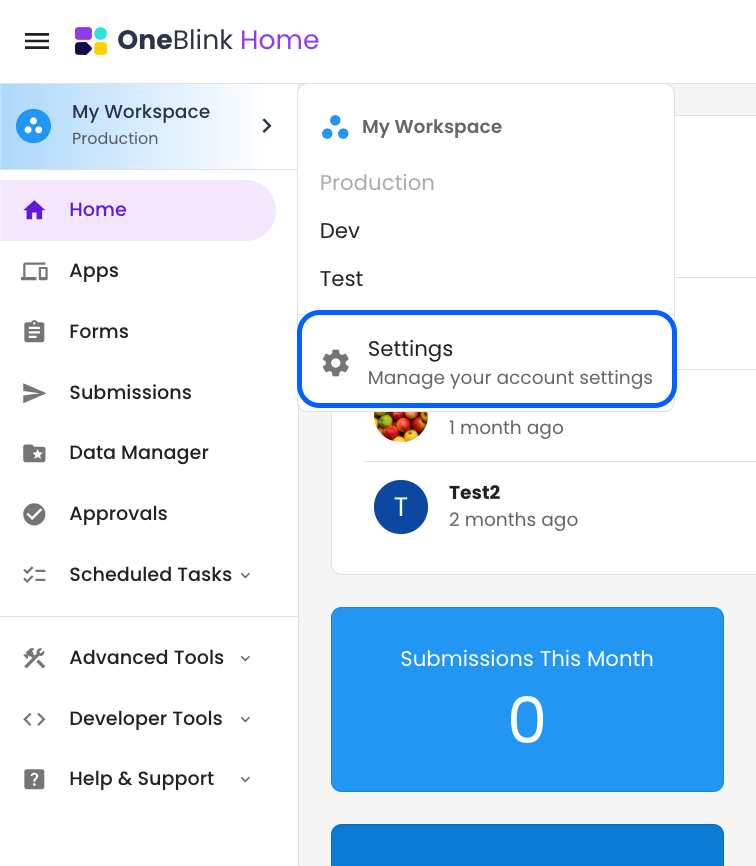
You can create a Power Automate key from the Integrations menu in Settings.
Step 1: Open the Environment Picker and click the Settings option.
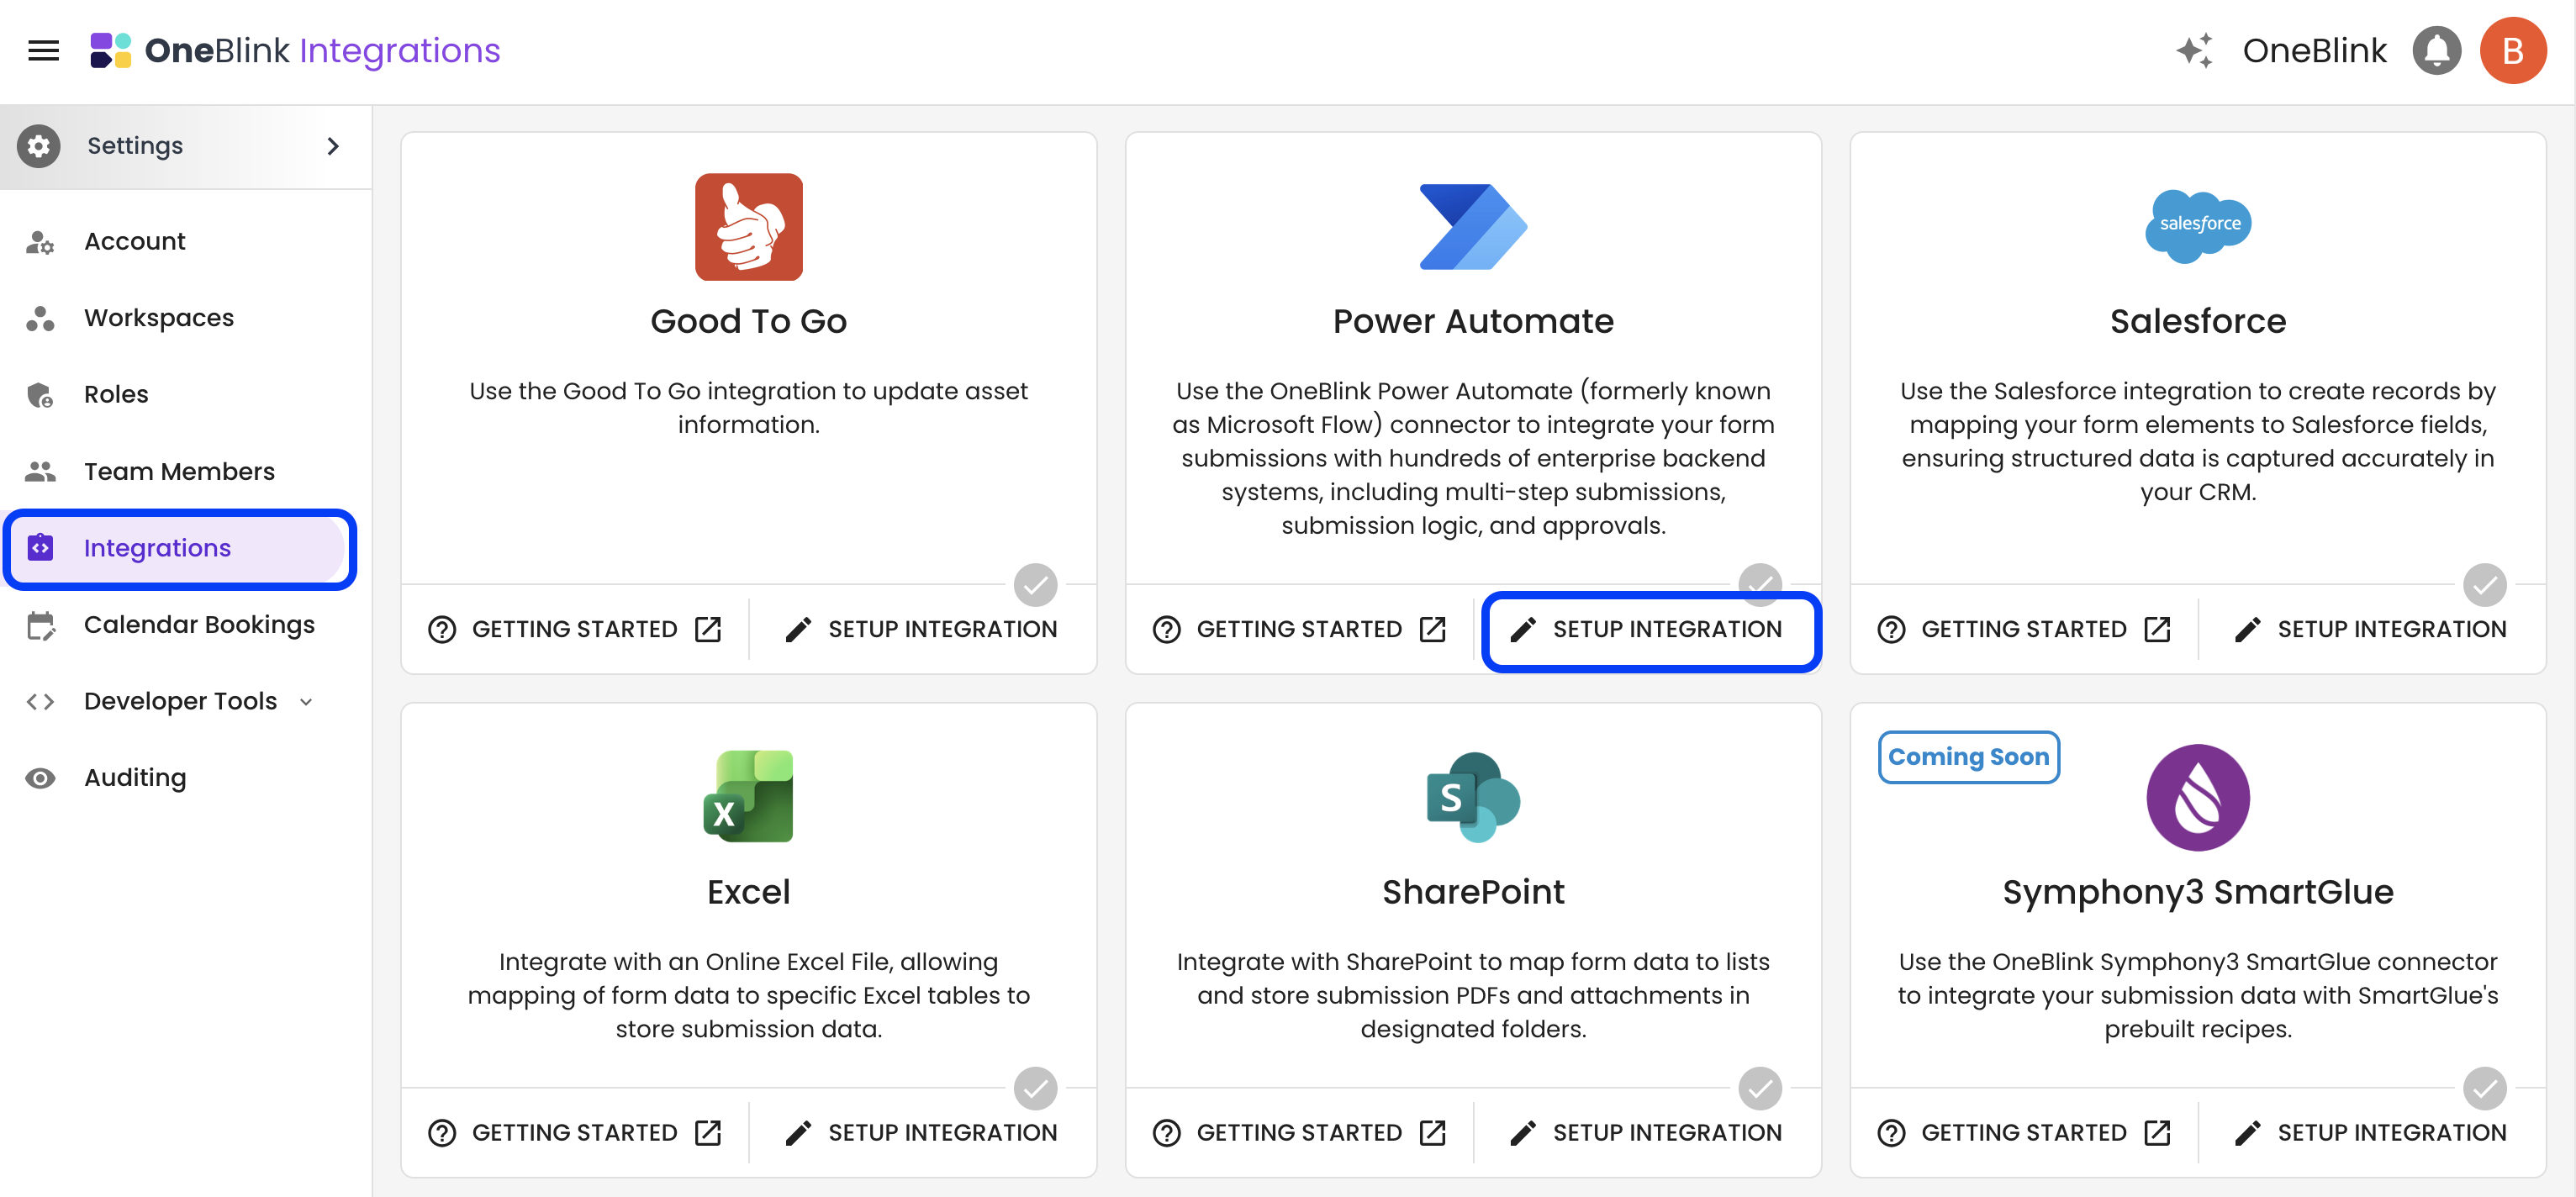
Step 2: Open the Integrations menu and click the Setup Integration button.
Step 3: Click the Create Power Automate Key button.
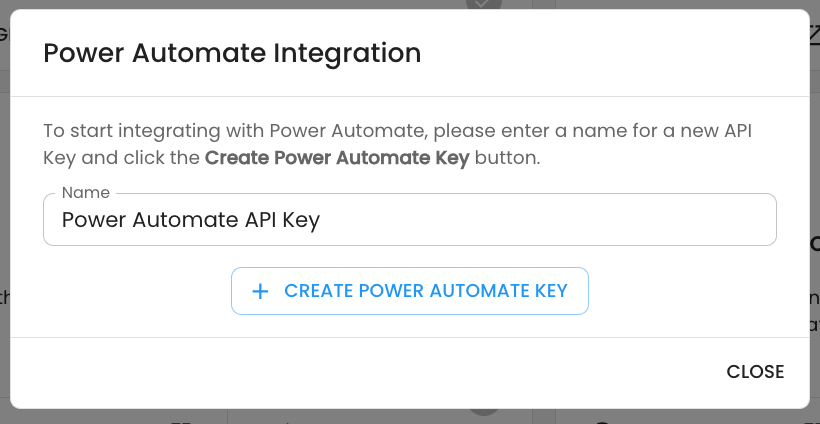
A new Power Automate key will be created.
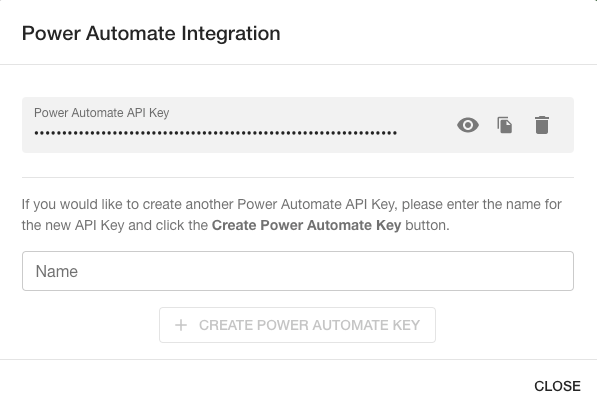
From this page, you can view, copy and delete your Power Automate keys. If you need to create another key, add a name and click the Create Power Automate Key button.
Creating a OneBlink Flow
Create a trigger
Select the trigger called “Triggers when a OneBlink Form submission occurs”. This trigger starts your flow when a OneBlink form is submitted.
The first time you select the OneBlink connector, you will be asked to enter:
- Connection name: This can be any name that helps you identify the connection.
- API Key: The Power Automate key from the OneBlink Console.
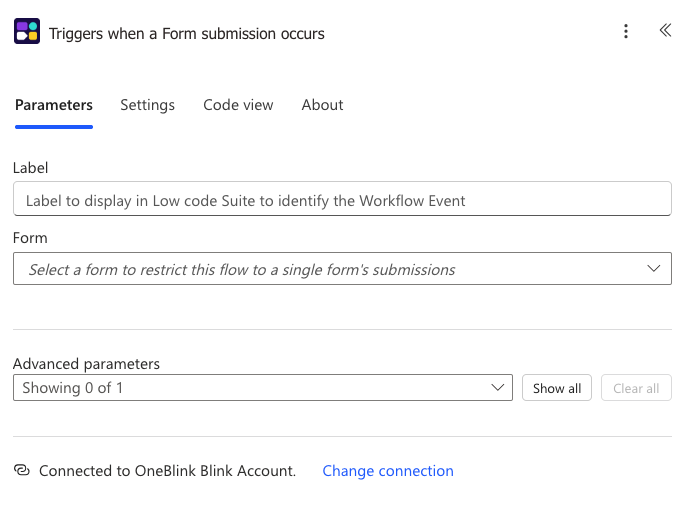
Trigger conditions
When setting up the trigger, add a Label and a Form.
The label helps identify the flow. Selecting a form ensures the flow only runs when that form is submitted. If a form is not selected, the flow will run when any form in the account is submitted.
Adding an Action
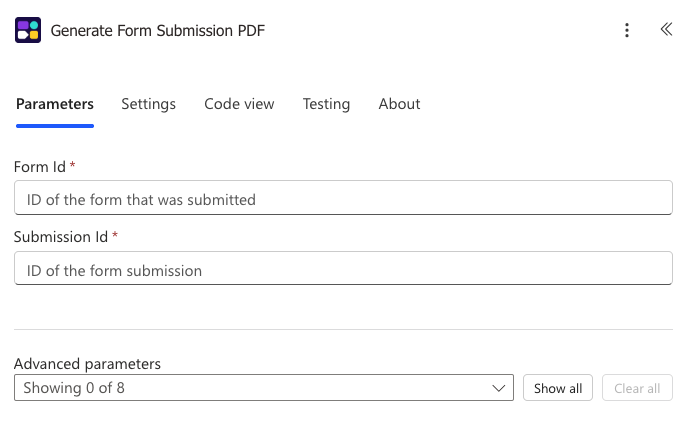
Generate Form Submission PDF
The Generate Form Submission PDF action allows you to generate a PDF of the submission data. The PDF can then be used as part of the flow. This action uses the same PDF configuration as other platform workflow events that generate a PDF.
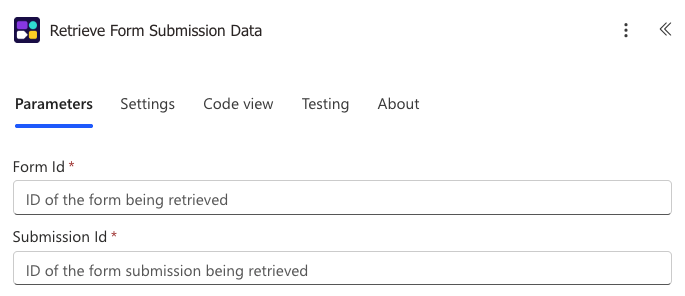
Retrieve Form Submission Data
The Retrieve Form Submission Data action allows you to retrieve the data captured in the form submission.
This action returns an object that includes both the form definition and the submission data, allowing you to build out your flow using the data captured in the form. Before being able to use the submission data in your flow, you will first need to parse the JSON. For more information on how to parse the JSON, see the Parse JSON section below.
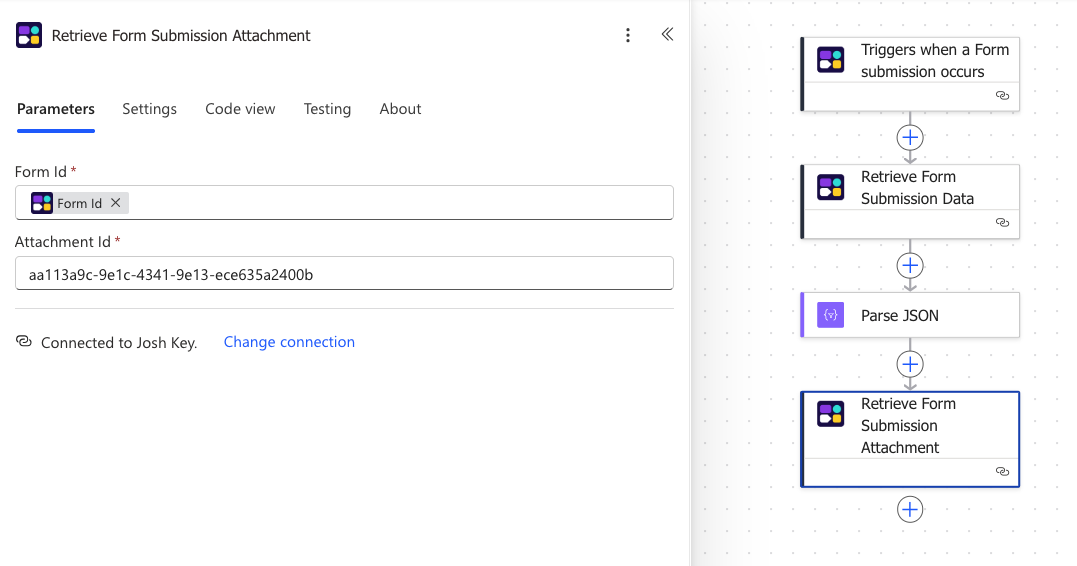
Retrieve Form Submission Attachment
The Retrieve Form Submission Attachment action allows you to retrieve attachments from a form submission and pass them into your flow.
This includes attachments from Camera, Files, Signature and Checklist-Files elements.
To use this action, you will need the Element ID for the elements capturing attachments. This can be obtained using the Parse JSON connector or by viewing the Network requests within the OneBlink Platform. Add the Attachment ID to the Retrieve Form Submission Attachment action. If you need assistance finding the Element ID
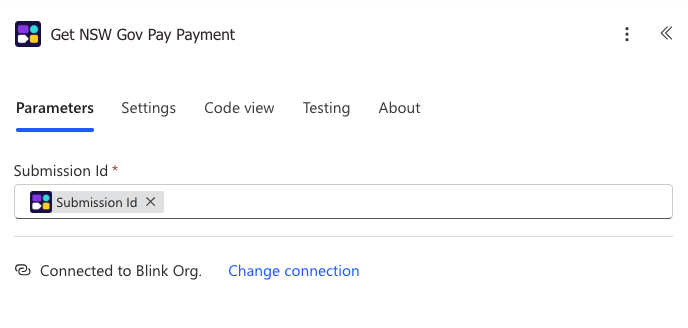
Get NSW Gov Pay Payment
Gov Pay data can also be collected as part of a Power Automate flow. To do this, use the Get NSW Gov Pay Payment action. This action accepts a submission ID.
If there is no Gov Pay record associated with the submission, this action will not work.
Parse JSON
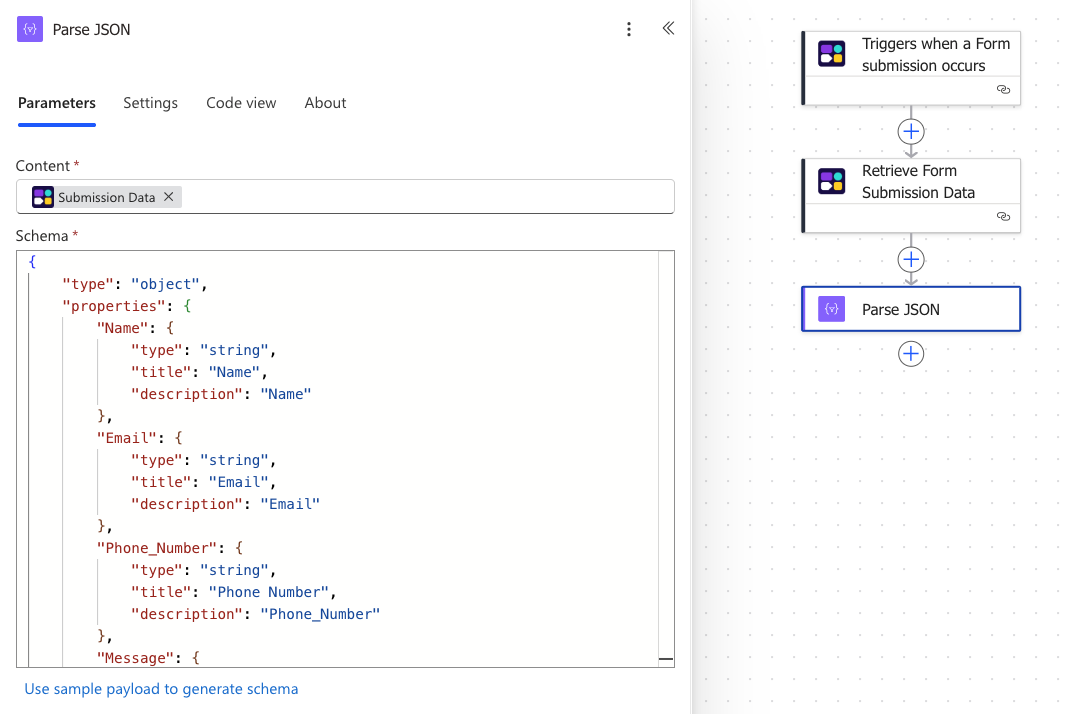
The next stage of the flow depends on what you need the flow to do. In most cases, you will likely use the Parse JSON connector to turn the submission data into dynamic values that can be used in later flow steps.
To parse the JSON value, you will need access to the form JSON schema.
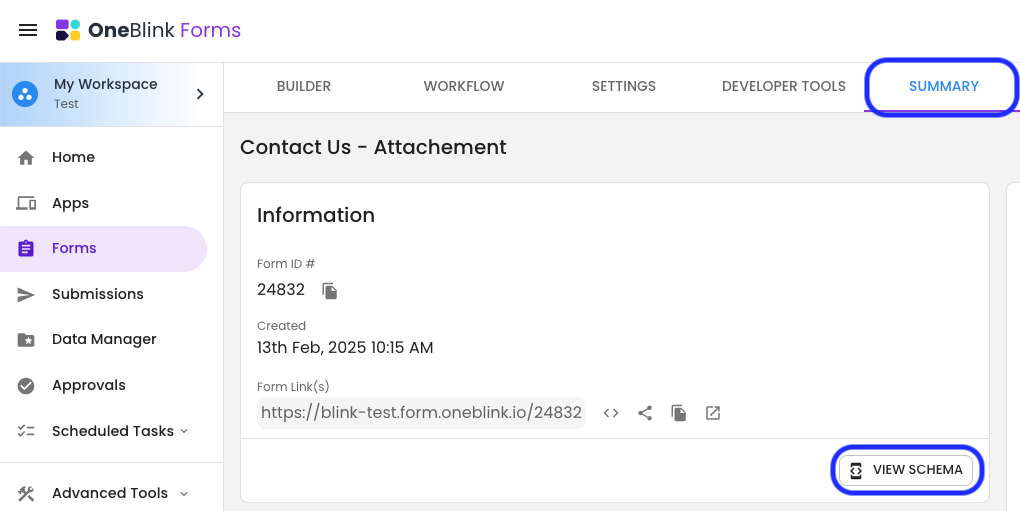
Step 1: Open the Forms builder and navigate to the Summary tab
Step 2: In the Information card, click View Schema.
Step 3: Copy the schema to your clipboard.
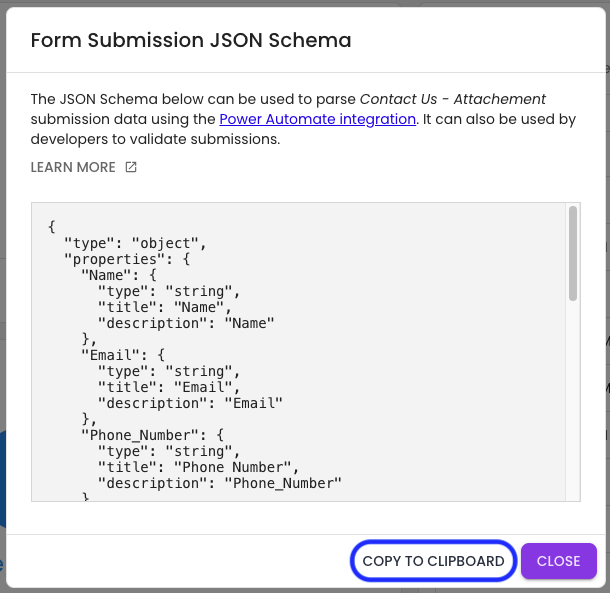
Step 5: Paste the schema directly into the Parse JSON connector.
Do not use the “Use sample payload to generate schema” option, as this can break the schema. Paste the schema directly into the input instead.
The Content field for the Parse JSON connector should be set to Submission Data.
Tips and Tricks
Renaming Attachments
The standard way to name attachments as they are uploaded is to use the Dynamic content value “FileName”. This ensures the uploaded attachment keeps the same name it had when it was added to the form.
If you want to rename an attachment as it is uploaded, you will need to get the attachment extension so the uploaded file keeps the correct format. This can be done using a substring expression.
Camera Element
When uploading an attachment from a Camera element, set the file name to the value you want to use, such as the submission ID, attachment ID or a hard-coded value.
Then open the expression tab and enter the expression below, replacing camera with the name of your Camera element:
substring(body('Parse_JSON')?['camera']?['fileName'],lastIndexOf(body('Parse_JSON')?['camera']?['fileName'],'.'))
This takes everything after the dot (.) in the file name, which gives you the attachment extension. You can then rename the attachment as part of the flow.
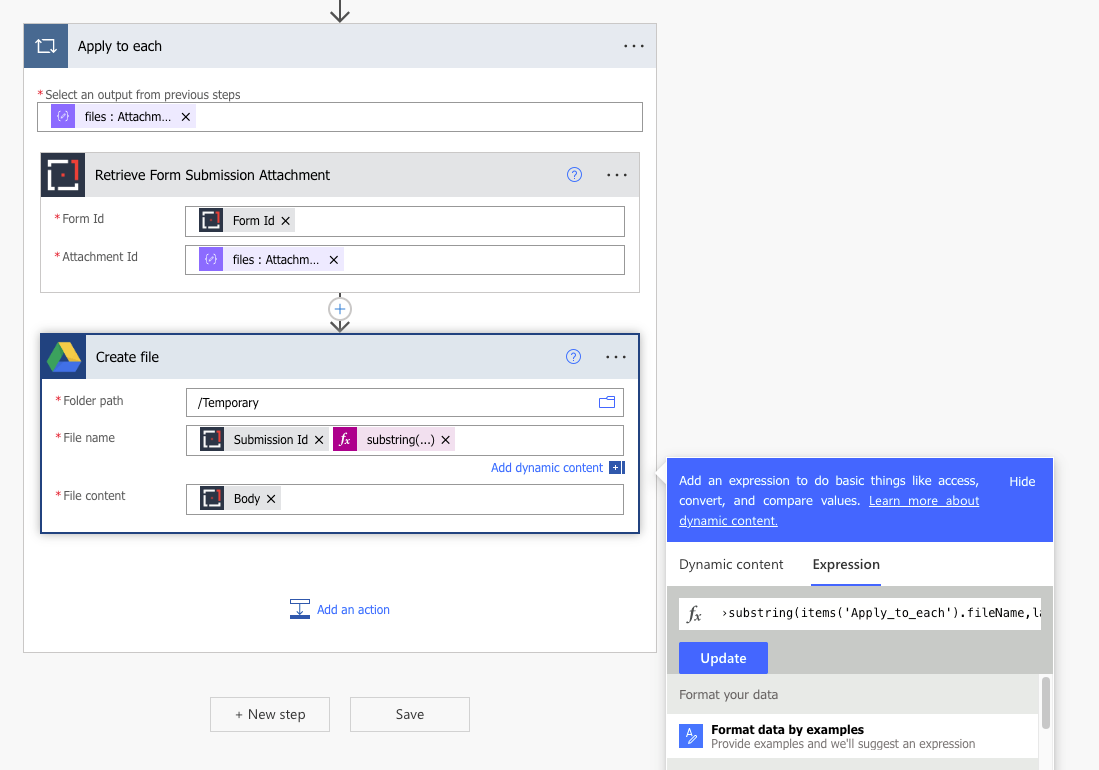
Files Elements
Because a Files element can upload multiple files, this must be done in an Apply to each loop.
Set the file name to the value you want to use, then open the expression tab and enter the expression below:
substring(items('Apply_to_each').fileName,lastIndexOf(items('Apply_to_each').fileName,'.'))
This takes everything after the dot (.) in the file name, which gives you the file extension.
In the example below, the file name is set to the Submission ID plus the file extension.
Getting Help
If you need any assistance with Power Automate integration, please reach out through the Report Issue menu or email support@oneblink.io.
Was this article helpful?
That’s Great!
Thank you for your feedback
Sorry! We couldn't be helpful
Thank you for your feedback
Feedback sent
We appreciate your effort and will try to fix the article