When a form is completed, the platform can generate a PDF report of that submission. This Submission PDF can then be sent to the person who completed the form, or passed through one of the supported workflow processes.
TABLE OF CONTENTS
How to Generate a Submission PDF
PDF can be created in two ways: one is in the Success Message, and the other is using Workflow Events.
For more information on the success message, check out the Forms article.
For more information on workflow events, check out the Workflow article.
Adding a PDF to the Success Message
The success message will display after the user submits the form.
Step 1: Open your form and navigate to the Settings Tab.
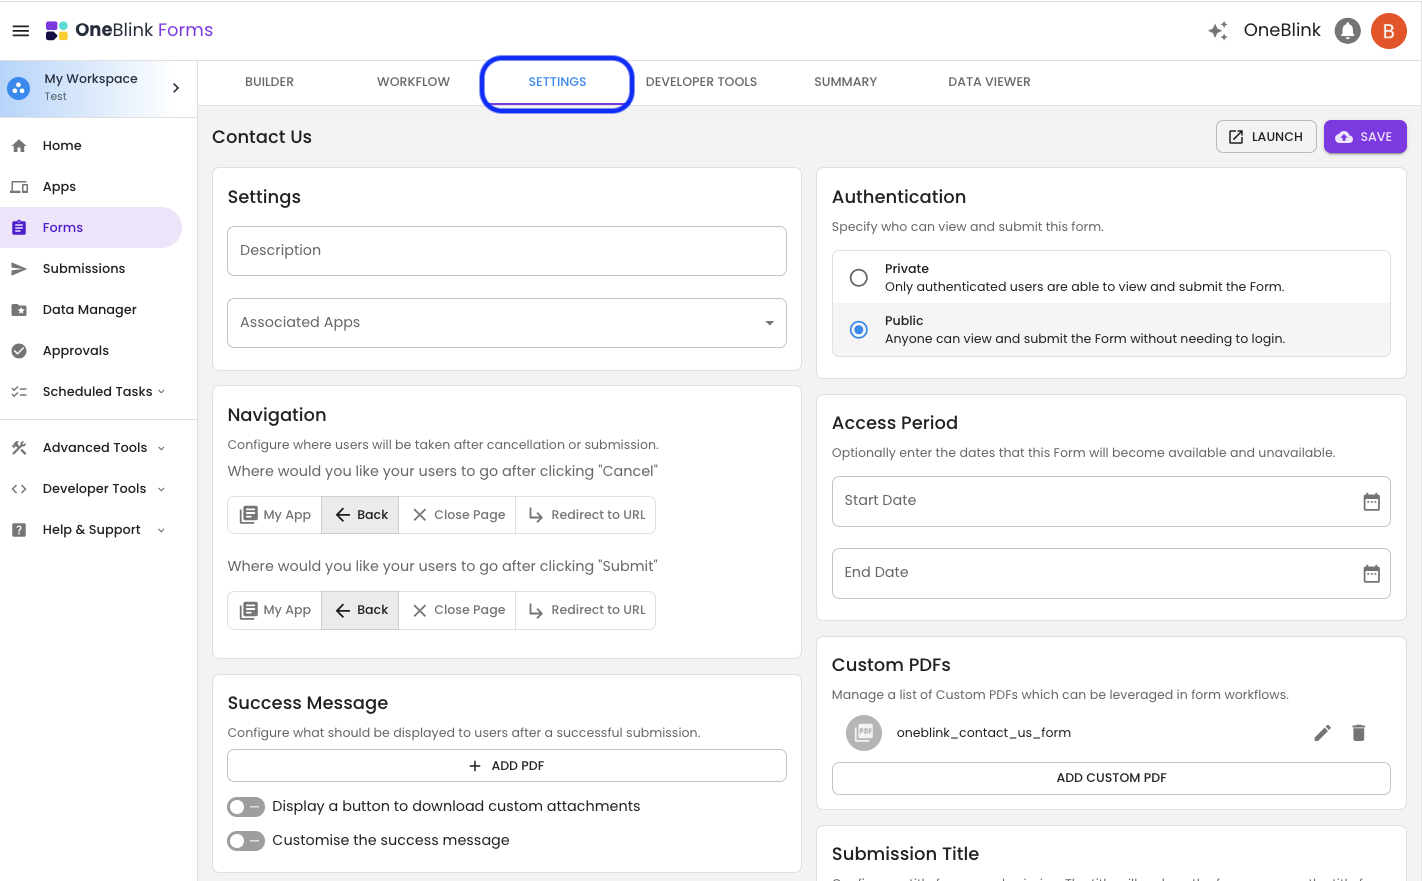
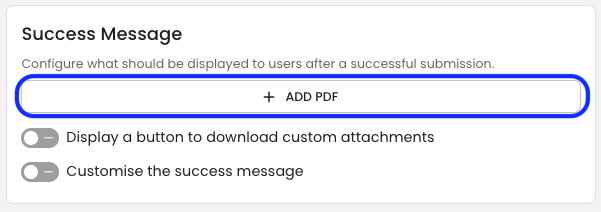
Step 2: On the Success Message Card, click the Add PDF button.
Adding a PDF to a Workflow Event
The Workflow events can be triggered as part of the form submission process. The following workflow events can be used to generate a submission PDF.
- Salesforce: Create Object Record
- SharePoint: Store PDF
- Micro Focus Content Manager
- Civica Authority - CRM
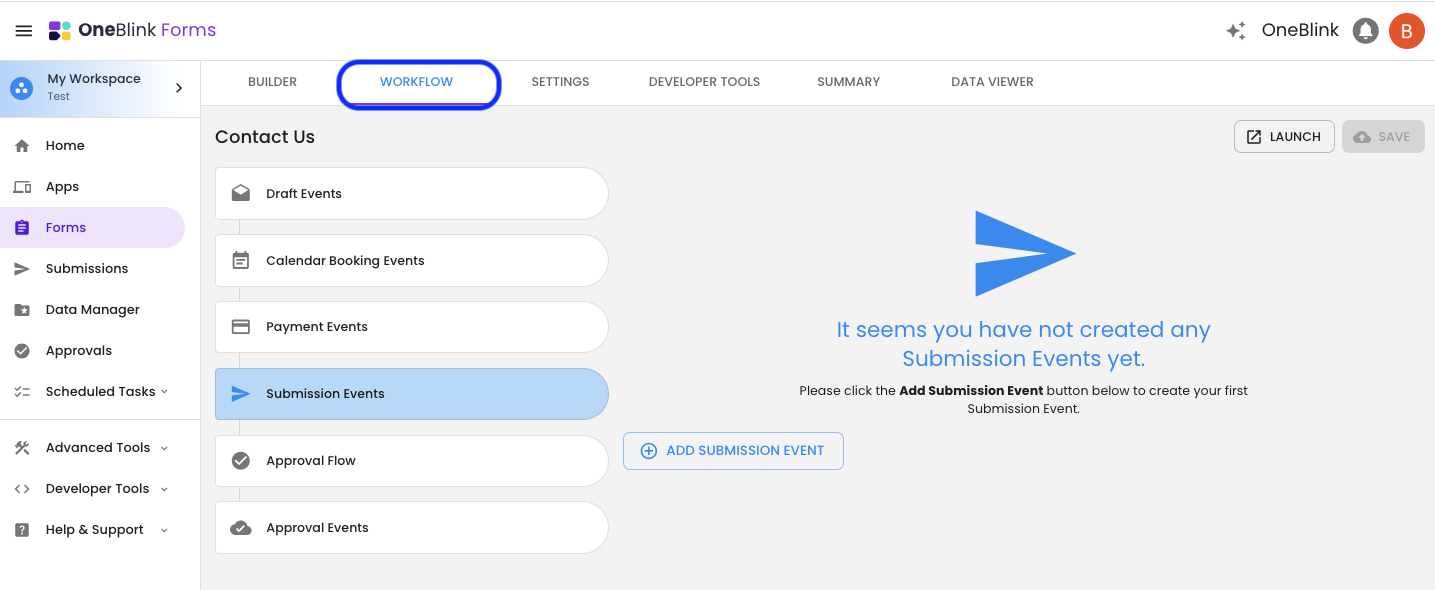
Step 1: Open your form and navigate to the Workflow tab.
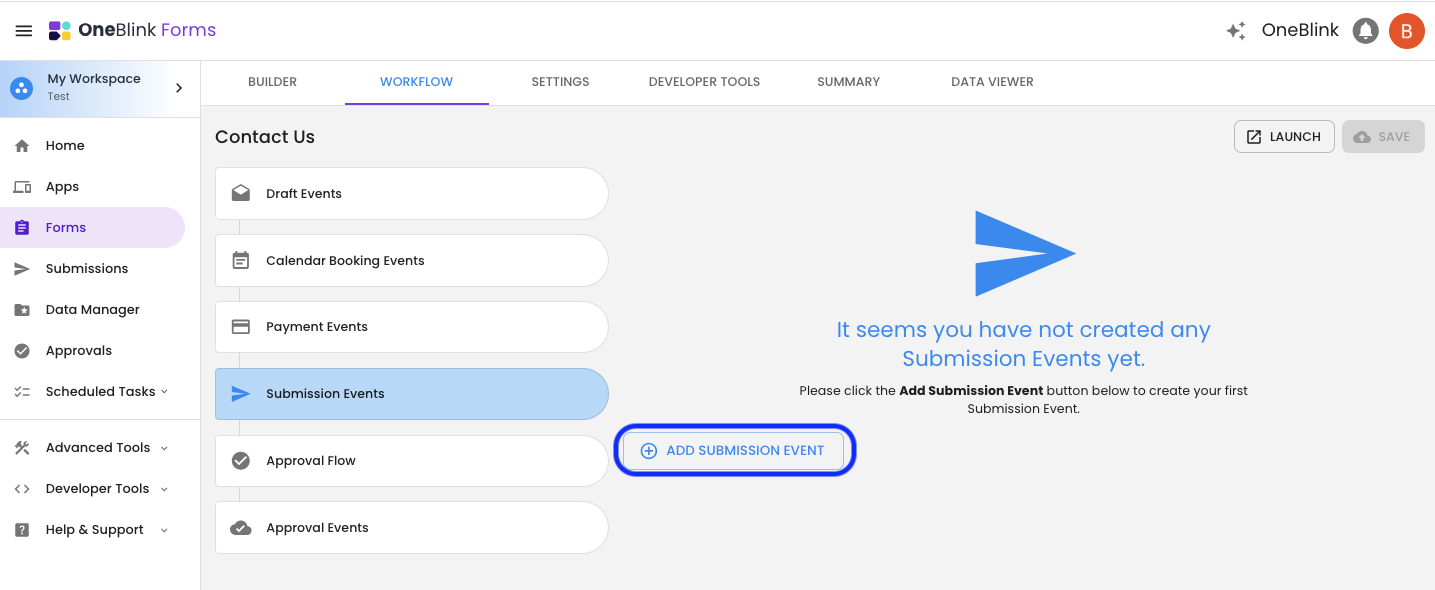
Step 2: Click the 'Add Submission Event' button.
Step 3: This will depend on the type of workflow event you are using.
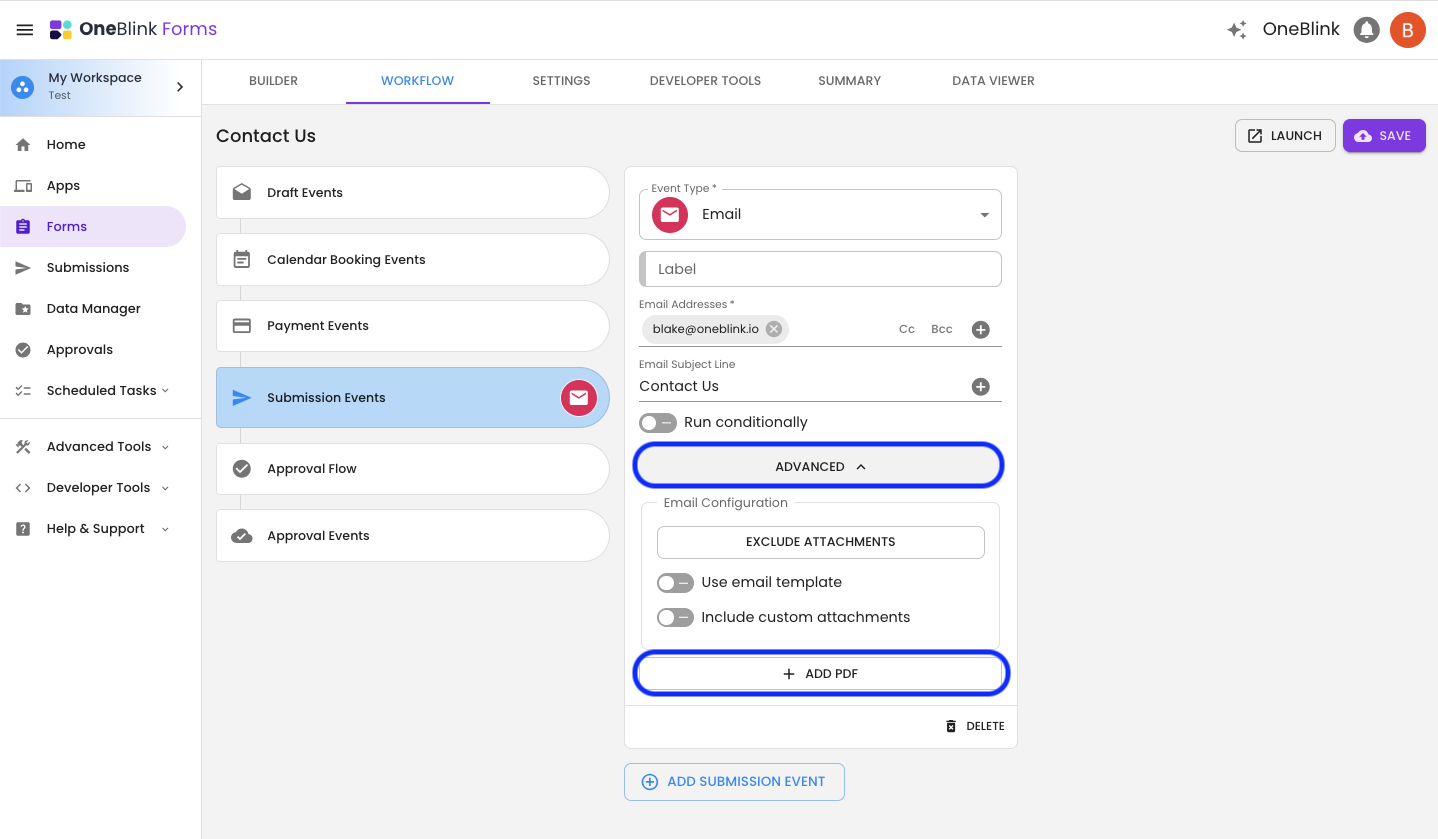
For an Email and Salesforce workflow Event: Open the Advanced Section and click the Add PDF Button.
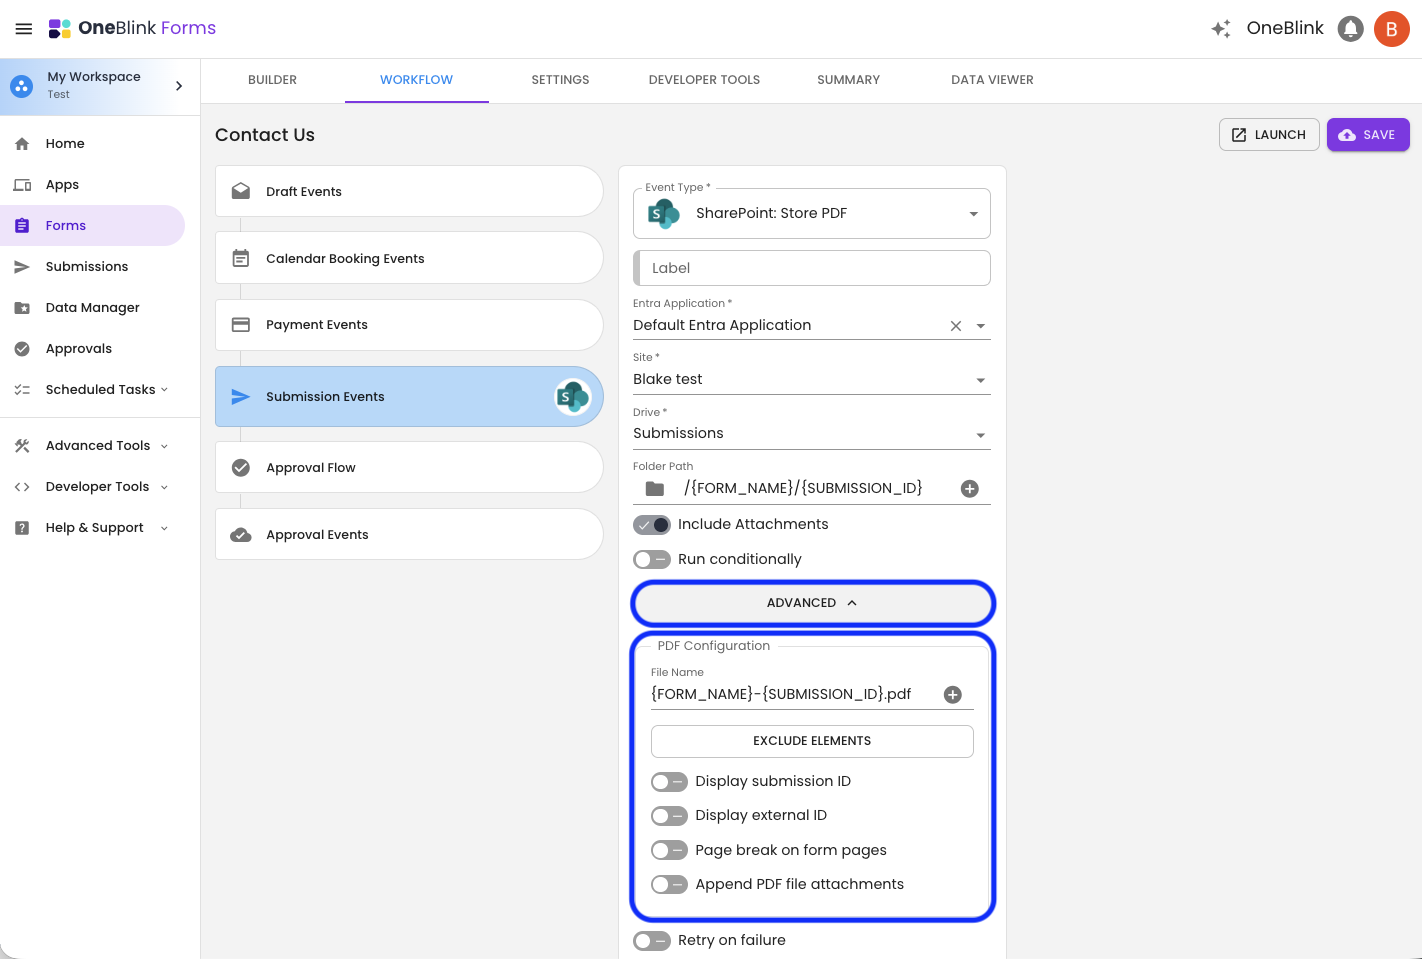
For all other workflow events listed at the beginning of this section, the Submission PDF will be automatically included.
Submission PDF Configuration
The submission PDFs have multiple different configuration options that can be used to modify the PDF. You can also replace the standard submission PDF with a Custom PDF. For more on Custom PDFs, check out this article.
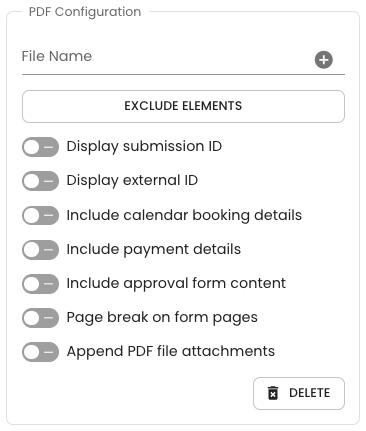
PDF File Name: The name of the PDF attachment. This can be changed to better support your business processes and can include inputs from the form.
Exclude Elements: Allows you to remove elements from the PDF that may not be relevant to the email recipient.
Display Submission ID: Adds the submission ID as a footer on each page of the PDF.
Display External ID: Adds the external ID as a footer on each page of the PDF.
Include calendar booking details: This option is only shown when a calendar booking event has been configured. It adds the calendar booking details to a new page at the end of the PDF.
Include payment details: This option is only shown when a payment event has been configured. It adds the payment details to a new page at the end of the PDF.
Include approval form content: This option is only shown when an approval flow has been configured. It adds the details of any approval forms to a new page at the end of the PDF.
Page break on form pages: Creates page breaks in the PDF that match the page breaks in the form.
Append PDF file attachments: Append any PDF attachments uploaded to the form to the PDF.
Getting Help
If you need any assistance with Submission PDFs, please reach out through the Report Issue menu or email support@oneblink.io.
Was this article helpful?
That’s Great!
Thank you for your feedback
Sorry! We couldn't be helpful
Thank you for your feedback
Feedback sent
We appreciate your effort and will try to fix the article