This article is an overview of the OneBlink LcS, covering many of the features of the platform.
TABLE OF CONTENTS
Login
To log in, navigate to the OneBlink Console. If you’re not yet registered, you can ask a colleague to add you or start a free trial. Once you log in, you’ll be taken to the organisation dashboard.
Workspace
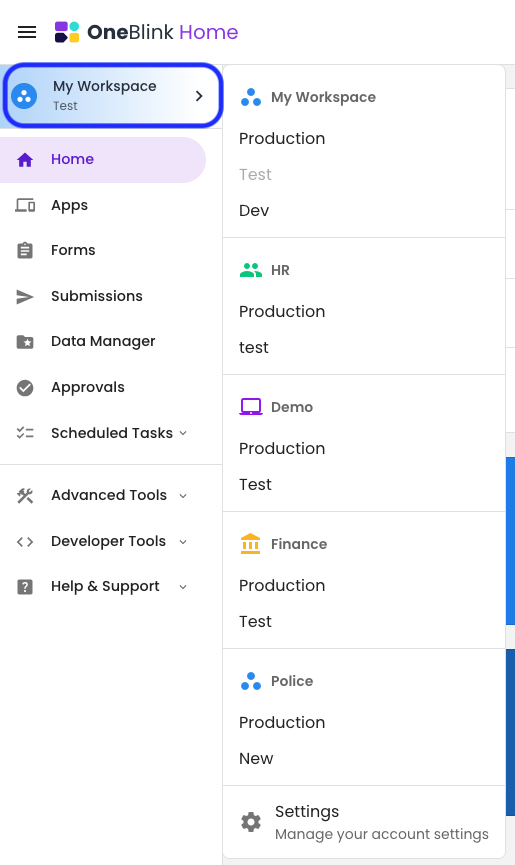
All accounts start with one workspace, "My Workspace". From here, you can access all the menu items listed below.
If you have more than one workspace configured, you can navigate between your different Workspaces and Environments using the Environment picker.
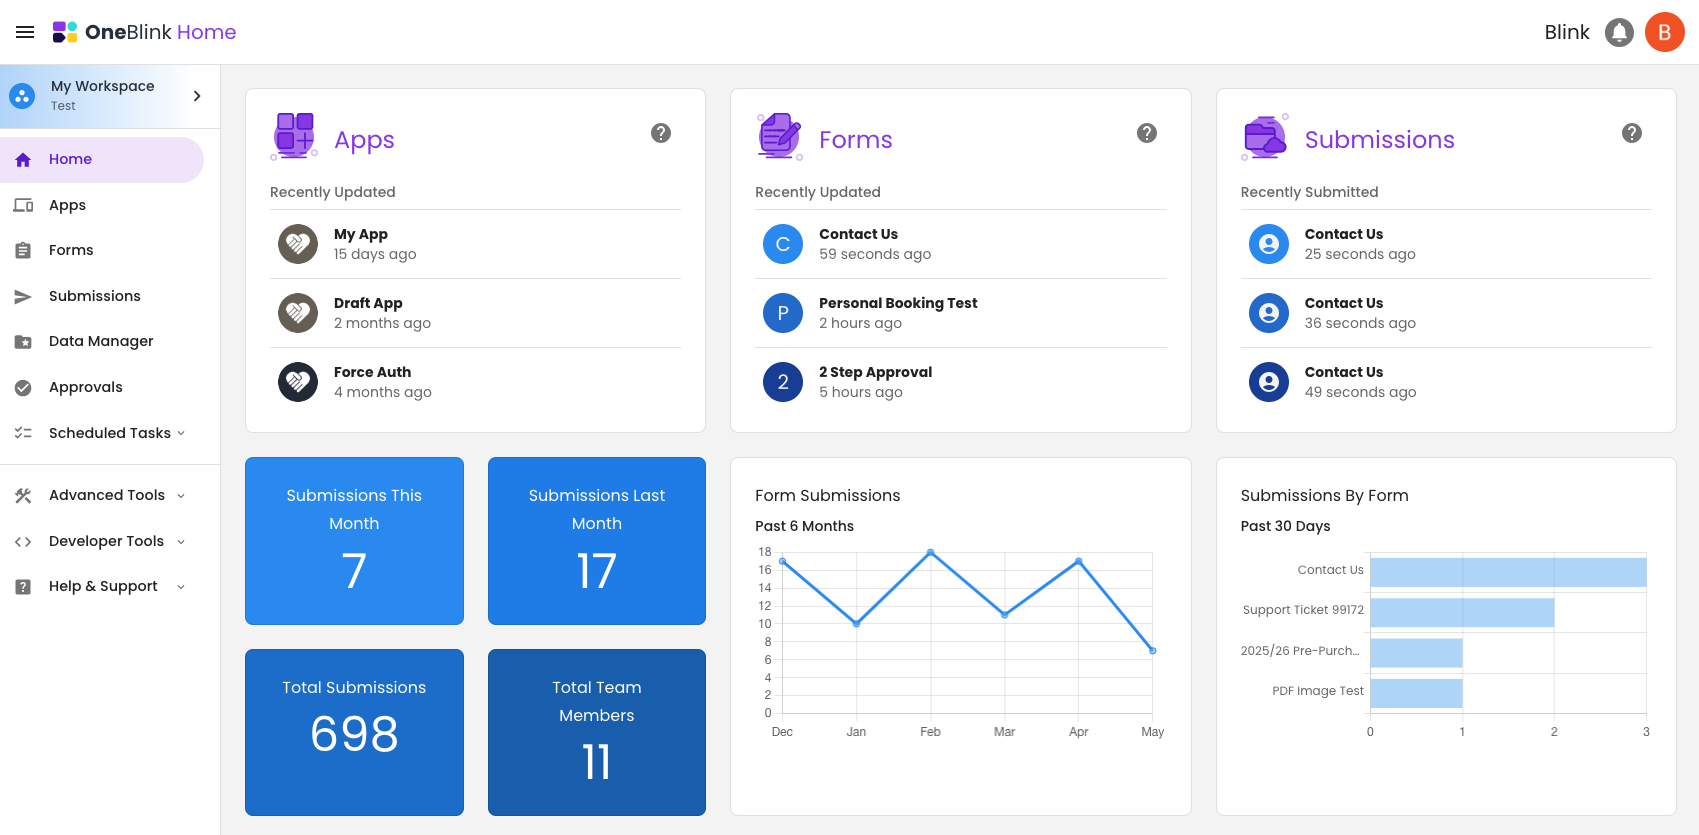
Home
This is the home screen for your Environment. The screen shows links to the most recently modified apps and forms. As well as links to the most recent submissions and form submission analytics for the environment.
Apps
The Apps menu is used to create purpose-built web applications for public or authenticated users to be able to access a subset of your apps and utilise features like drafts, offline, jobs, scheduled tasks and more.
For more information, check out this article.
Forms
Forms are the primary building block of the platform. Use the form builder to easily build digital forms. Use the Templates Library, Convert PDF or Build with AI features to get building even faster.
For more information, check out this article.
Submissions
The Submission menu allows you to view all of the submissions for your environment.
For more information, check out this article.
Data Manager
Data Manager allows you to view, filter, search and download your form data from a tabular view.
For more information, check out this article.
Approvals
The Approvals app allows you to create a custom branded app for approvers to be able to approve, deny and request clarification for submissions before workflow processes run.
For more information, check out this article.
Scheduled Tasks
Scheduled tasks allow for the creation of Tasks that can be completed within a Daily, Weekly or specific date timeframe.
For more information, check out this article.
Advanced Tools
Environments
Environments are used to contain and manage your apps, forms, and submissions. Using environments, you can create separate areas for development, testing, and production.
For more on Environments, check out this article.
Lists
Lists are used for user-select elements (radio buttons, checkboxes, selects and autocomplete). They allow you to create a list of options that can be used in any user-select elements.
For more information, check out this article.
Lookups
Lookups allow you to store a table of contents that can be looked up against in a form.
For more information, check out this article.
Email Templates
Email Templates allow you to modify the content of emails that are generated from the platform.
For more information, check out this article.
Developer Tools
Dynamic Lists
Dynamic Lists are very similar to Lists in that they are used on user-select elements to create lists of options. Option sets, however, allow you to create integrations via APIs into other systems where your list is located.
For more information, check out this article.
Dynamic Lookups
Dynamic lookups are used to either populate existing form elements or generate form elements by linking to an API. These can be incredibly powerful, from pulling information into a form via your CMS to generating entirely custom forms.
For more information, check out this article.
Help & Support
Knowledge Base
The Knowledge Base menu will link you to this knowledge base, allowing you to search platform articles.
Request Feature
OneBlink provides a feature request dashboard, where you can view and upvote previously requested features and create your own.
Report Issue
If you are having any issues with the platform or find something that isn't working as expected, click the report issue button and fill in the form to notify OneBlink support.
Administration Settings
The Administration Settings are the account-level configuration options and features that affect all workspaces and environments. To access the Account settings, use the Environment Picker and click on the settings option.
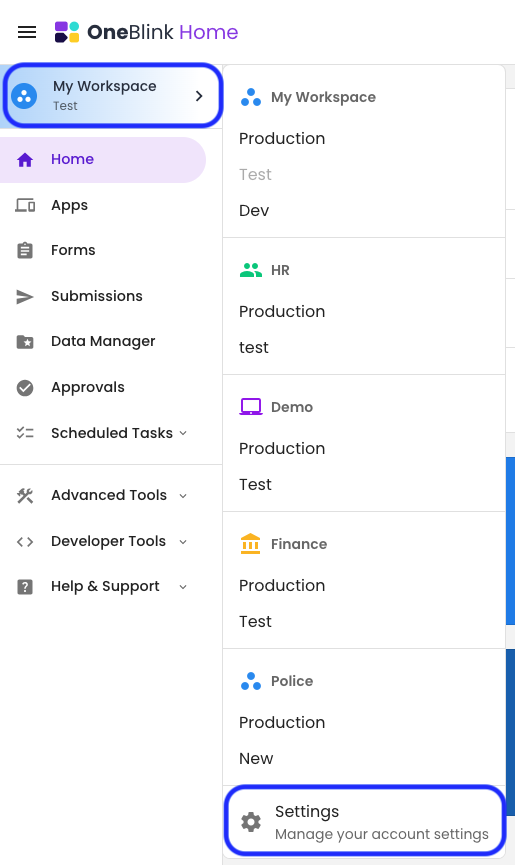
This will then open up the Account Settings menu.
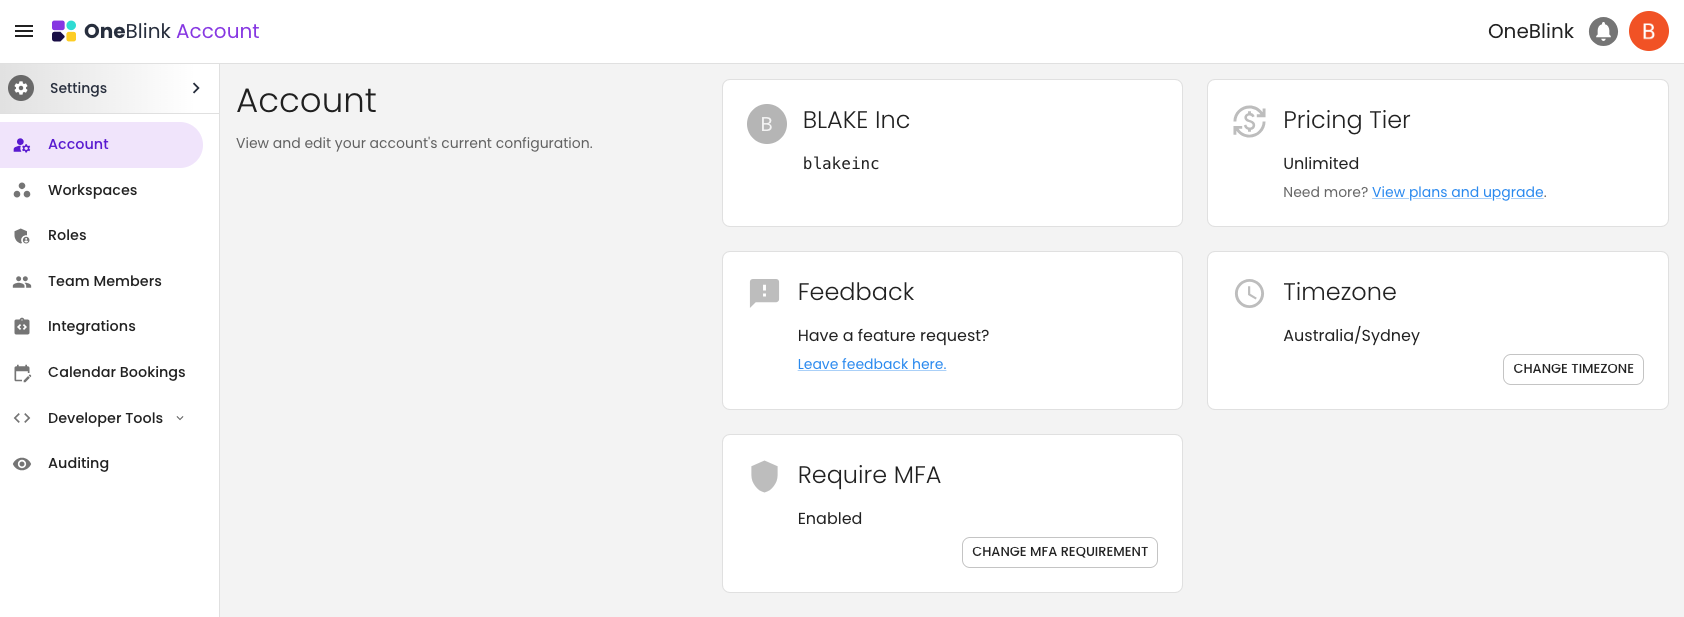
Account
The Account menu provides an overview of your personal profile and your account details. The Account menu also allows configuration for your retention policies, data manager forms and stats for your usage.
For more information, check out this article.
Workspaces
The Workspaces menu can be used to manage Workspaces and Environments. Allowing you to create, add or move environments between workspaces. Workspaces allow you to create separate areas for different departments or projects within your organisation's account.
For more information, check out this article.
Roles
The roles menu allows you to customise the standard roles' permissions or create completely custom roles. This ensures that your team members only have the access that they require.
For more information, check out this article.
Team Members
The team member menu allows you to add and manage the people who have access to the OneBlink LcS.
For more information, check out this article.
Integrations
The integrations menu shows all of the out-of-the-box integrations that the OneBlink LcS supports. It is the consolidated location to configure those integrations. If you need assistance with a specific integration, check out the article associated with that integration.
Calendar Bookings
Calendar Bookings allows you to create a calendar event as part of a form submission, allowing users to book time for people, places or things.
For more information, check out this article.
Developer Tools
Dynamic Lists
Dynamic Lists are very similar to Lists in that they are used on user-select elements to create lists of options. Option sets, however, allow you to create integrations via APIs into other systems where your list is located.
For more information, check out this article.
Dynamic Lookups
Dynamic lookups are used to either populate existing form elements or generate form elements by linking to an API. These can be incredibly powerful, from pulling information into a form via your CMS to generating entirely custom forms.
For more information, check out this article.
API Hosting
You can access the API Hosting section by going to the side menu and selecting 'API Hosting'.
This will display a list of your API endpoints hosted on the platform, with the following options:
Endpoint: The unique URL that represents the API.
Environment Health: The environmental health column will show you the environments for that endpoint that have been deployed (for example, dev, test, and prod). The health is represented by a traffic light system, which measures the percentage of errors over 24 hours.
Green: < 5% errors
Yellow: >= 5% errors
Red: >= 20% errors
Viewing Logs: You can click on the environment to view the logs for the associated endpoint. You can then click on the API items to view details for that particular API endpoint.
Web/CDN Hosting
You can access the Web Apps section by going to the side menu and selecting 'Web Apps'.
This will display a list of your custom web apps hosted on the platform.
Endpoint: This is the unique URL for your web app.
You can then click on the web app items to view details for that particular web app.
Developer Keys
The platform allows developers to create their own keys inside the console.
To create a new key, click the plus button. You will then be asked to give the key a name and to select the type of key you would like to create.
SDK
The OneBlink SDK is an open-source SDK designed to allow developers easy access to features.
Users have access to the OneBlink GitHub Node.js and .net SDK, as well as NPM documentation.
Auditing
The auditing menu shows you who is doing what in your account. Ensuring you have an easy way to see exactly what is happening in your account.
For more information, check out this article.
Get Help
If you need any assistance with the OneBlink LcS, please reach out through the Report Issue menu or email support@oneblink.io.
Was this article helpful?
That’s Great!
Thank you for your feedback
Sorry! We couldn't be helpful
Thank you for your feedback
Feedback sent
We appreciate your effort and will try to fix the article