Conditional logic is used to show form elements, trigger workflow events and approval steps when specific form conditions are met.
TABLE OF CONTENTS
- How to Configure Conditional Logic
- Multiple Conditional Logic Rules
- Using the Submission DateTime in Conditional Logic
- Getting Help
How to Configure Conditional Logic
One of the most common and simple examples of conditional logic is when none of the available options matches what the user needs, so you provide them with an "Other" option where they can enter text into a text input. For example, you might have a feedback form including a question like "How did you find out about us?" with some common options "Search Engine, Social Media, Friend/Word of Mouth, Advertisement", but you want to include an "Other" option if none of those match.
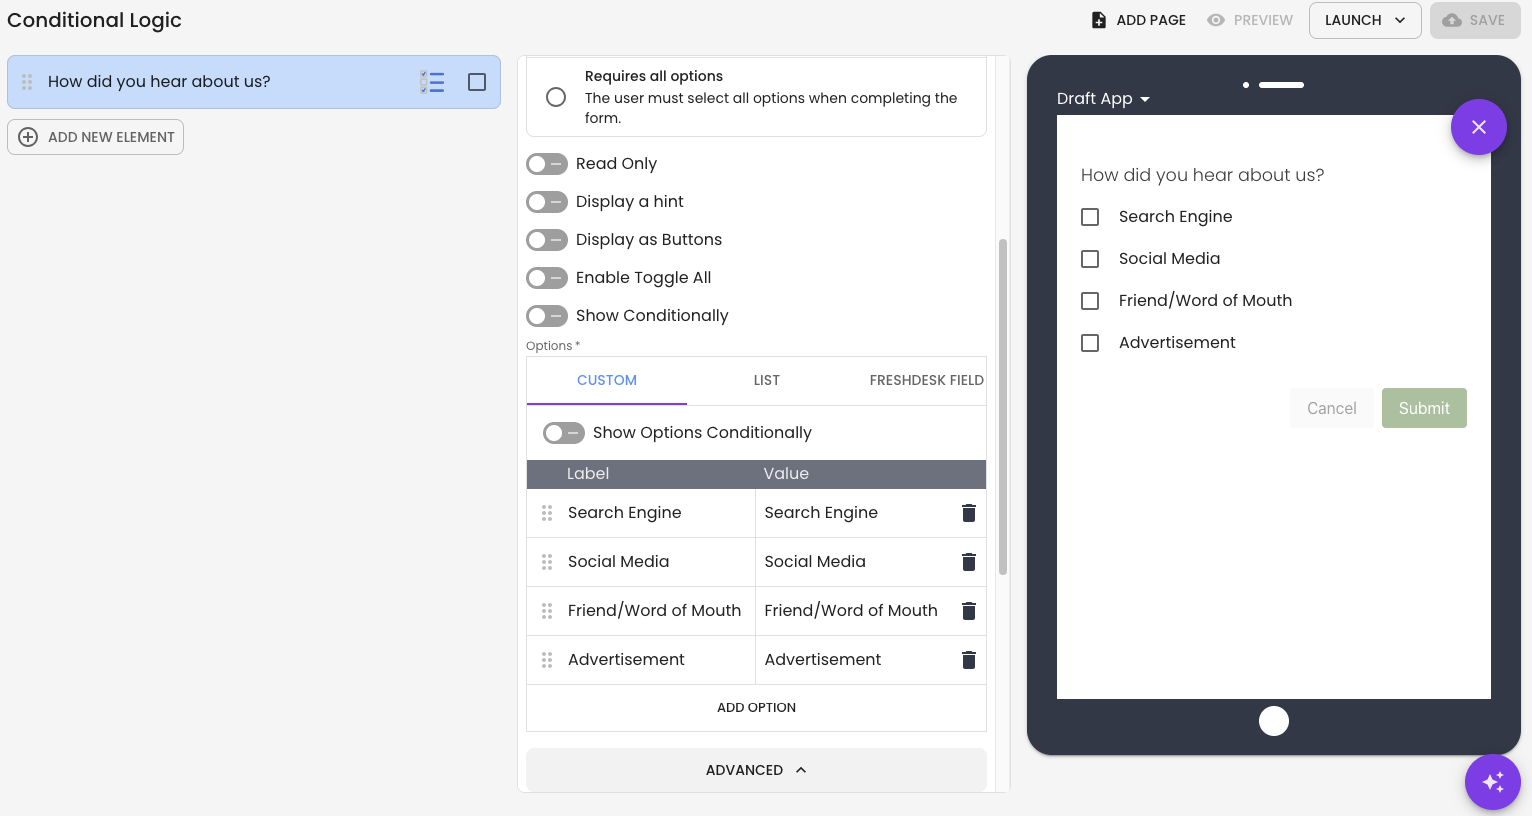
Step 1: Create the Element that will be used for the Condition. I will create a radio button for "How did you find out about us?" with the following options: "Search Engine, Social Media, Friend/Word of Mouth, Advertisement".
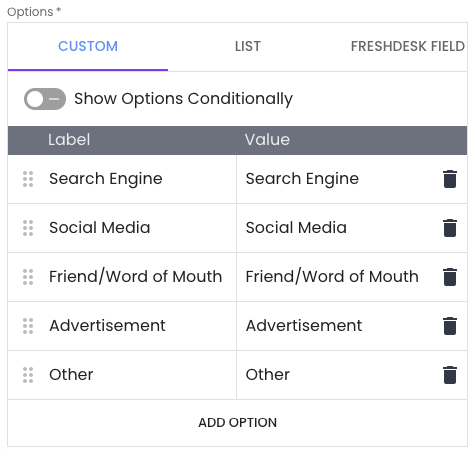
Step 2: Add the "Other" option to the list of options.
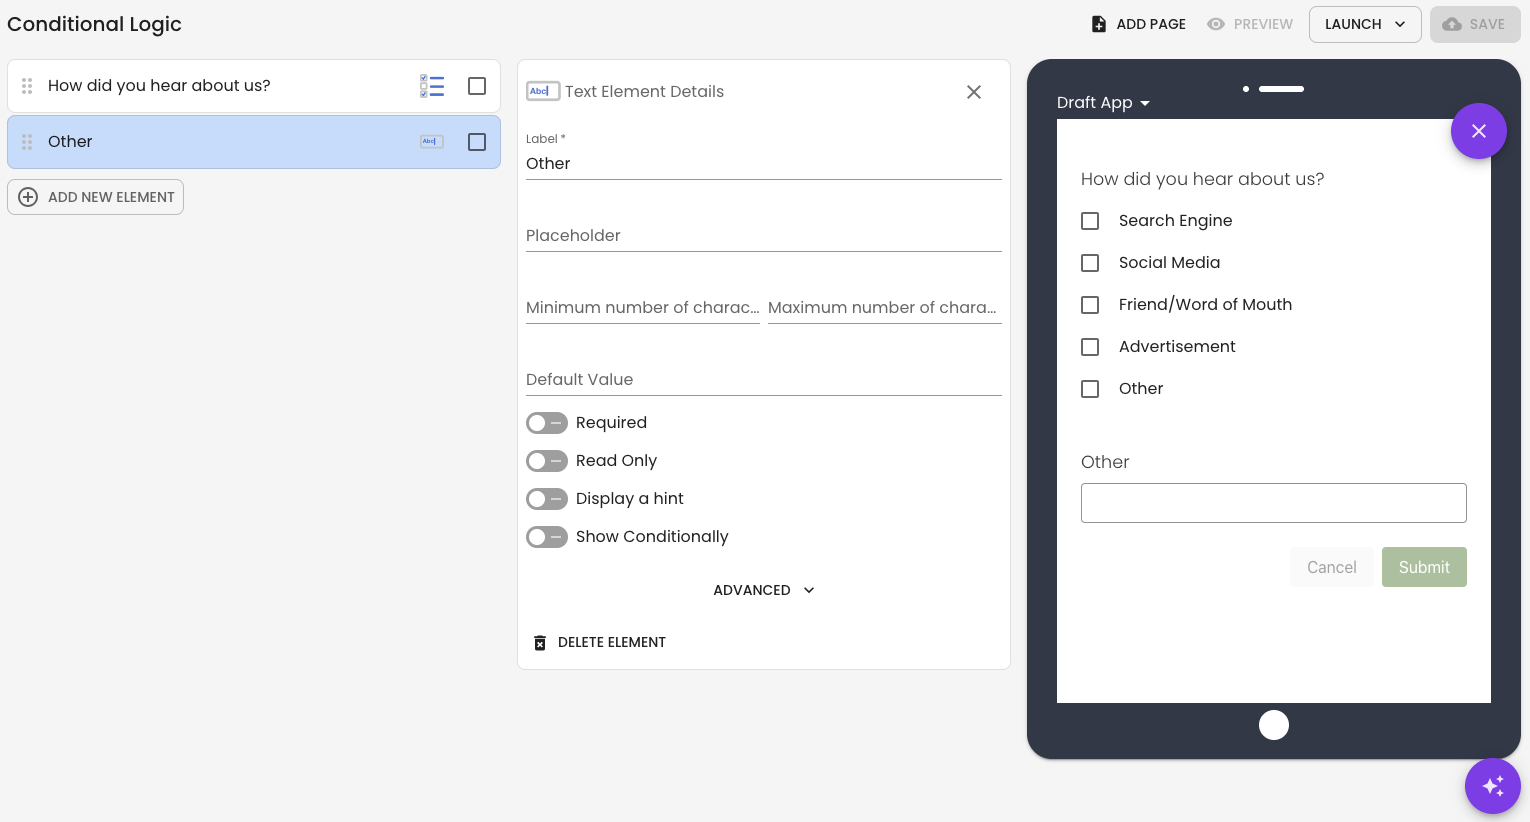
Step 3: Create the "Other" Element. In this example, I am using a Text element.
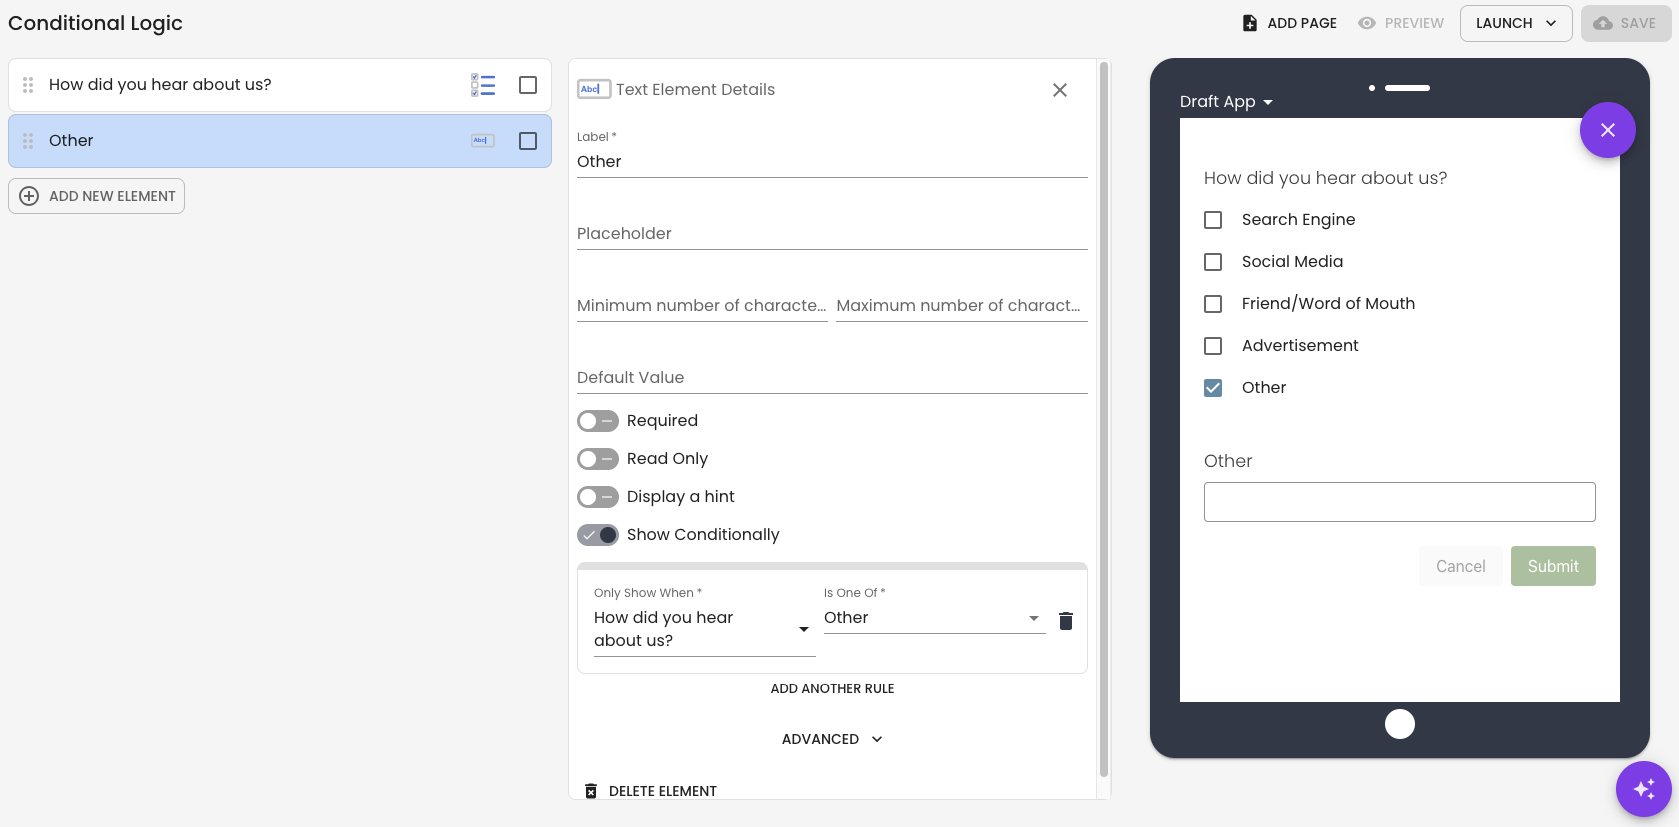
Step 4: Turn on the 'Show Conditionally' switch, select the "How did you find out about us?" element and choose the "Other" option.
Now, when the user chooses Other, the "Other" element will display for them to complete.
Multiple Conditional Logic Rules
When you add a second rule to the conditional logic of an element, a new option will appear: the 'Match ALL' and the 'Match ANY' buttons.
Match All example
Use Match All when every condition must be true before the field or section appears.
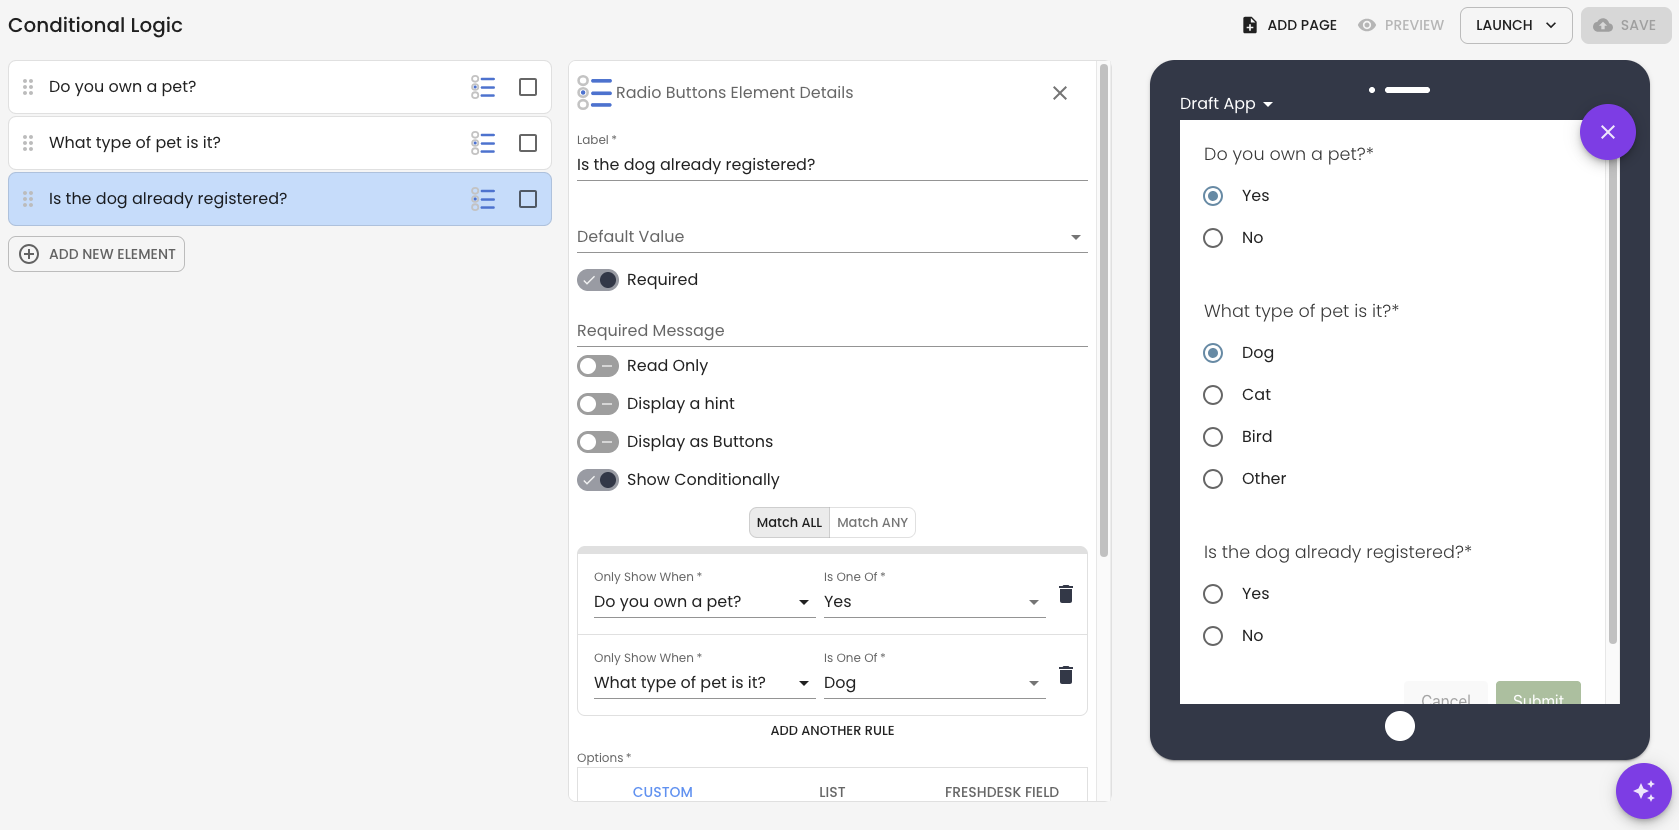
Scenario: Show a “Pet Registration Details” section only when the applicant owns a dog and the dog is not already registered.
Conditions:
| Question | Condition | Answer |
|---|---|---|
| Do you own a pet? | is | Yes |
| What type of pet is it? | is | Dog |
| Is the dog already registered? | is | No |
Result:
The section only appears if the user answers Yes, selects Dog, and says the dog is not registered.
Match Any example
Use Match Any when only one condition needs to be true before the field or section appears.
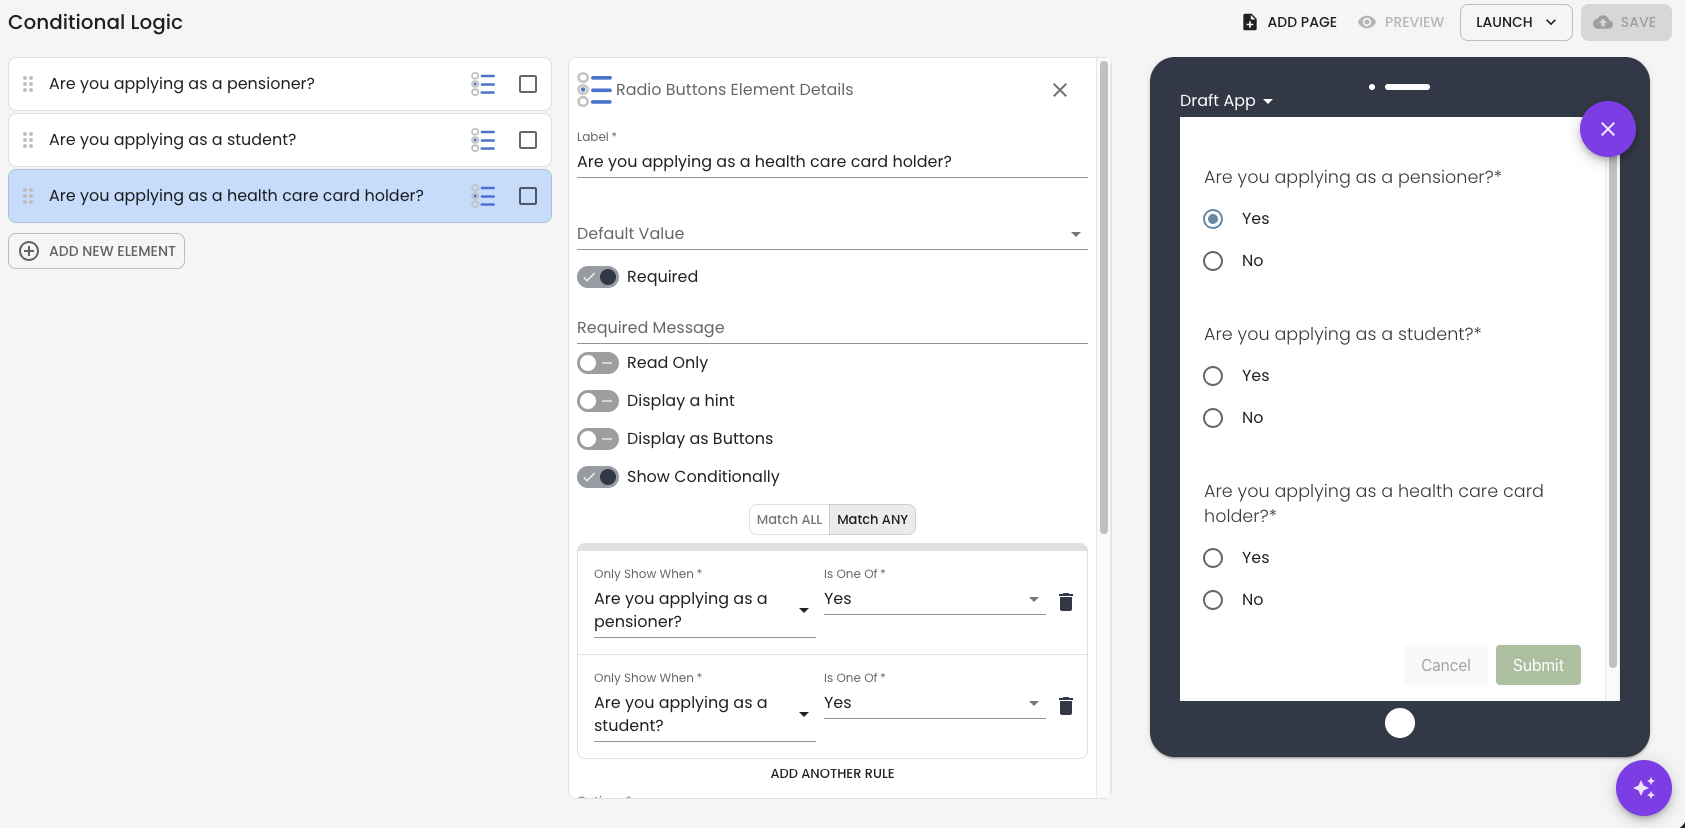
Scenario: Show an “Upload Supporting Documents” section when the applicant applies for any type of concession.
Conditions:
| Question | Condition | Answer |
|---|---|---|
| Are you applying as a pensioner? | is | Yes |
| Are you applying as a student? | is | Yes |
| Are you applying as a health care card holder? | is | Yes |
Result:
The section appears if the user answers Yes to any one of those questions.
Using the Submission DateTime in Conditional Logic
When configuring conditional logic for a workflow event or approval step, you can use Submission DateTime to run an action based on when the form was submitted.
Submission DateTime can be compared with a Date element in the form or a custom date using the following conditions:
- is before
- is after
- is between
You can also apply an offset in days to the selected date. For example, you can check whether the form was submitted before an event date plus 30 days.
Example: Apply a payment amount within 30 days of an event
Scenario: Apply a payment amount only when the form is submitted within 30 days of an event.
Configuration:
Step 1: Open the conditional logic for the relevant payment workflow event and select Submission DateTime.
Step 2: Select is between
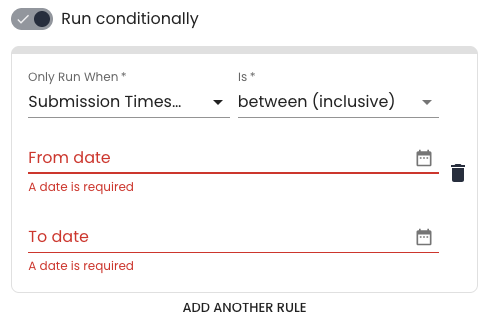
Step 3: For the From date, select a custom date that is 30 days before the event, and for the To date, select the date of the event.
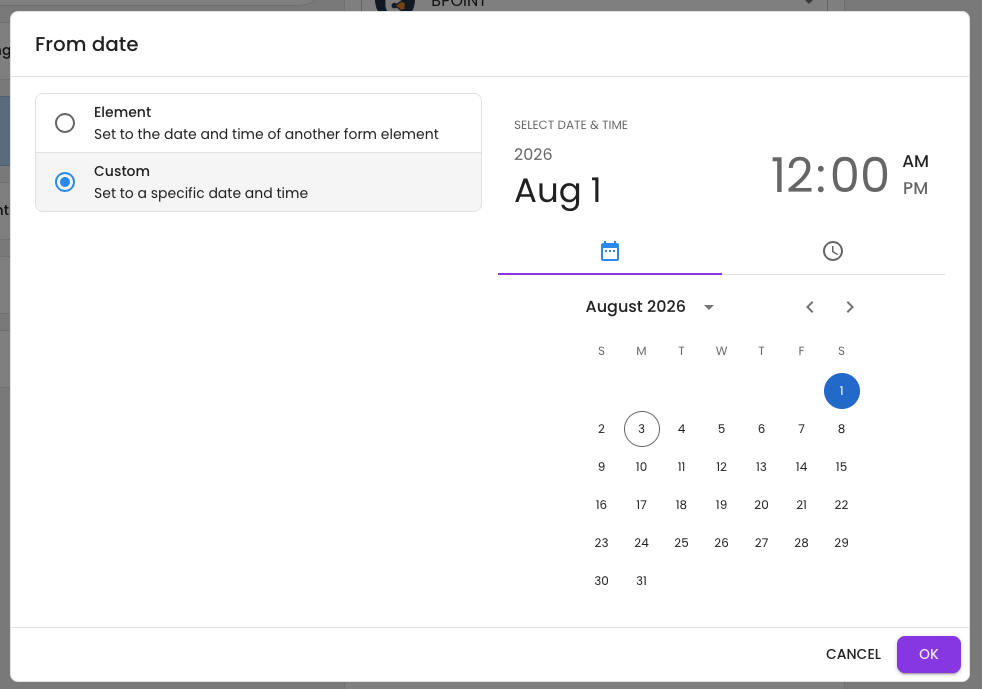
Result: The payment workflow event will only run when the form is submitted between the event date and 30 days after the event.
You can use the same approach in approval flows to determine whether an approval step should run based on the submission date.
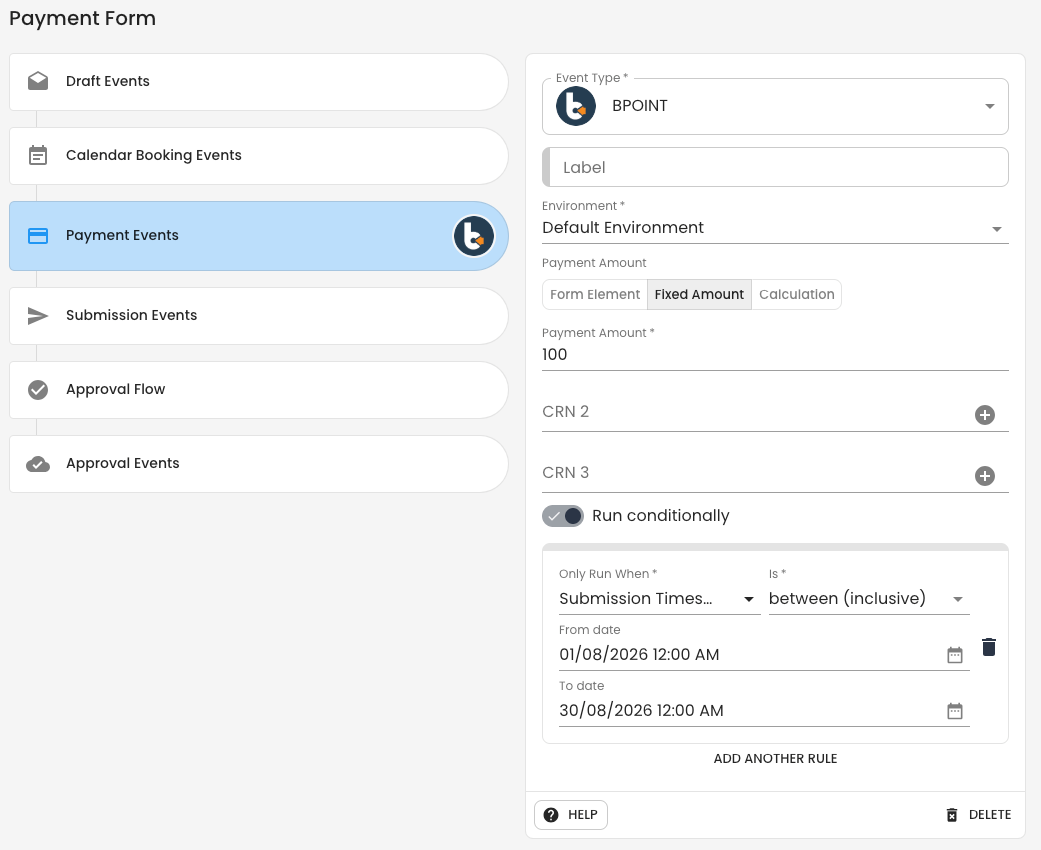
Note: When Submission DateTime is compared with a Date element that does not include a time, the condition evaluates the entire selected day. The is between condition includes both the start and end dates.
Using a Date element and offsets
Instead of selecting a custom date, you can compare the Submission DateTime with a Date element completed as part of the form submission. This is useful when the relevant date is different for each submission, such as an event, appointment or commencement date.
You can also apply an offset to the selected Date element. The offset adjusts the date by a specified number of days, allowing you to create conditions such as:
- Submission DateTime is before the Event Date plus 30 days.
- Submission DateTime is after the Event Date minus 14 days.
- Submission DateTime is between the Event Date and the Event Date plus 30 days.
Using a Date element with an offset allows the conditional logic to calculate the relevant date range dynamically for each submission.
Getting Help
If you need any assistance with conditional logic, please reach out through the Report Issue menu or email support@oneblink.io.
Was this article helpful?
That’s Great!
Thank you for your feedback
Sorry! We couldn't be helpful
Thank you for your feedback
Feedback sent
We appreciate your effort and will try to fix the article