The Data Classification feature allows you to apply a classification to emails generated as part of a form workflow or approval process. When configured, the classification adds the relevant markings to the top and bottom of the email body and inserts the corresponding classification metadata into the email headers.
Important Note: While Data Classifications are added to individual forms, the configuration is used across the entire account, meaning if a classification is updated, it will be updated across all forms using that classification.
TABLE OF CONTENTS
- Create a Data Classification
- Adding a Data Classification
- Update a Data Classification
- Delete a Data Classification
- Getting Help
Create a Data Classification
Step 1: Open the Form you want to add Data Classification to and navigate to the Developer Tools Tab.
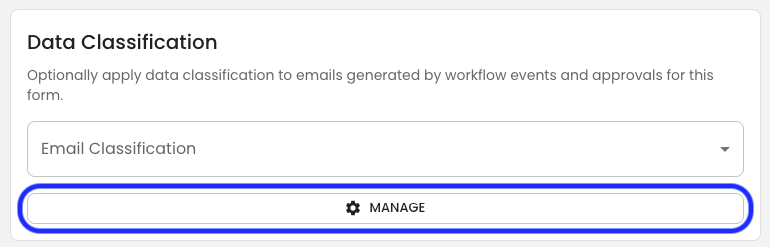
Step 2: In the Data Classification Card, click the Manage button.
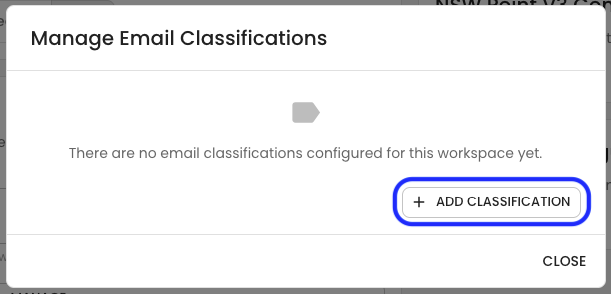
Step 3: Click the Add Classification button
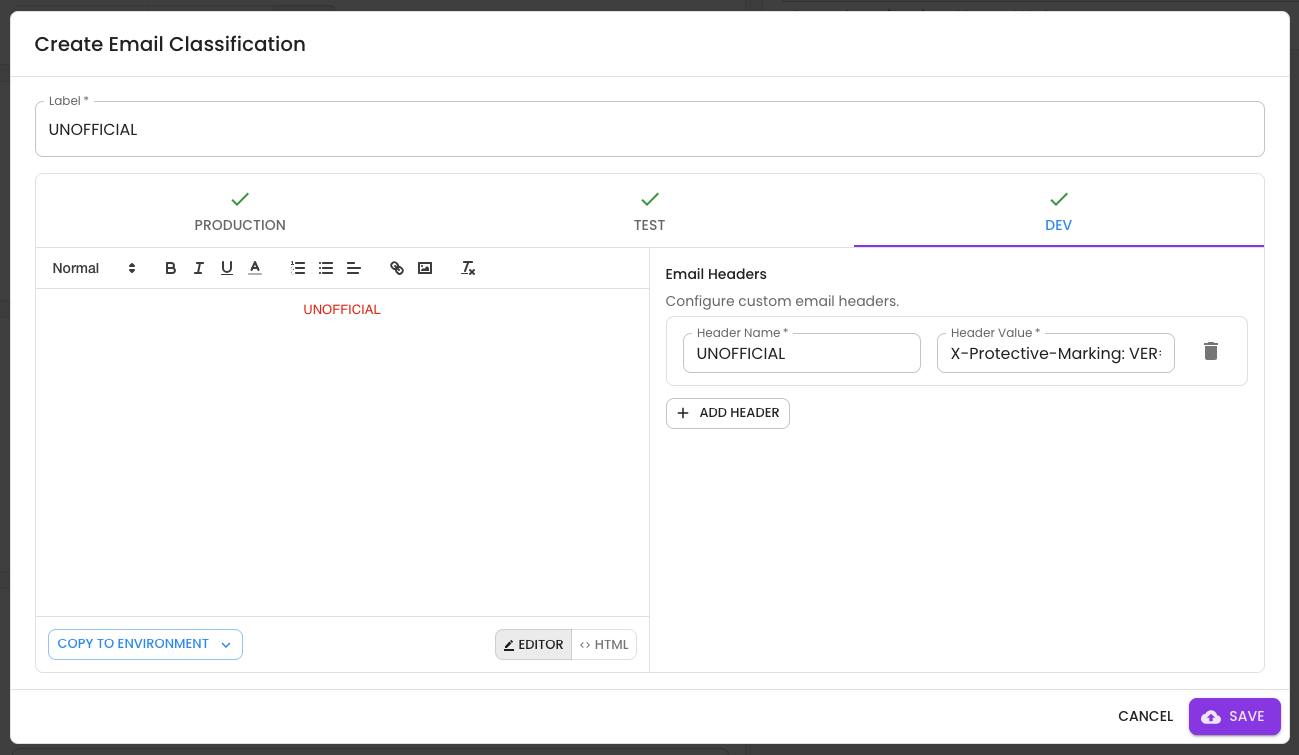
Step 4: Configure your clarification.
Label: What the clarification will be called.
Email top and tail wording: The content that will appear at the top and bottom of your email.
Email Headers: The classification metadata added into the email headers.
From here, you can also modify or copy the Email Classification to other environments.
Adding a Data Classification
Step 1: Open the Form you want to add Data Classification to and navigate to the Developer Tools Tab.
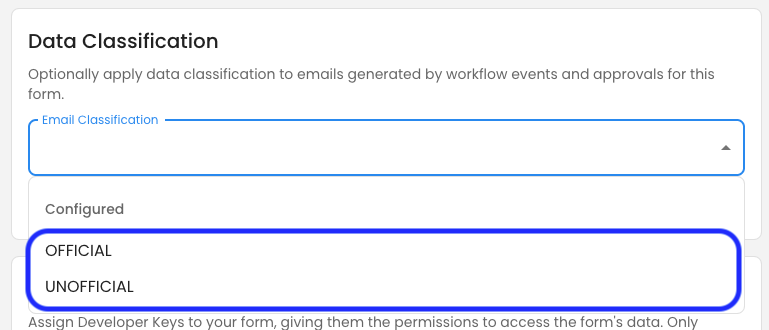
Step 2: In the Data Classification Card, select a configured Clarification from the drop-down.
Update a Data Classification
Step 1: Open the Form you want to add Data Classification to and navigate to the Developer Tools Tab.
Step 2: In the Data Classification Card, click the Manage button.
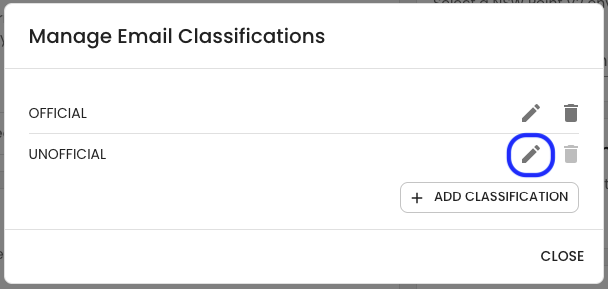
Step 3: Click the edit button on the Classification you want to update.
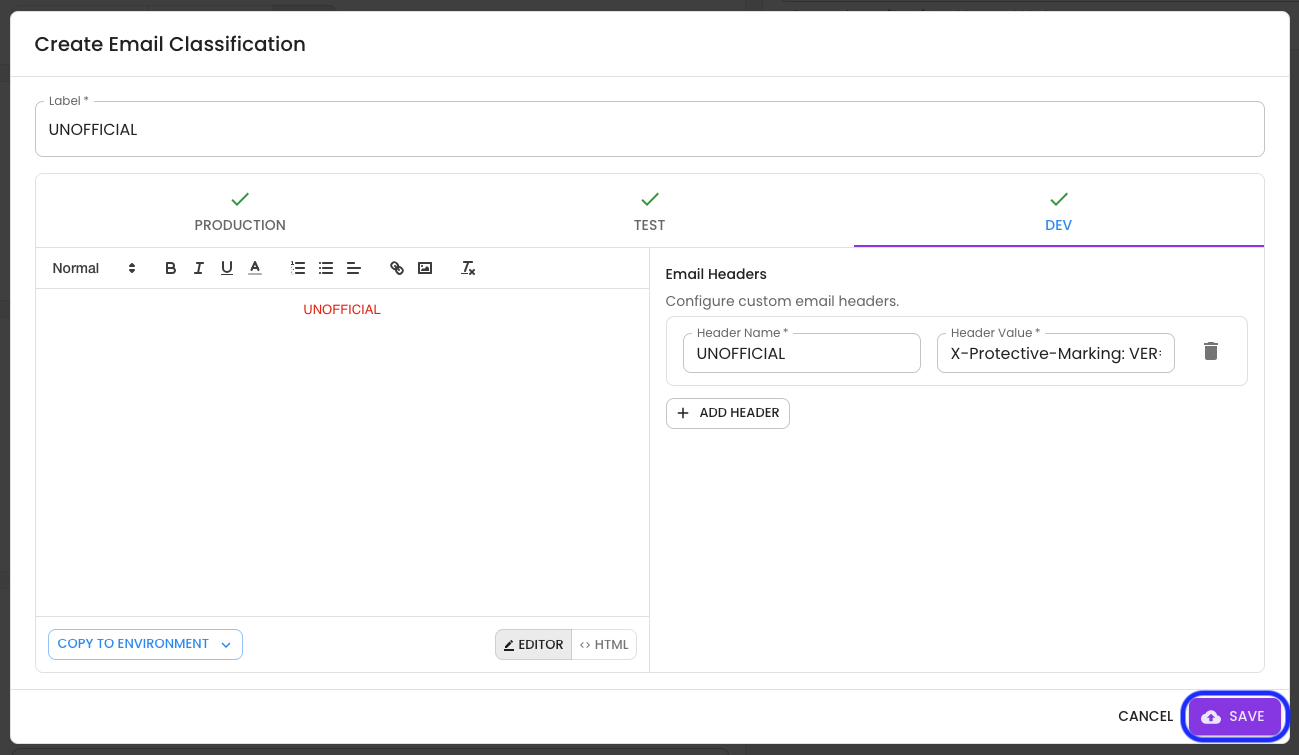
Step 4: Make any desired changes and click Save.
Delete a Data Classification
Step 1: Open the Form you want to add Data Classification to and navigate to the Developer Tools Tab.
Step 2: In the Data Classification Card, click the Manage button.
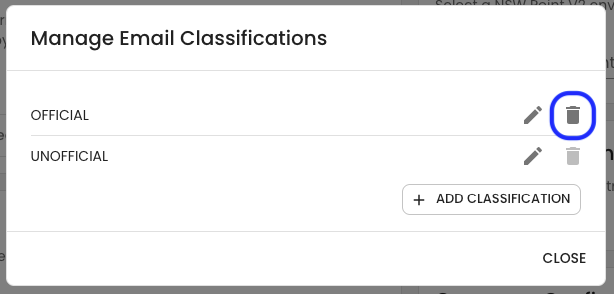
Step 3: Click the delete button on the Classification you want to delete.
Note: You are not able to delete a Classification that is currently in use.
Getting Help
If you need any assistance with Data Classifications, please reach out through the Report Issue menu or email support@oneblink.io.
Was this article helpful?
That’s Great!
Thank you for your feedback
Sorry! We couldn't be helpful
Thank you for your feedback
Feedback sent
We appreciate your effort and will try to fix the article