Custom Domains allow you to replace the standard OneBlink domain with your own domain. Custom domains can be configured at the Environment level or for a specific App, helping users recognise and trust the form URL.
TABLE OF CONTENTS
- Environment Domains
- Adding a Custom Environment Domain
- App Domains
- Adding a Custom App Domain
- Getting Help
Environment Domains
By default, forms use a OneBlink URL in the following format:
https://(account-prefix)-(environment-suffix).form.oneblink.io/{form-id}
account-prefix: The prefix assigned to your account. This is the same for all of your forms and apps.environment-suffix: The suffix assigned to the environment, for example,devortest. Your account’s production environment does not have a suffix.form-id: The unique ID of your form, which can be found on the Form Summary tab.
Adding a Custom Environment Domain
To add a custom domain to an environment, follow the steps below.
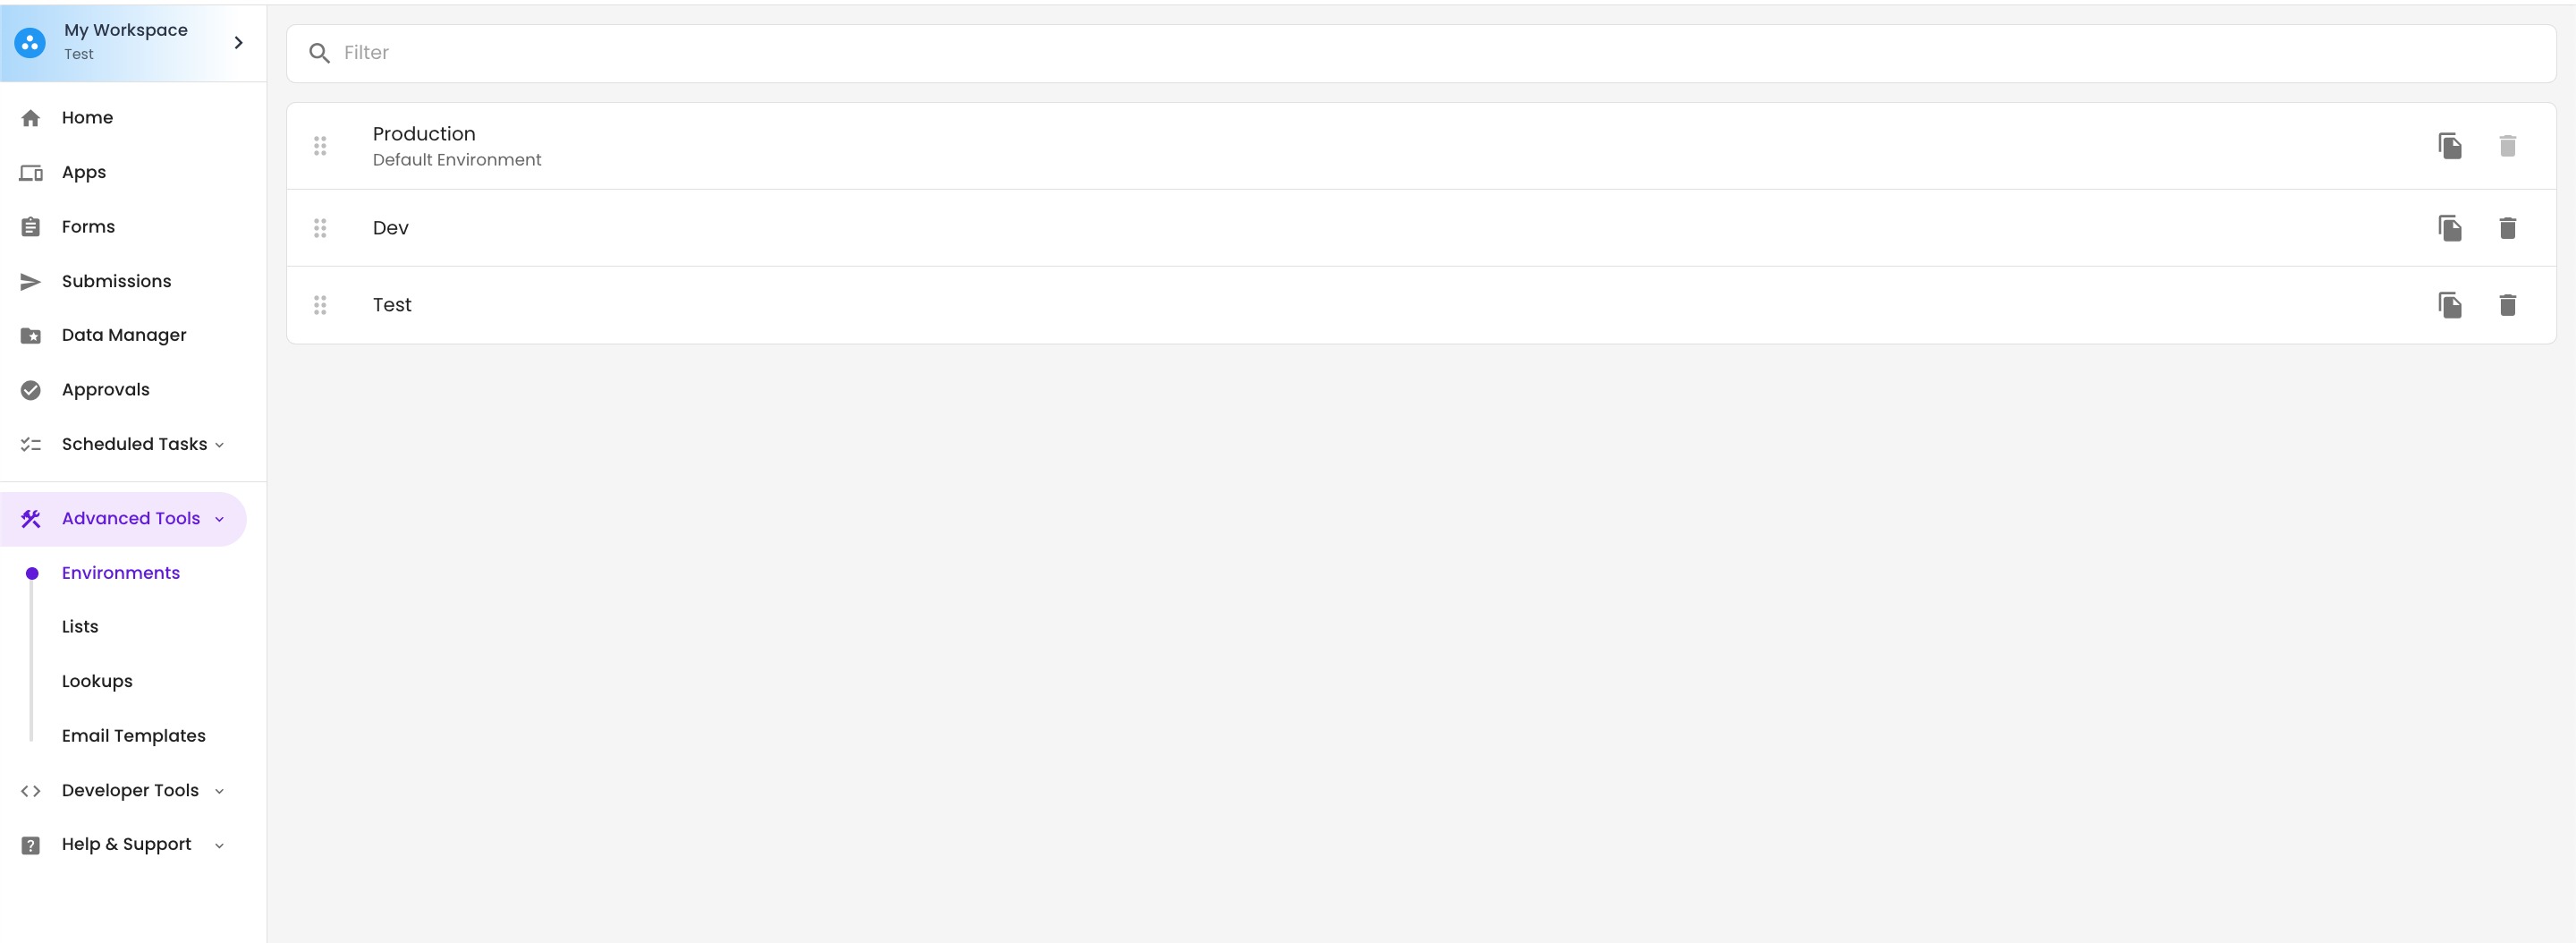
Step 1: Navigate to the Environment menu and select the environment you want to add the custom domain to.
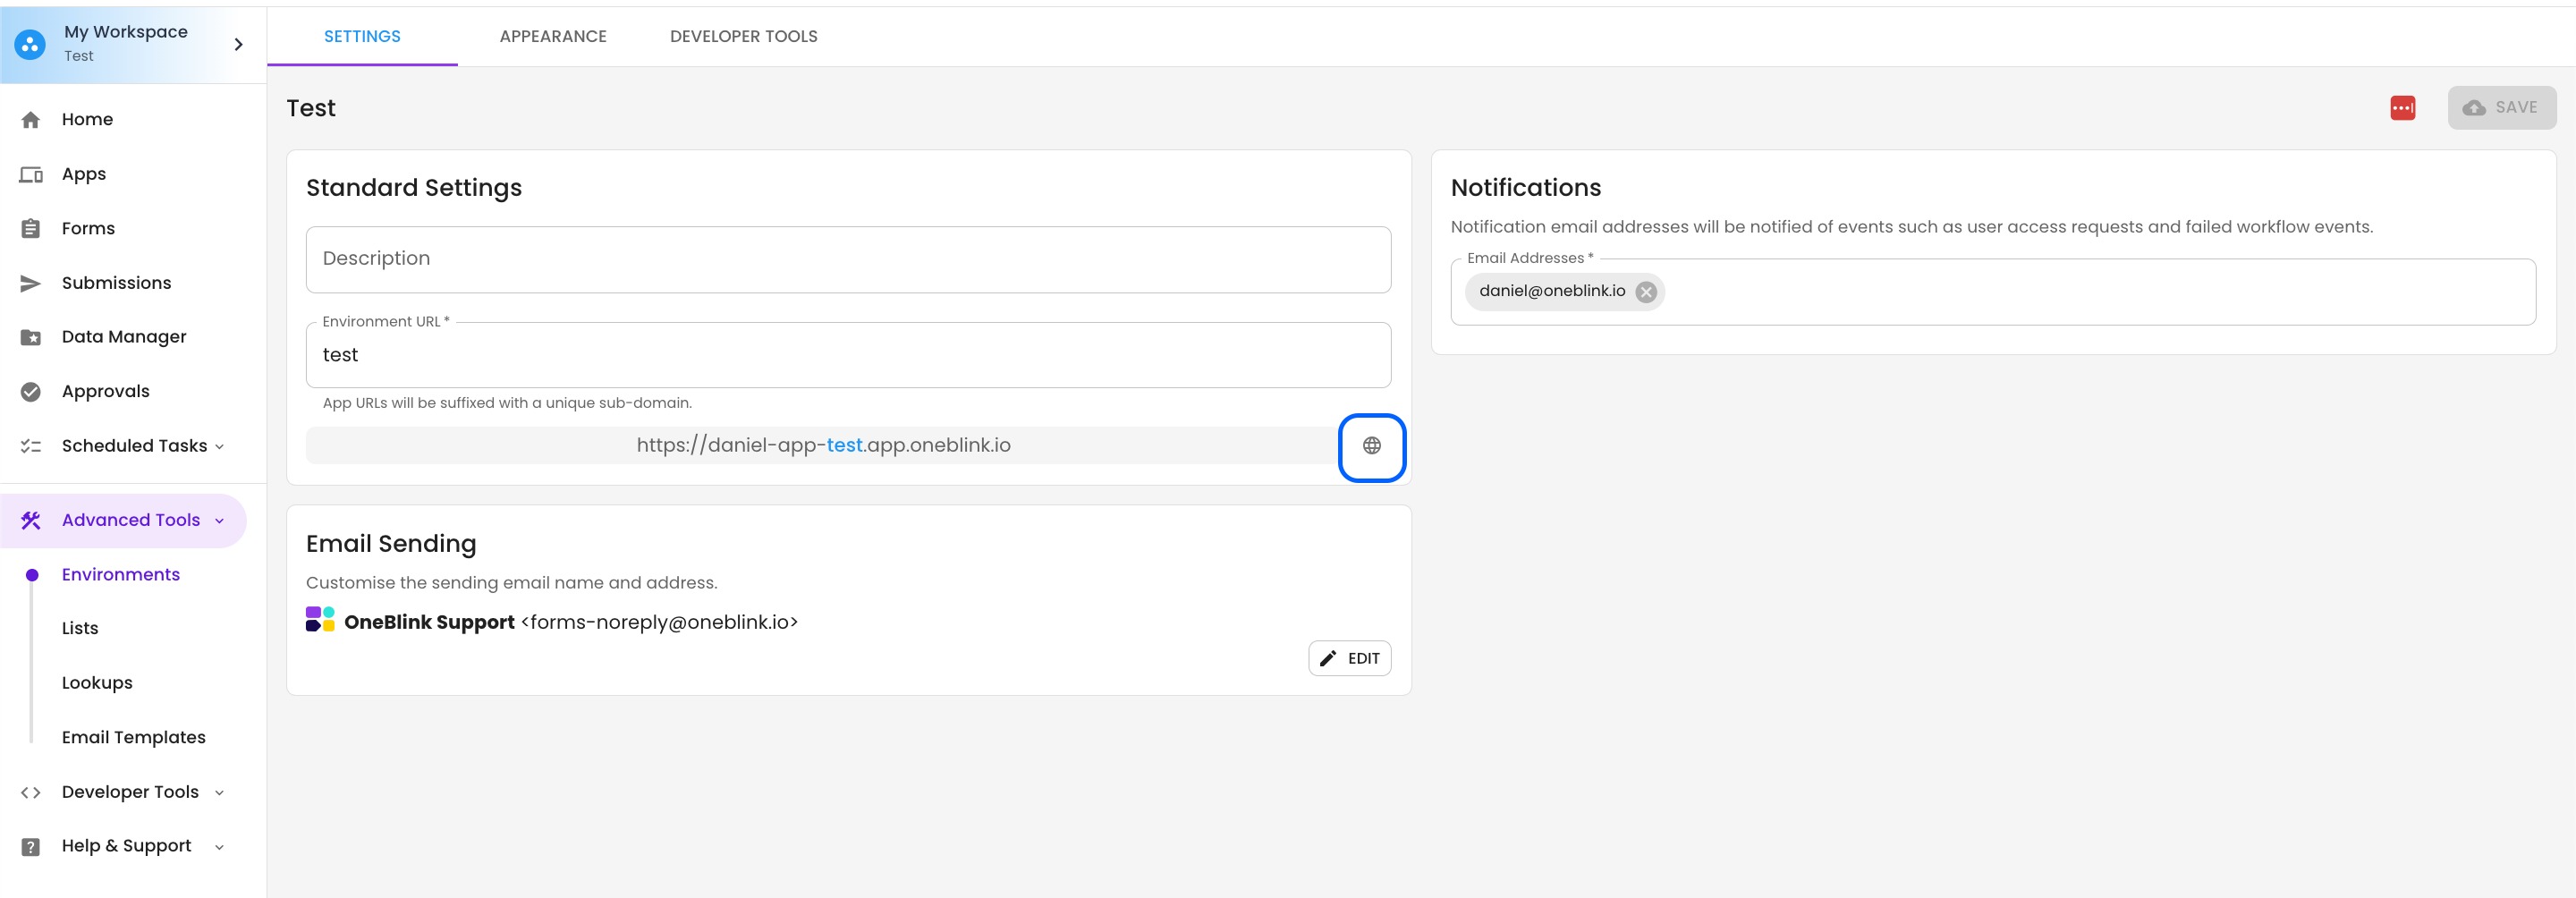
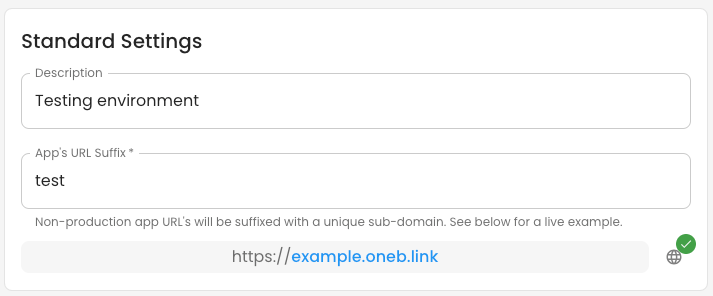
Step 2: On the Summary tab, in the Standard Settings card, click Set Custom Domain.
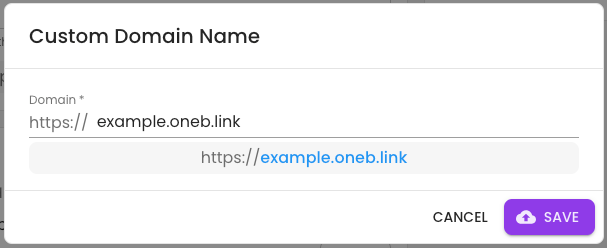
Step 3: Enter the custom domain you would like to add, then click Save.
Step 4: OneBlink will generate a CNAME record that must be added to your DNS. Once the CNAME record has been added, click the refresh button.
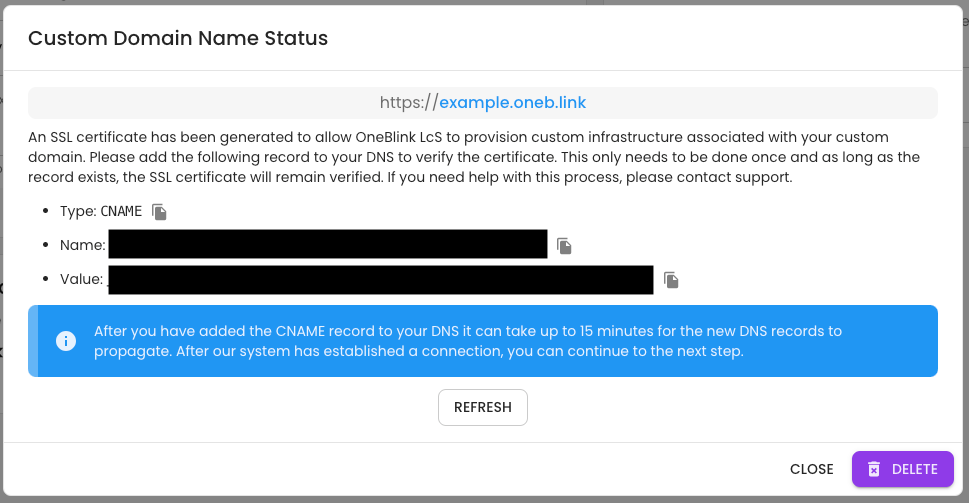
Step 5: Add the second CNAME record to your DNS.
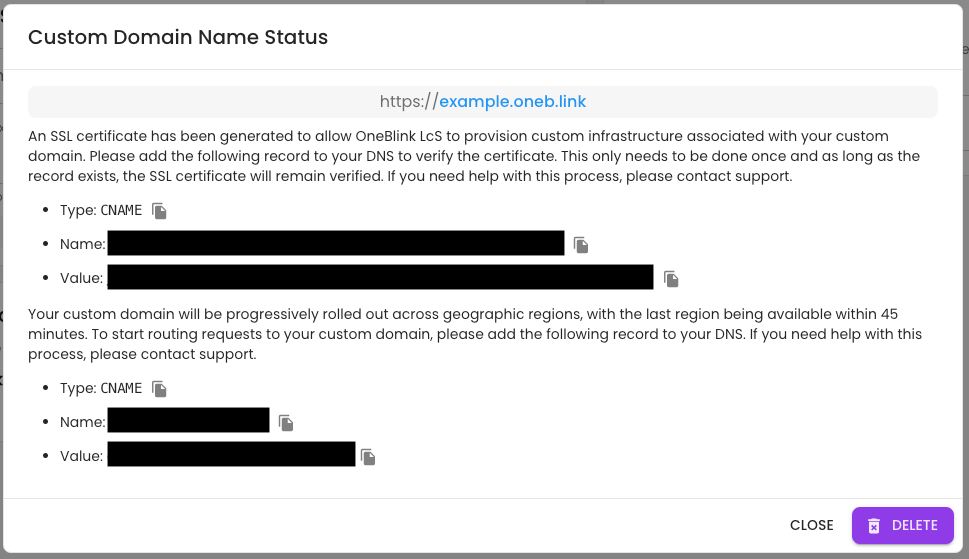
Step 6: Once both CNAME records have been added to your DNS, the new URL will start working as expected.
App Domains
By default, forms associated with apps use a OneBlink URL in the following format:
https://(account-prefix)-(app-subdomain)-(environment-suffix).form.oneblink.io/{form-id}
account-prefix: The prefix assigned to your account. This is the same for all of your forms and apps.app-subdomain: The subdomain assigned to your app. This is usually a shortened version of your app name.environment-suffix: The suffix assigned to the environment, for example,devortest. Your account’s production environment does not have a suffix.form-id: The unique ID of your form, which can be found on the Form Summary tab.
Adding a Custom App Domain
To add a custom domain to an app, follow the steps below.
Step 1: Navigate to the App menu and select the app you want to add the custom domain to.
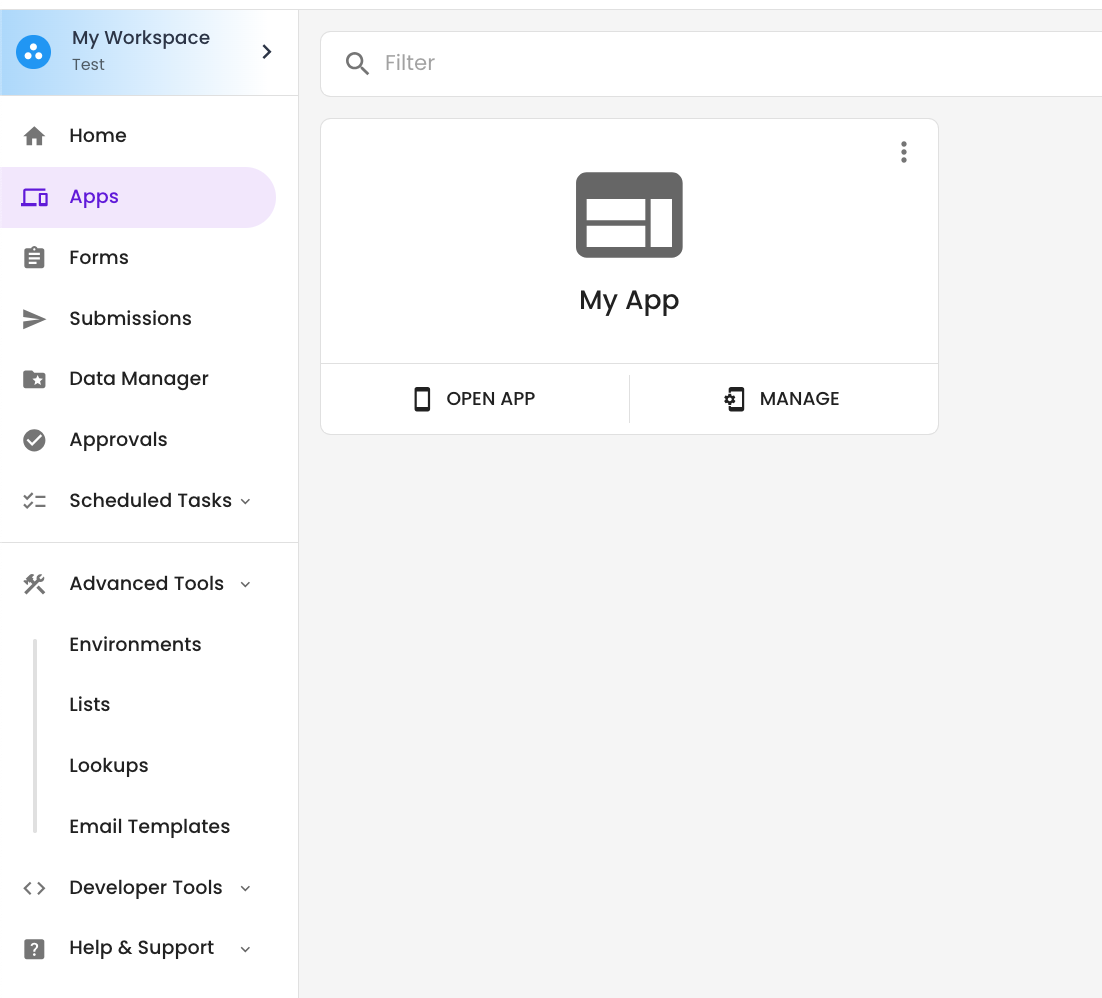
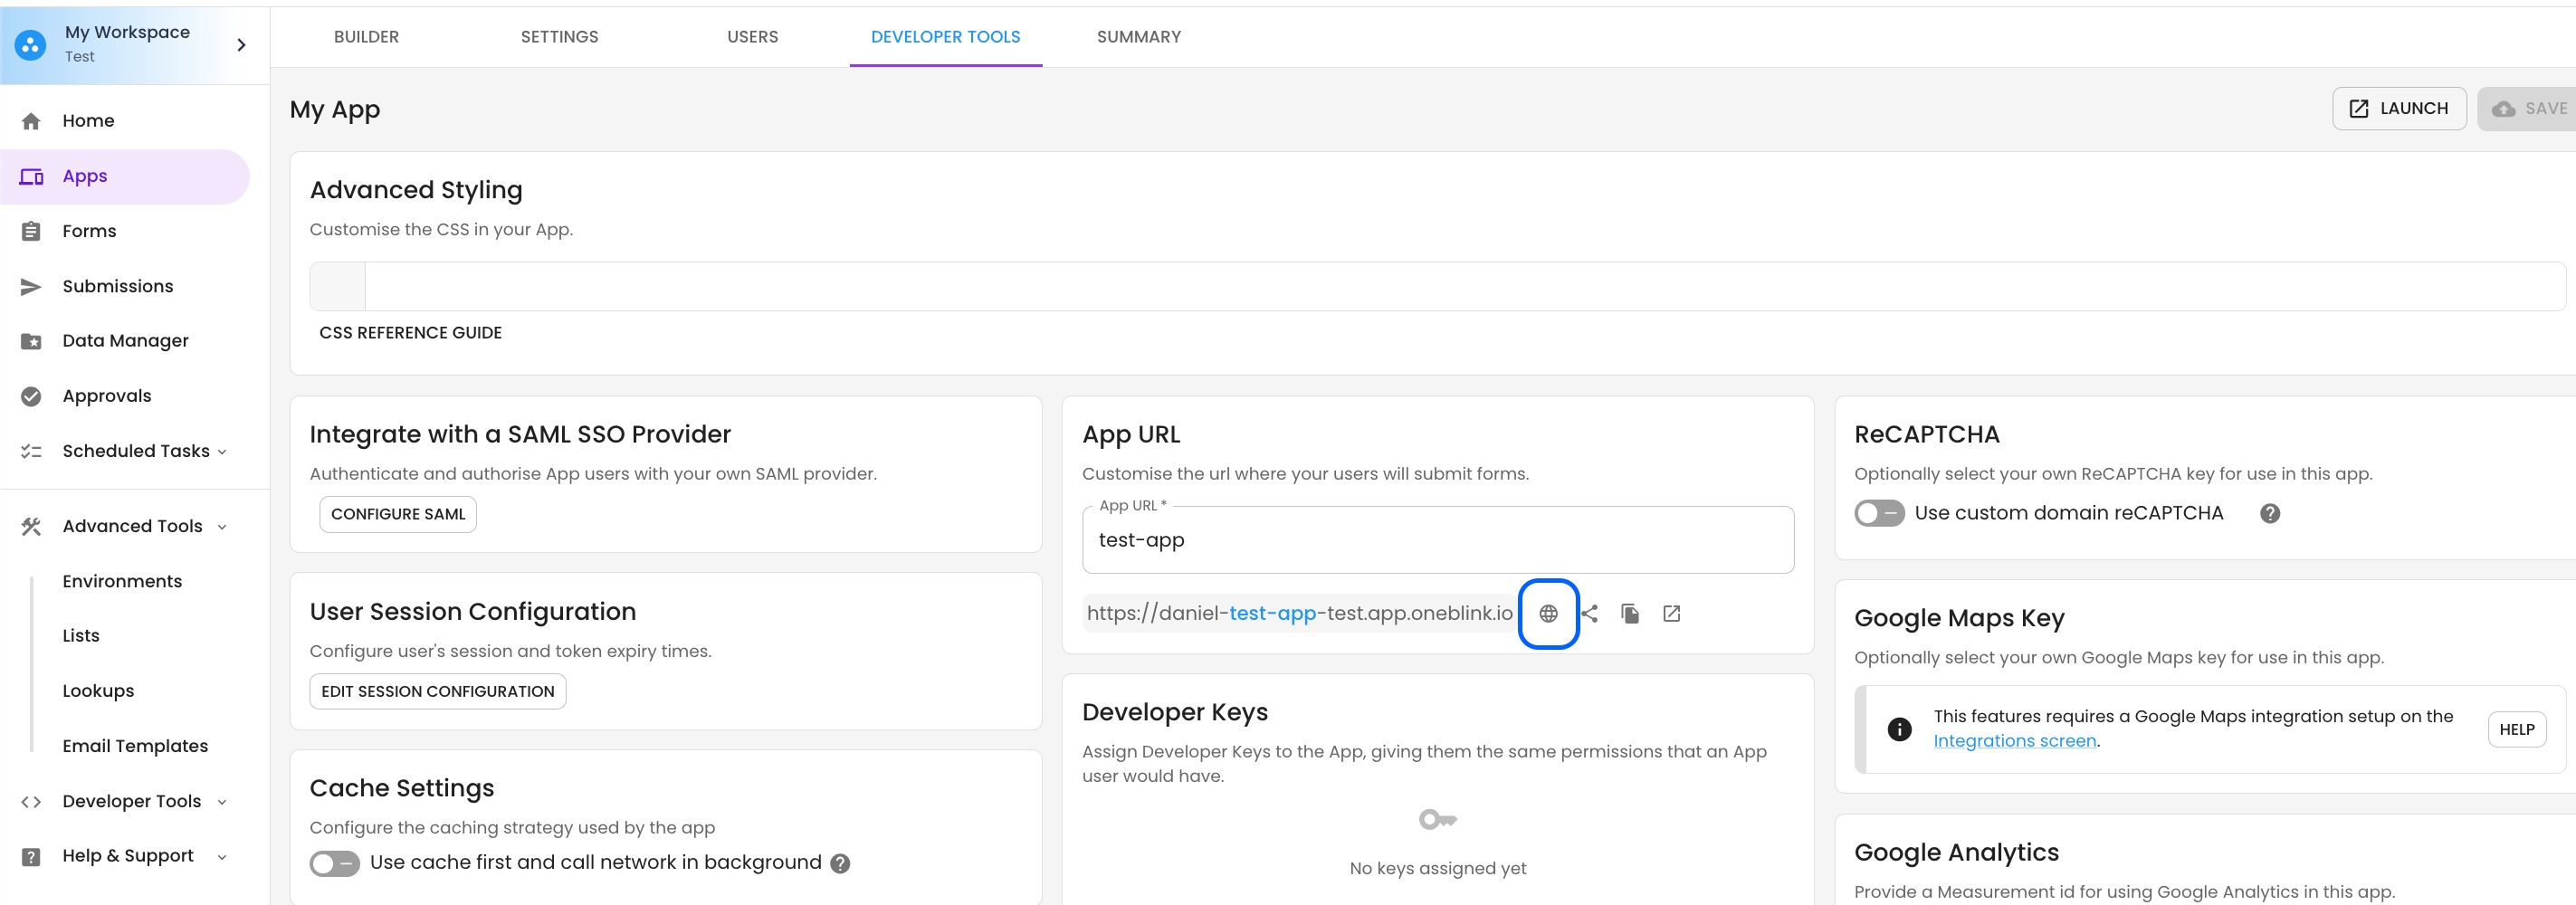
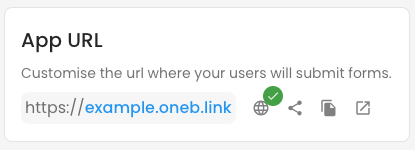
Step 2: On the Developer Tool tab, in the App URL card, click Set Custom Domain.
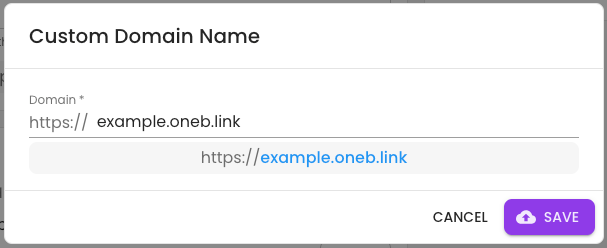
Step 3: Enter the custom domain you would like to add, then click Save.
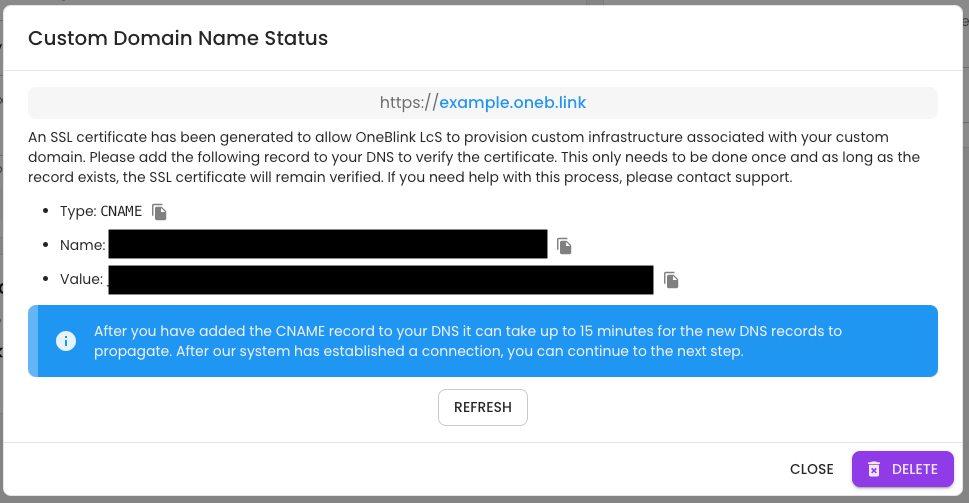
Step 4: OneBlink will generate a CNAME record that must be added to your DNS. Once the CNAME record has been added, click the refresh button.
Step 5: Add the second CNAME record to your DNS.
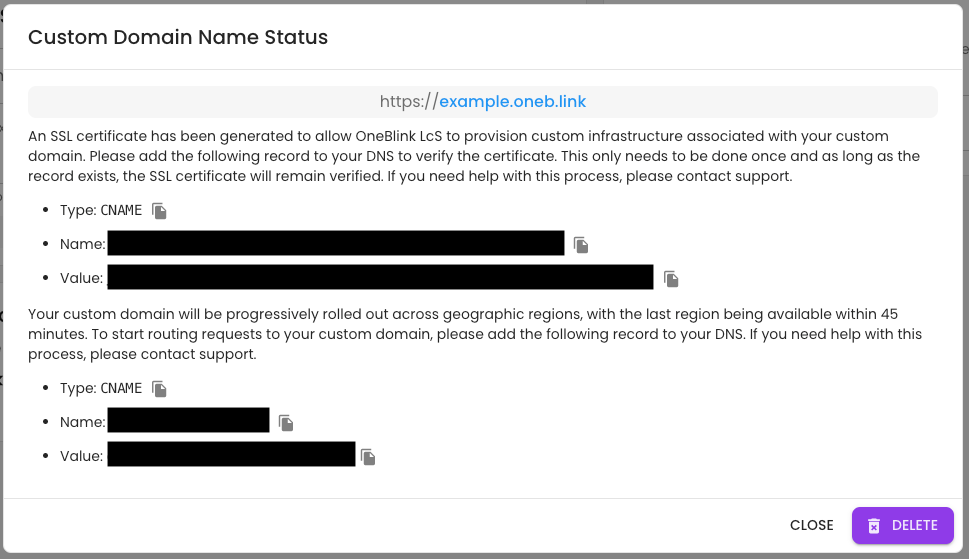
Step 6: Once both CNAME records have been added to your DNS, the new URL will start working as expected.
Getting Help
If you need assistance setting up a Custom Domain, please reach out through this support portal or email support@oneblink.io.
Was this article helpful?
That’s Great!
Thank you for your feedback
Sorry! We couldn't be helpful
Thank you for your feedback
Feedback sent
We appreciate your effort and will try to fix the article