Embedding a OneBlink form into your website provides a seamless, branded experience by allowing users to complete forms without leaving your webpage. A website script can be generated from OneBlink and added to your site in just a few steps.
TABLE OF CONTENTS
- Accessing the Website Script
- Generating a Script from the Form Summary
- Generating a Script from the SDK Page
- Adding preFillData
- Getting Help
Accessing the Website Script
The Website Script can be generated from either the Form Summary screen or the SDK page.
Once generated, the script is customised to include the relevant Form App ID and Form ID. You can then copy the script and add it to your website.
Generating a Script from the Form Summary
To generate the Website Script from a form, follow the steps below:
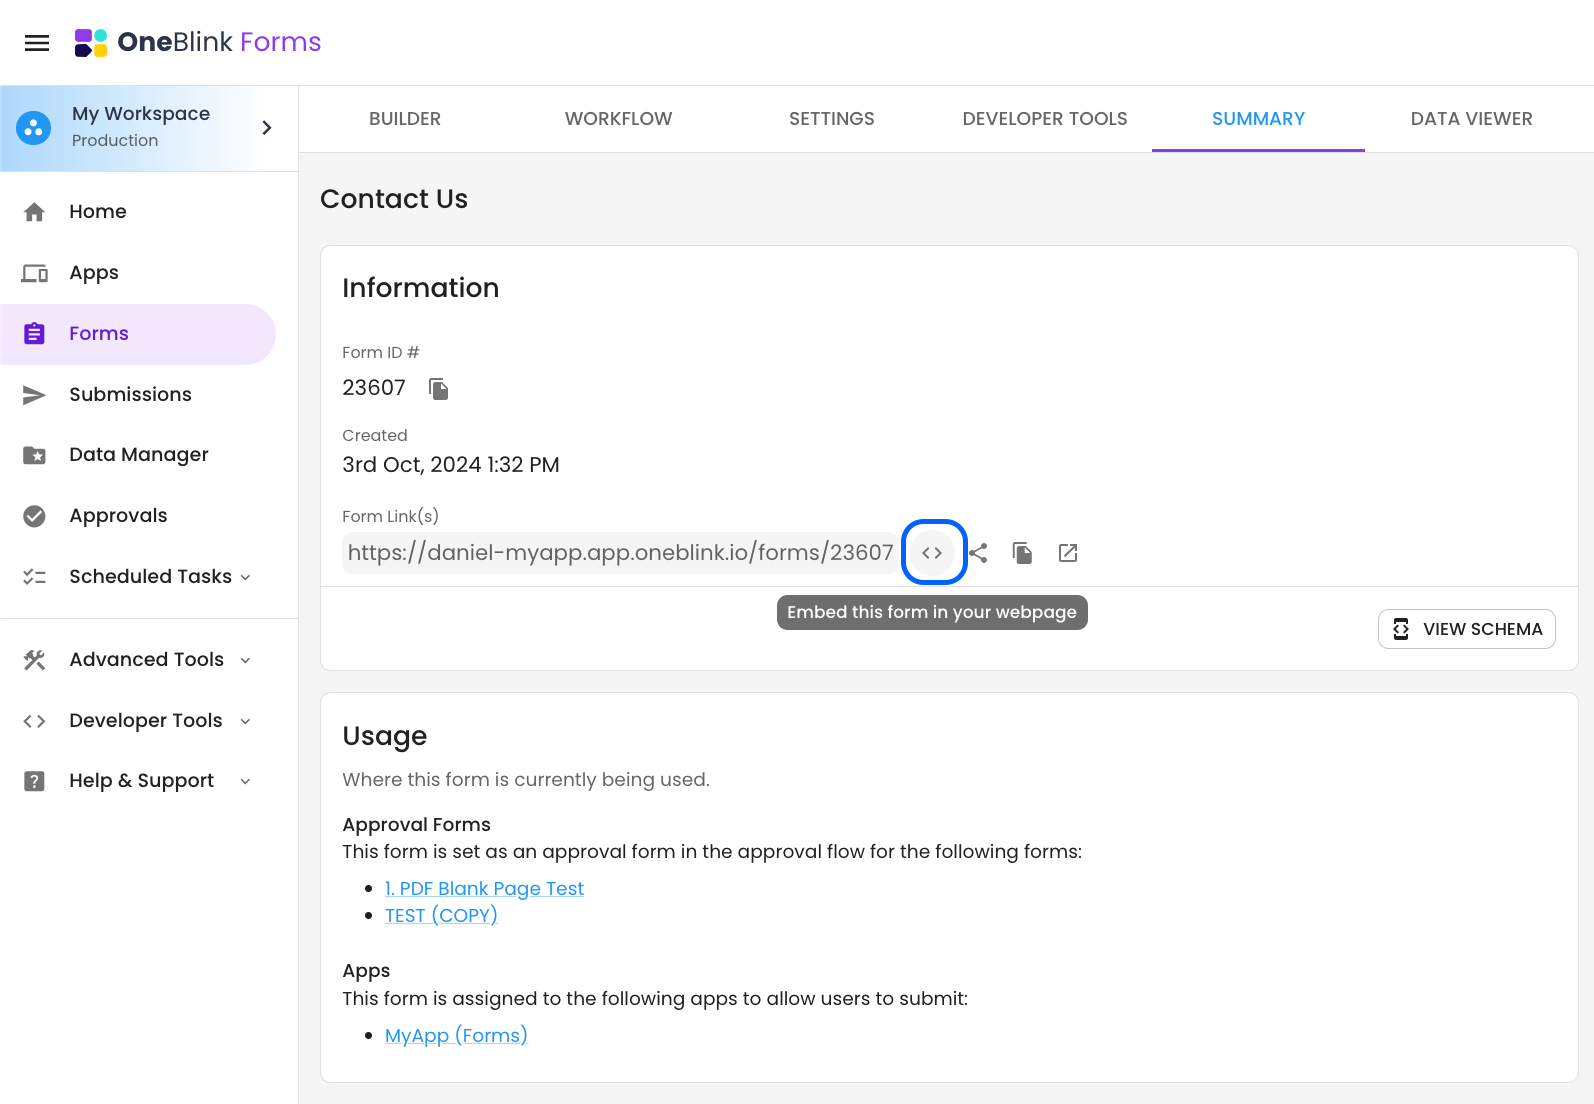
Step 1: Navigate to the form you would like to add to your website.
Step 2: Click the script button next to the Form Link.
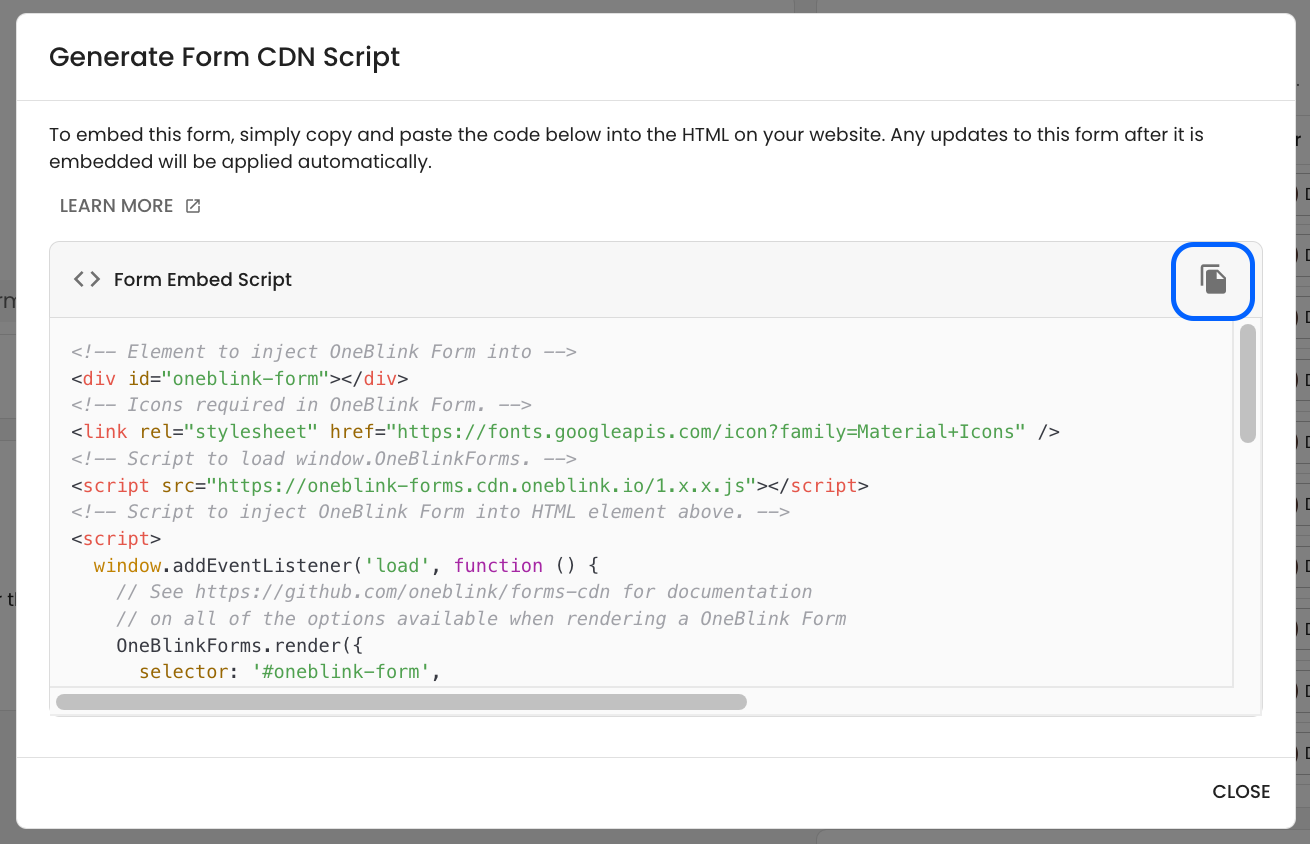
Step 3: Click the Copy button to copy the generated script.
Generating a Script from the SDK Page
You can also generate the Website Script from the SDK page.
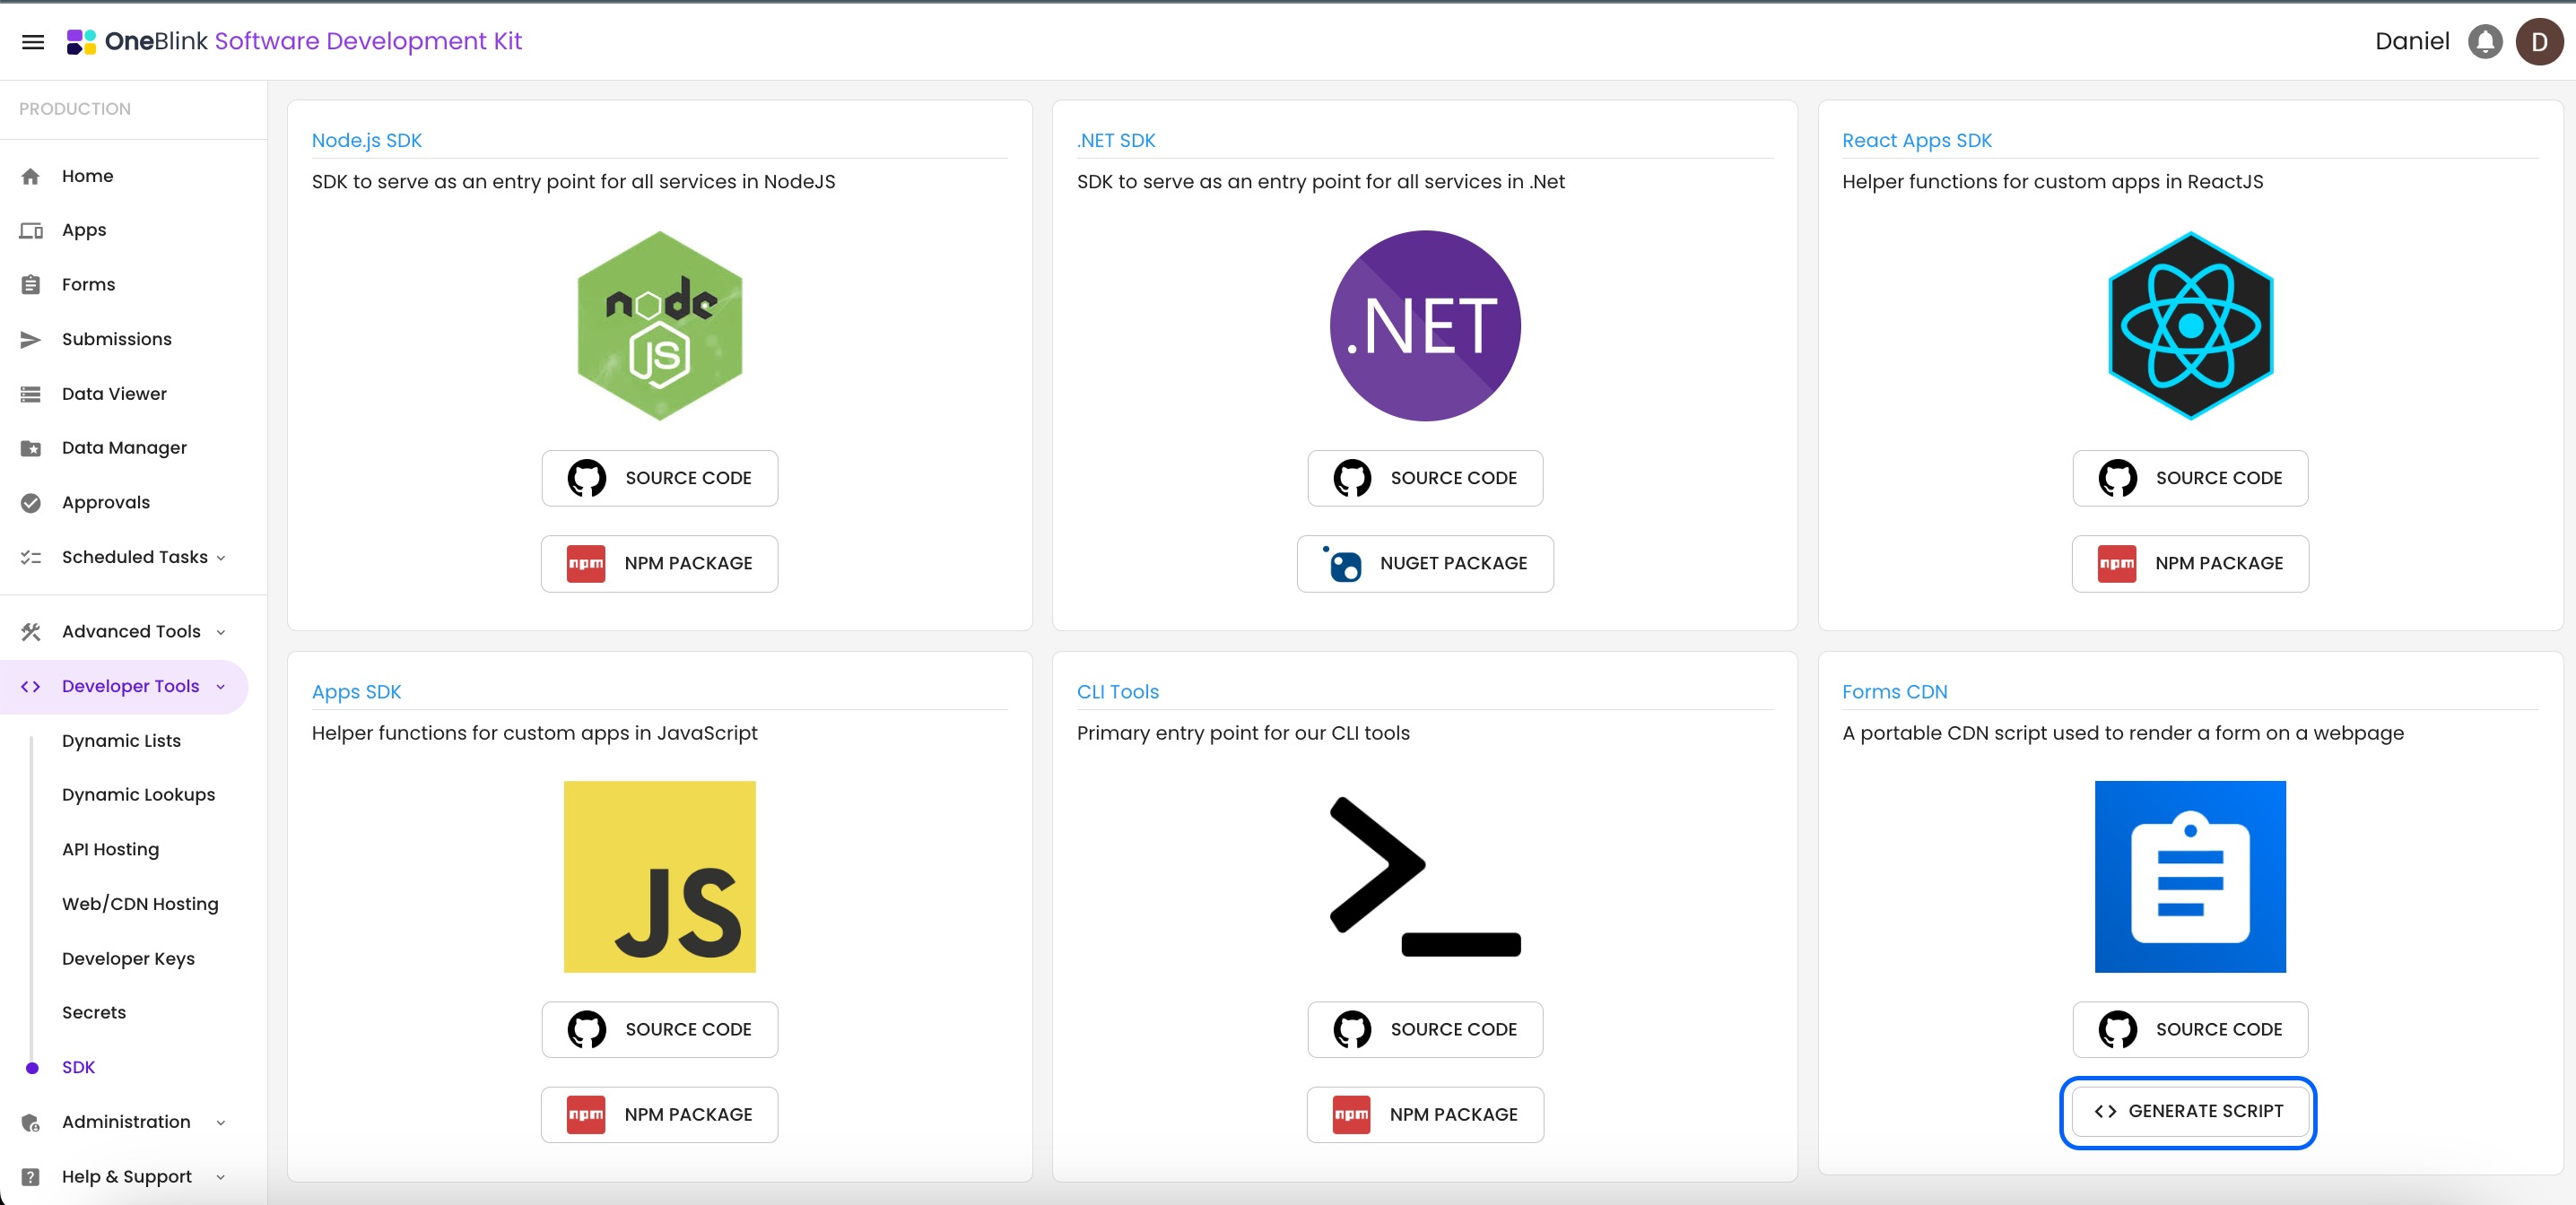
Step 1: Navigate to the SDK page.
Step 2: In the Forms CDN card, click the Generate Script button.
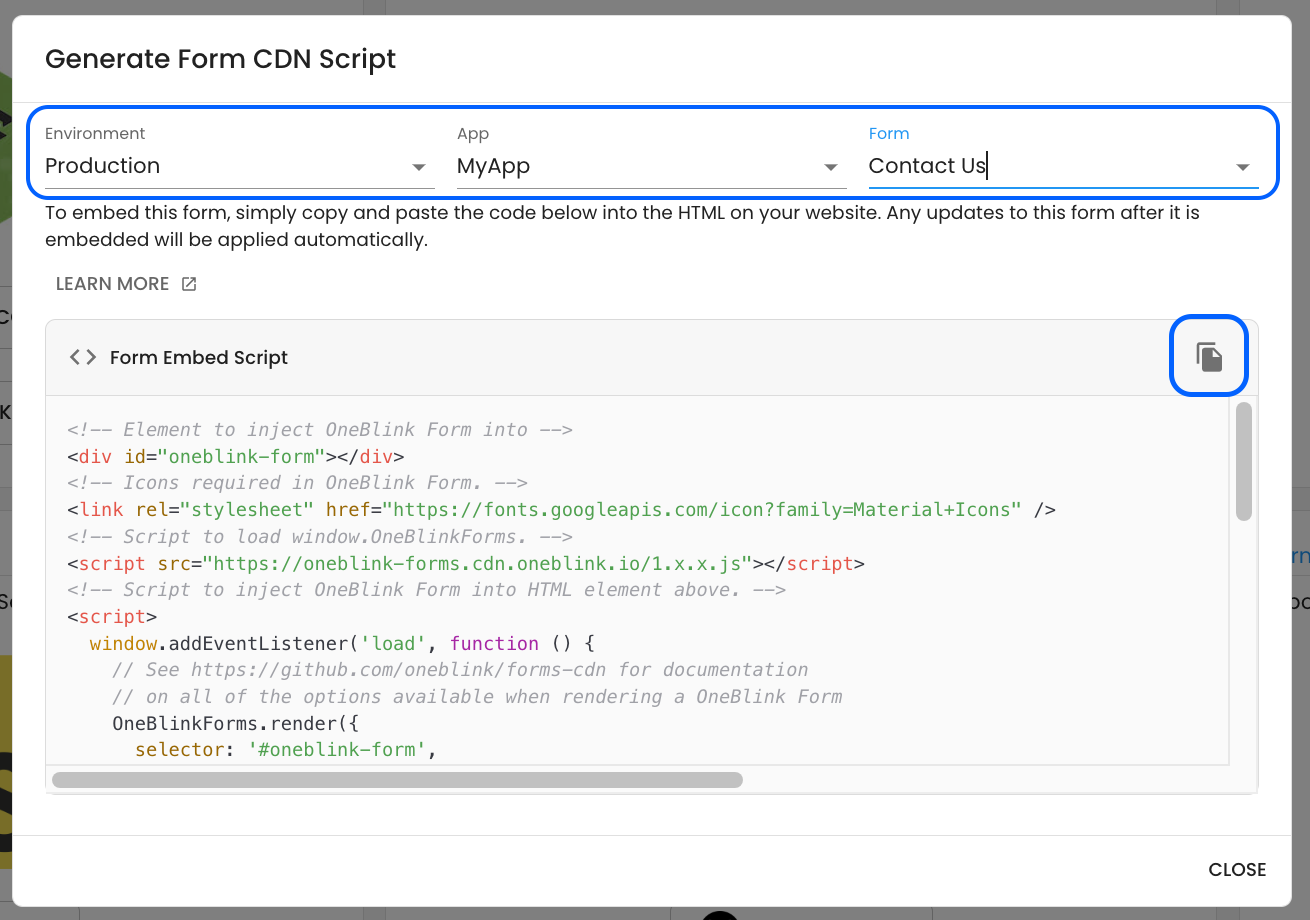
Step 3: Select the relevant Environment, App and Form.
Step 4: Once the script has generated, click the Copy button to copy the script.
Adding preFillData
preFillData allows you to pre-populate form elements when the form is rendered.
The example below includes prefill data for two elements:
fullnameyour-email
{ fullname: "Donald Duck", "your-email": "donald.duck@email.com" }
If a form element name contains special characters, including spaces, wrap the property name in quotes. In the example above, "your-email" is wrapped in quotes because it contains a hyphen.
To render preFillData, add the JavaScript object to the preFillData property in the OneBlinkForms.render function.
window.addEventListener("load", function () {
  OneBlinkForms.render({
    selector: "#oneblink-form",
    formId: 23460,
    formsAppId: 560,
    submissionRedirectUrl: "www.google.com",
    cancelRedirectUrl: "www.google.com",
    paymentReceiptUrl: "",
    paymentFormUrl: "",
    externalId: "",
    preFillData: {
      fullname: "Donald Duck",
      "your-email": "donald.duck@email.com",
    },
  });
});
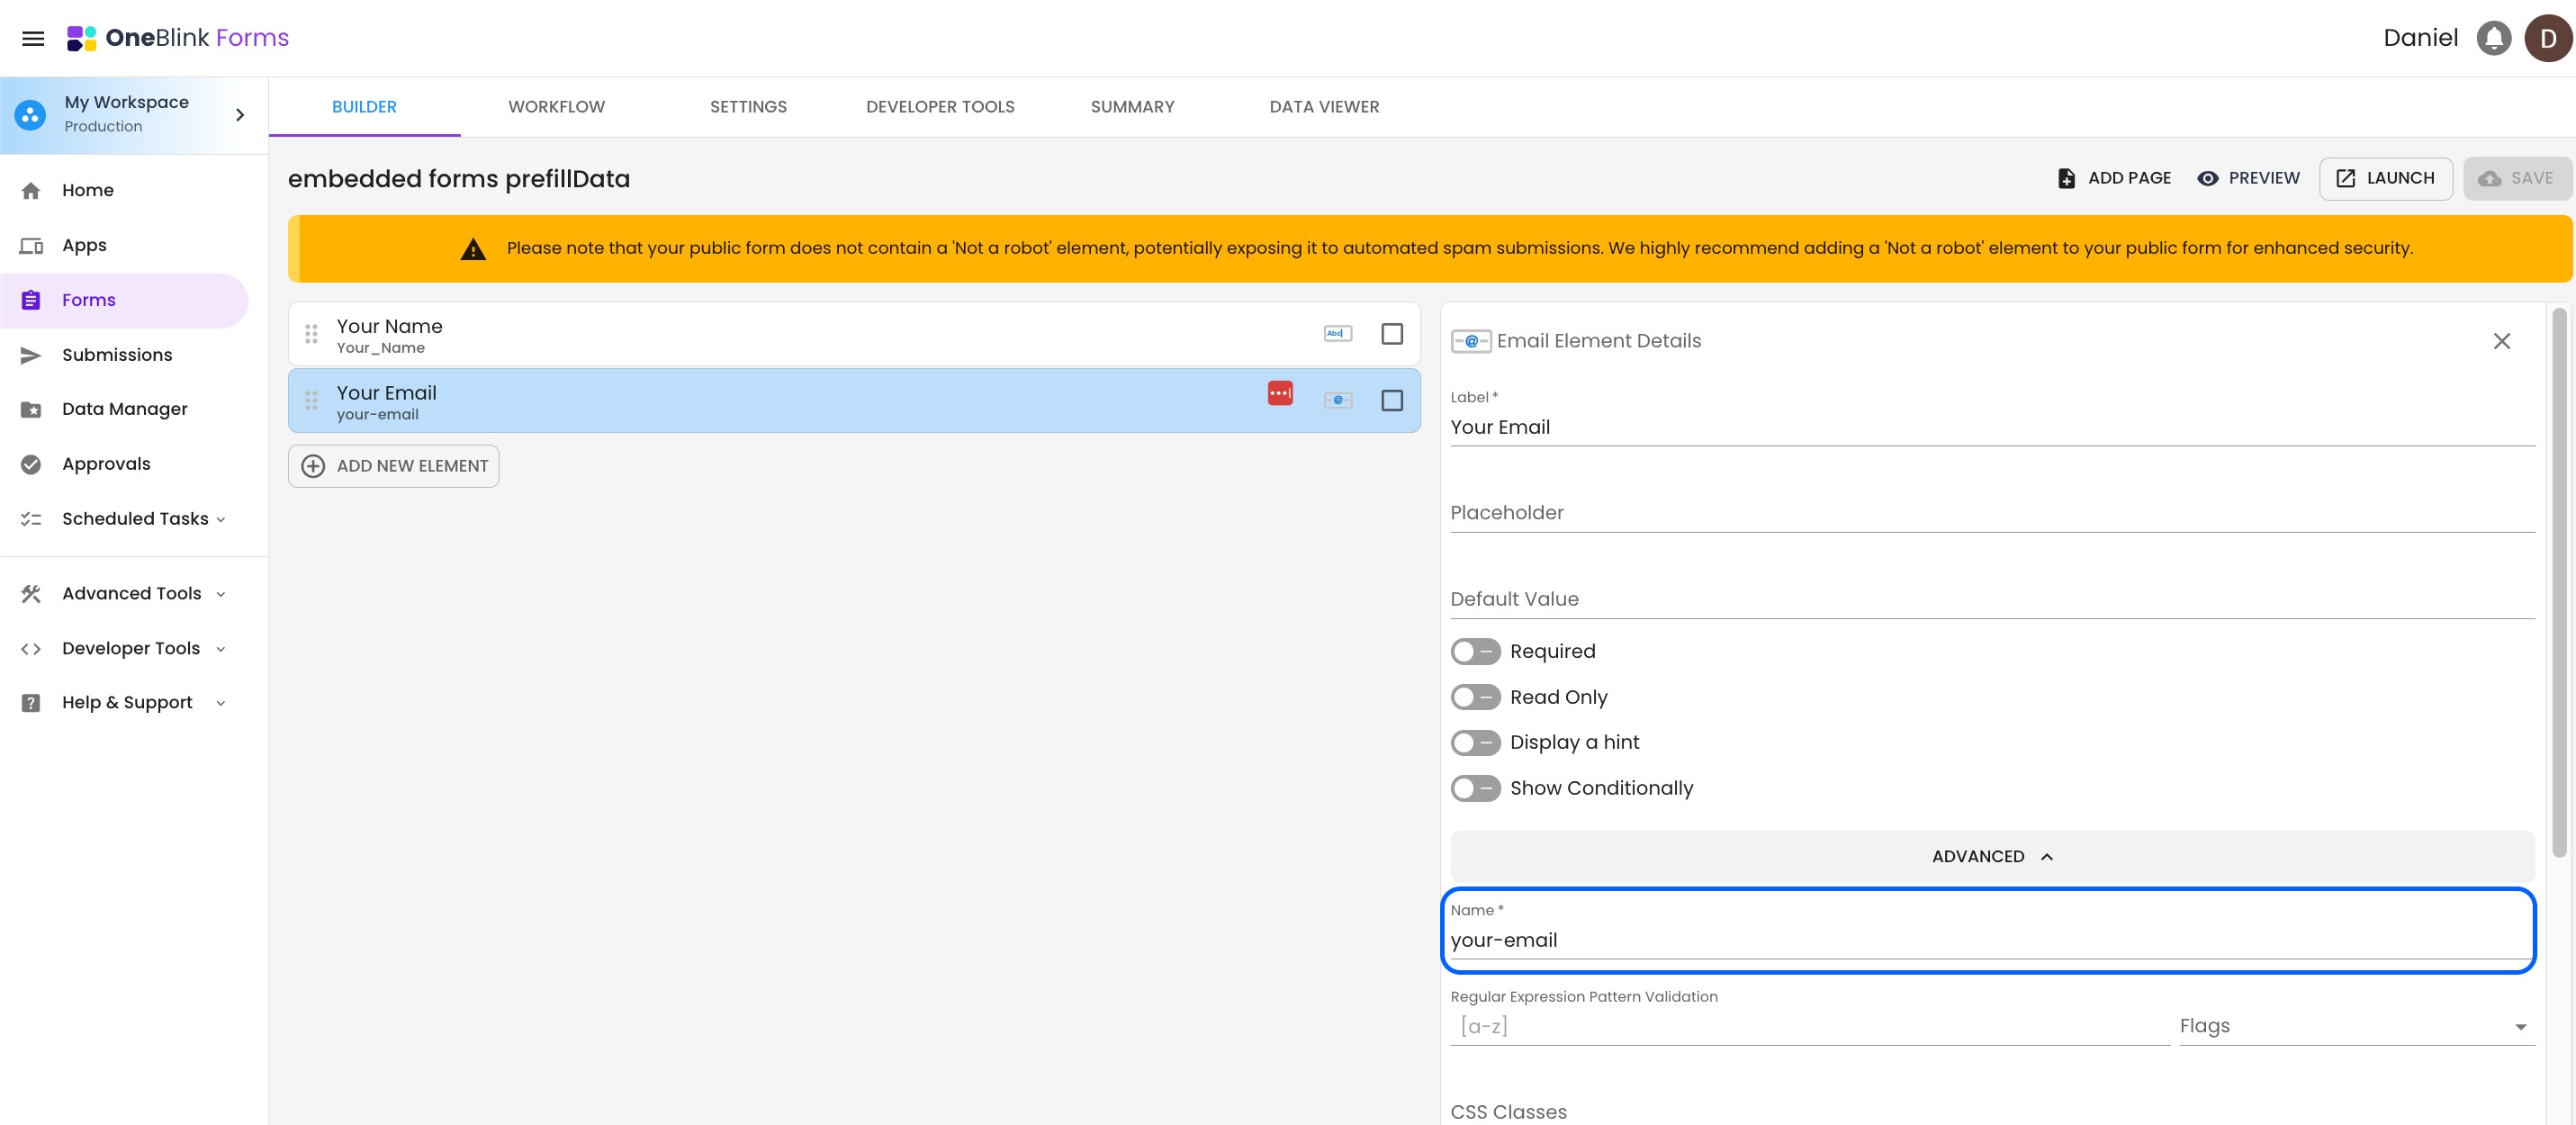
In the Form Builder, make sure the element name property matches the corresponding preFillData attribute. For example, the form element name must be your-email for the "your-email" Prefill value to appear.
Getting Help
If you need any assistance with Website Script, please reach out through the Report Issue menu or email support@oneblink.io.
Was this article helpful?
That’s Great!
Thank you for your feedback
Sorry! We couldn't be helpful
Thank you for your feedback
Feedback sent
We appreciate your effort and will try to fix the article