Use the steps below to update the SAML configuration for an Entra ID (formerly Azure Active Directory) application so it points to the new OneBlink URN.
TABLE OF CONTENTS
Update the SAML configuration
Step 1: Log in to the Azure portal.
Step 2: Select Azure Active Directory.
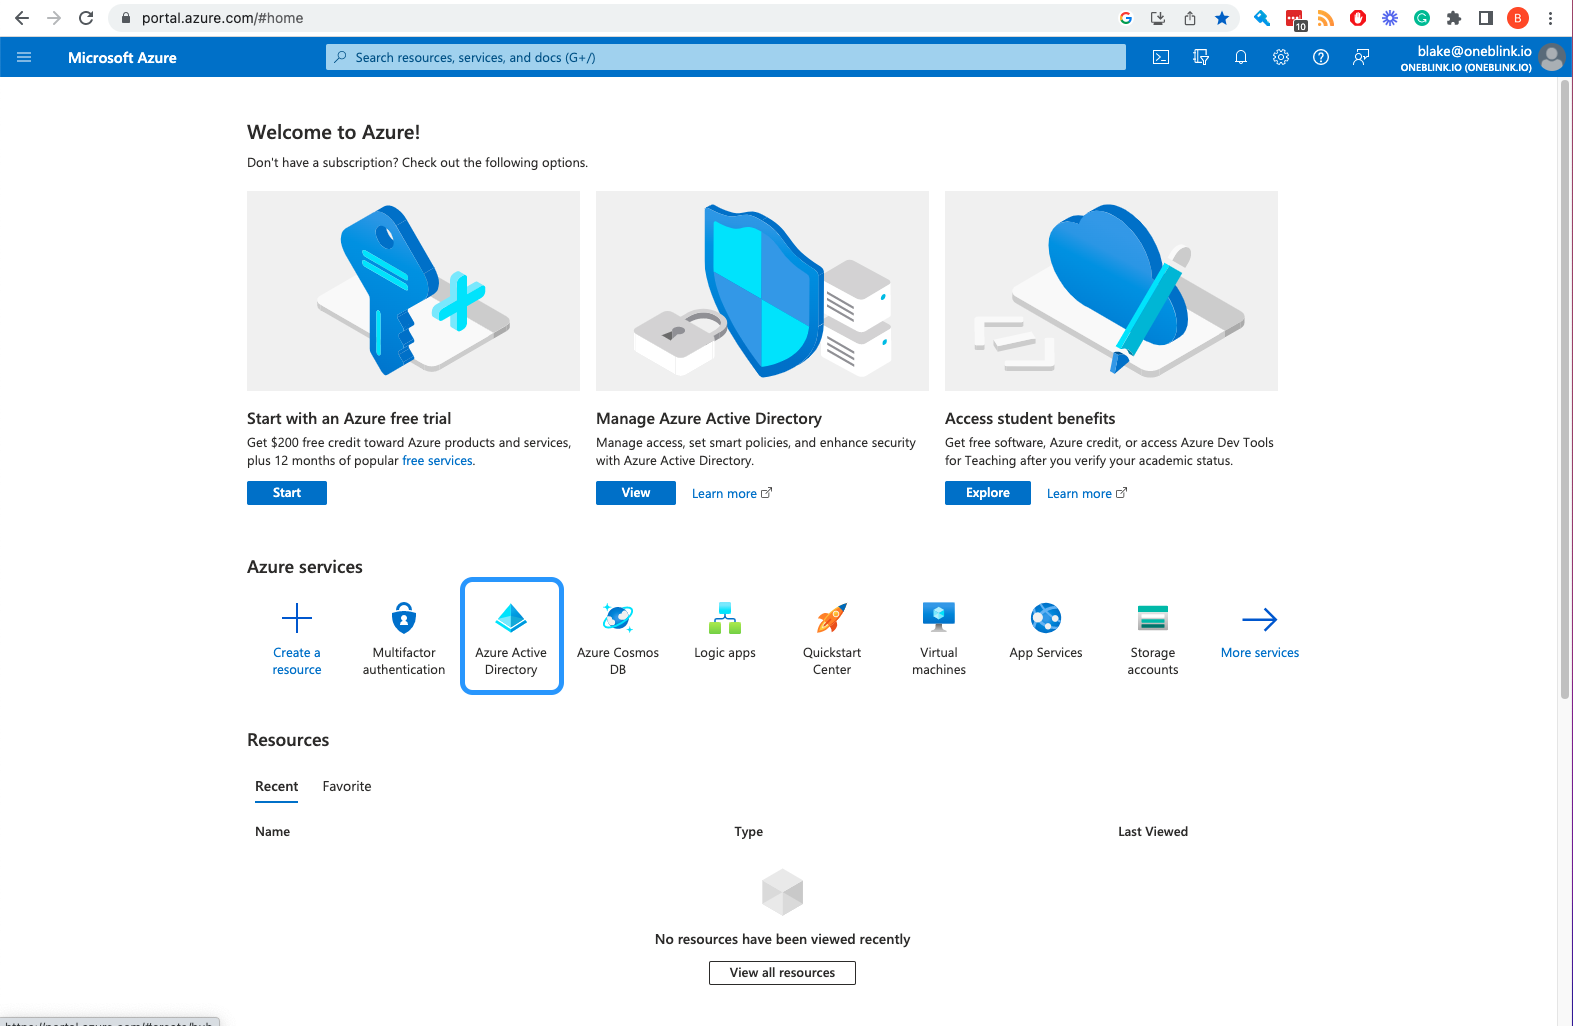
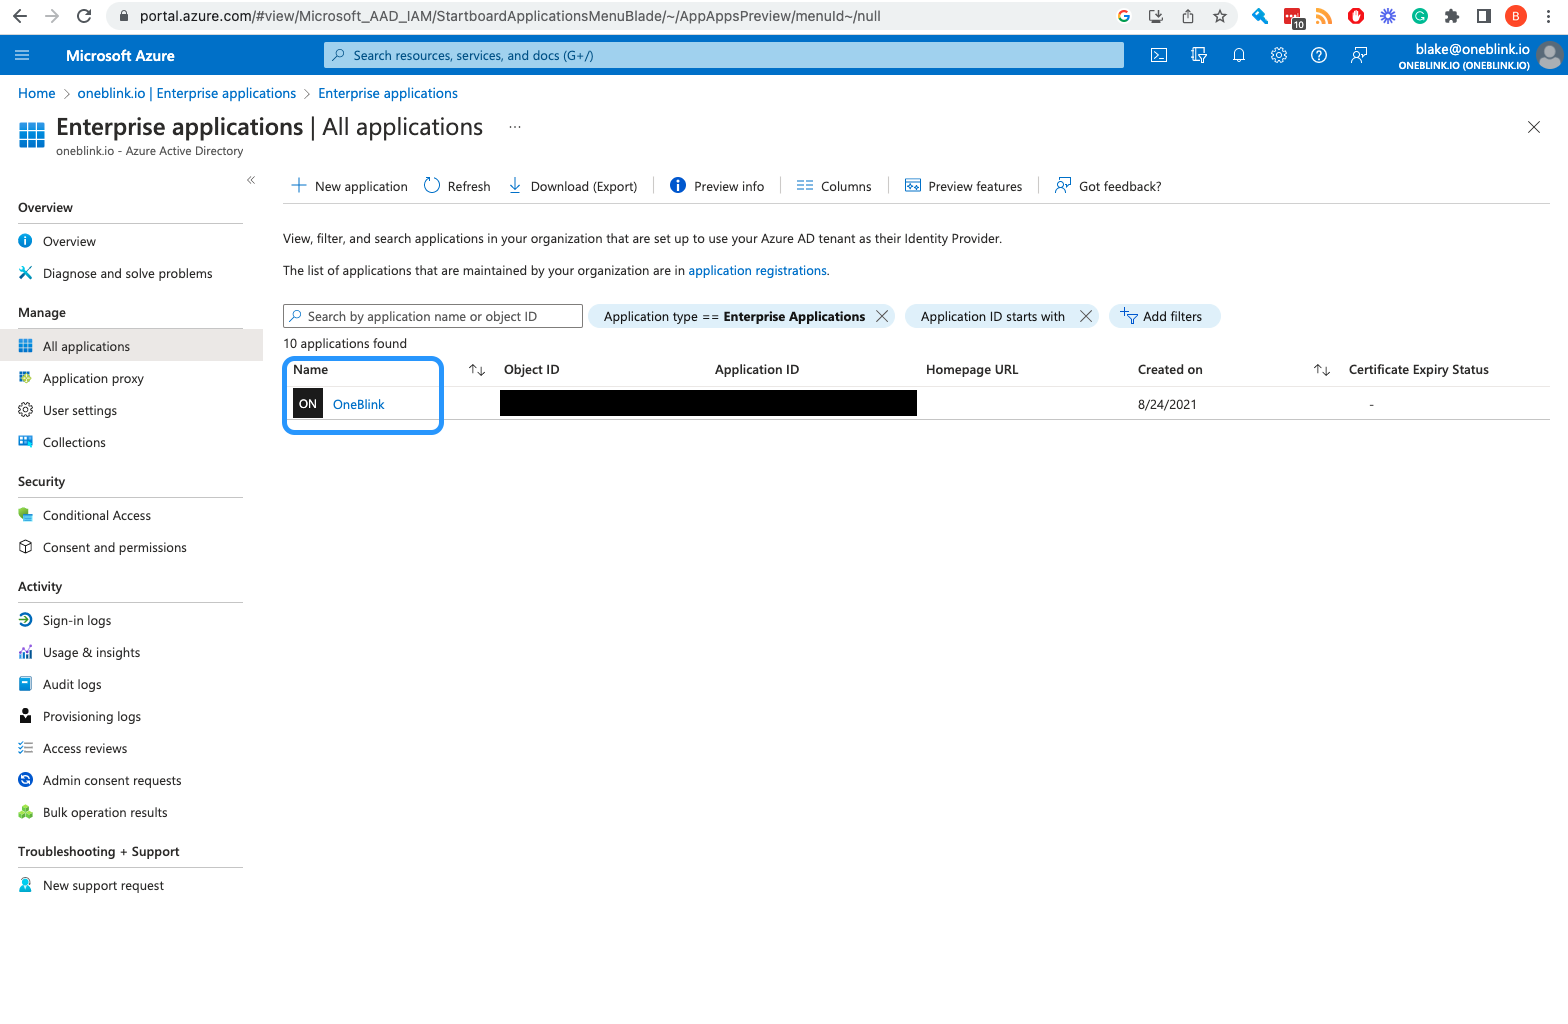
Step 3: Select Enterprise Apps, then choose your application.
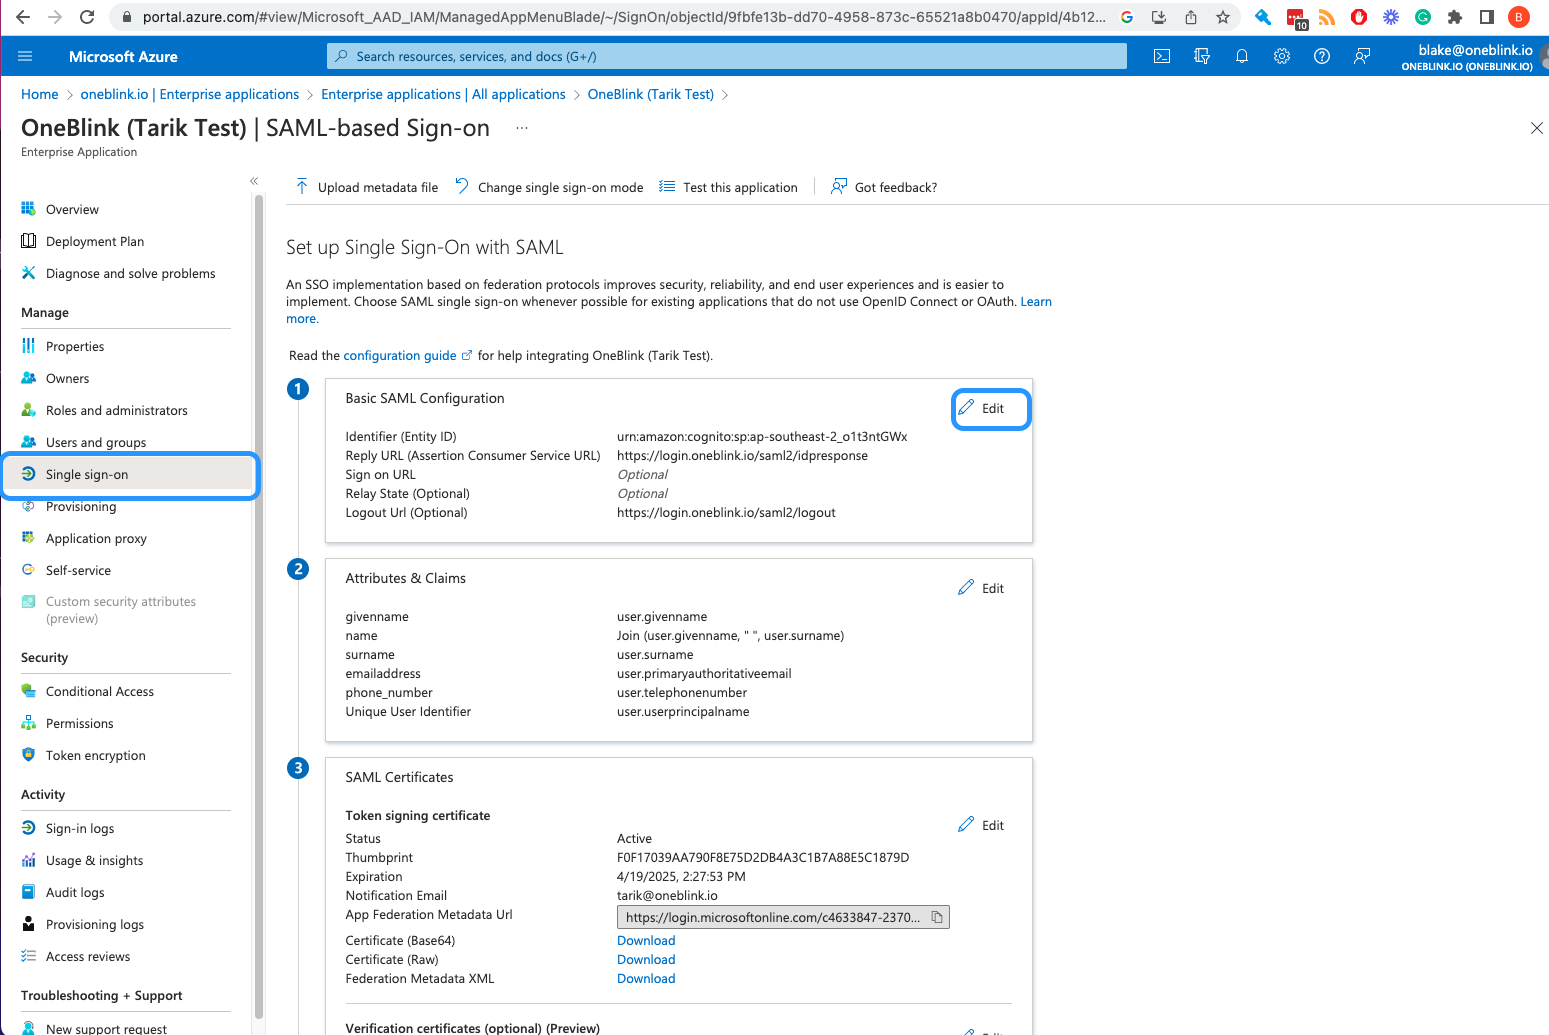
Step 4: Select Single sign-on, then click Edit on the Basic SAML Configuration section.
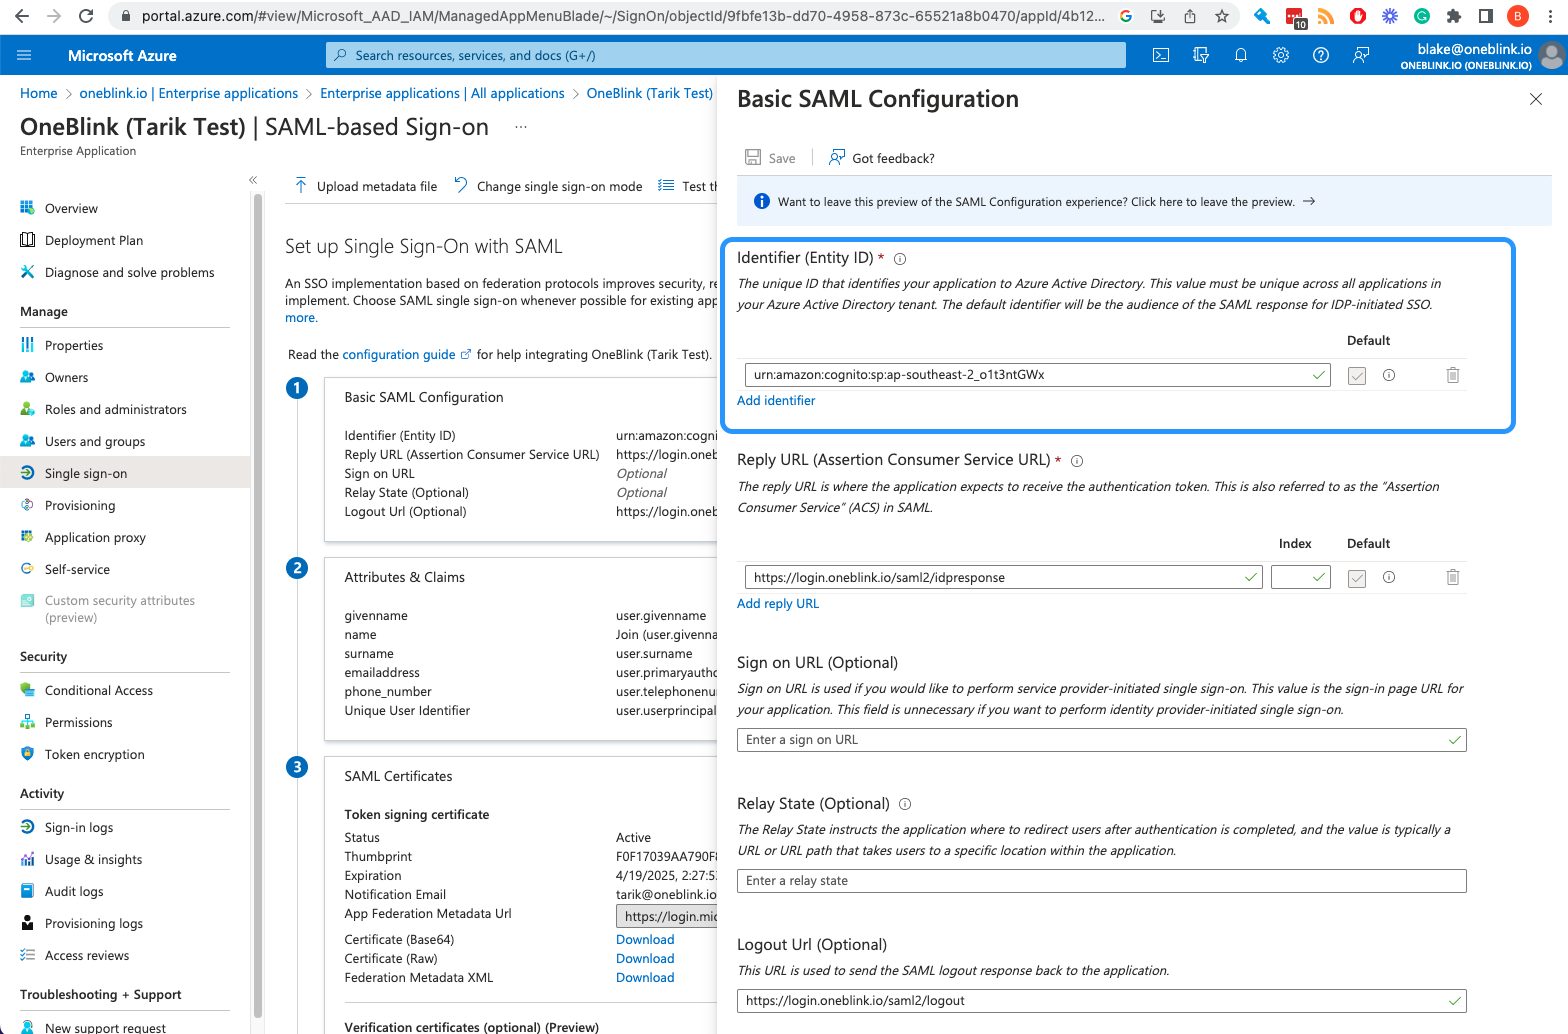
Step 5: Update the Identifier (Entity ID) value.
Change the existing value from:
urn:amazon:cognito:sp:ap-southeast-2_o1t3ntGWx
To:
urn:amazon:cognito:sp:ap-southeast-2_7kAsz3n3x
Configure user groups for platform app access
When using SAML SSO with authenticated platform apps, Team Members can configure group claims to control which SAML users can access specific app content.
This is useful when different groups of users need access to different apps. For example, some users may only need access to an app for creating legal notices by submitting a form, while other users may need access to an app that allows them to update and create legal notices through the HCMS content menu.
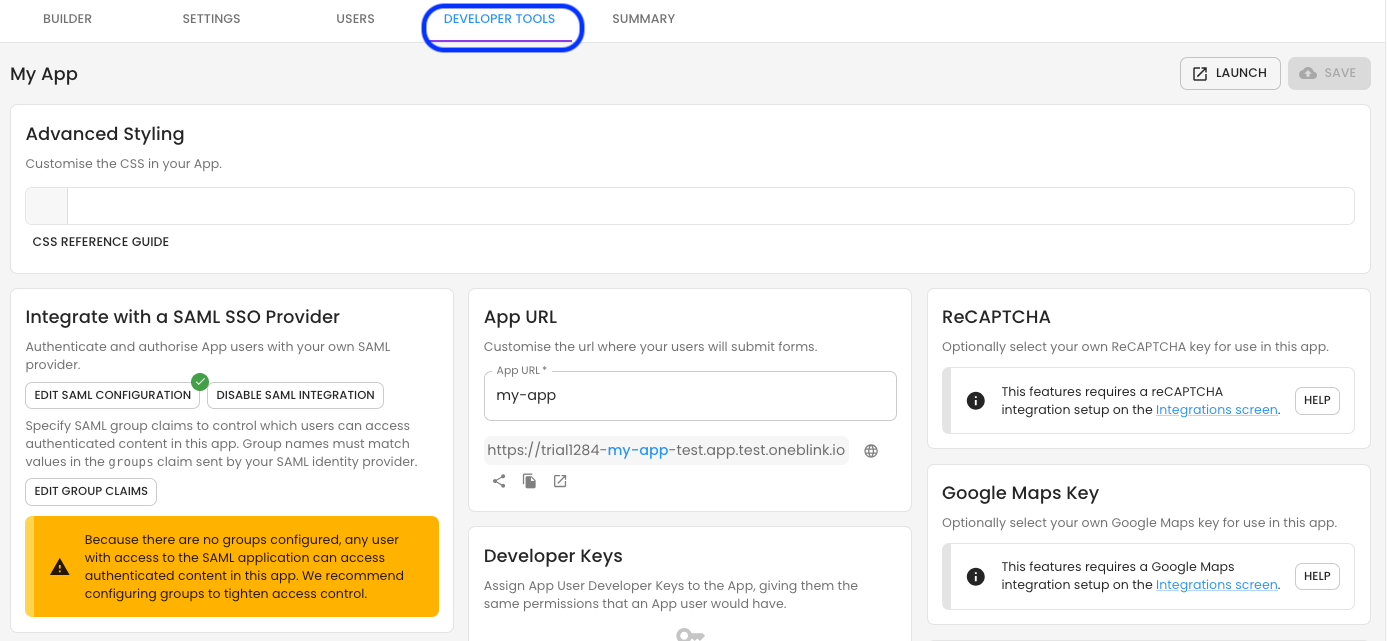
Step 1: Open the relevant platform app and navigate to the Developer Tools Tab
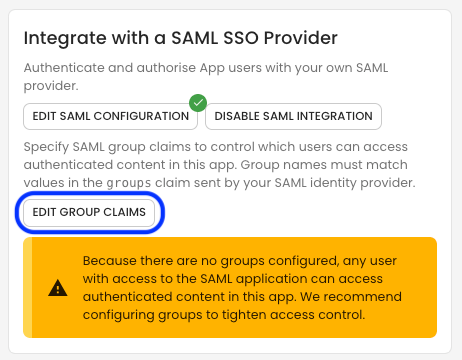
Step 2: Click the Edit Groups button and add the required group claim that should have access to the app.
Step 3: Save the group configuration.
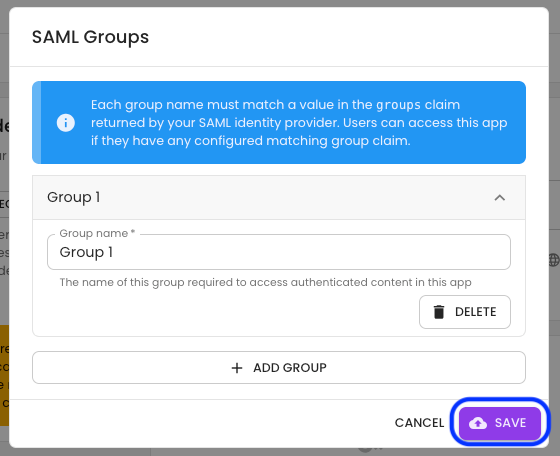
Users can access the authenticated app content when their SAML user has at least one of the configured group claims. If no group claim is configured, any user with access to the SAML app can continue to access the authenticated app content.
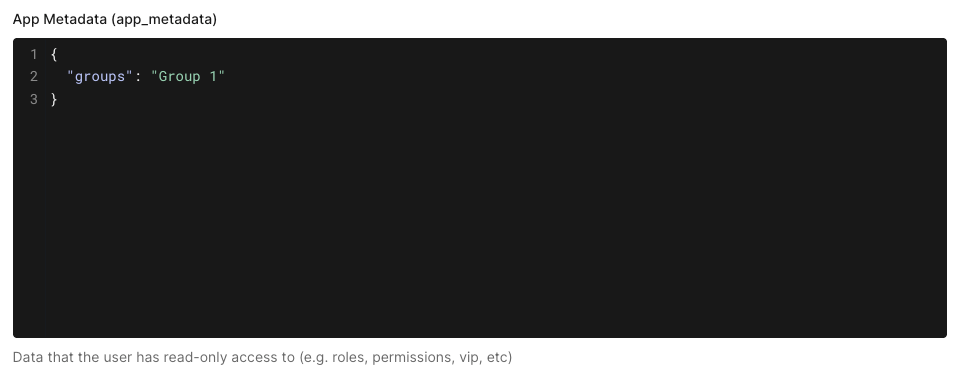
You will need to ensure that your users' group claims match the group claims configured in the platform.
Get help
If you need assistance updating your SAML configuration, please reach out through the Report Issue menu or email support@oneblink.io.
Was this article helpful?
That’s Great!
Thank you for your feedback
Sorry! We couldn't be helpful
Thank you for your feedback
Feedback sent
We appreciate your effort and will try to fix the article