Personalisation is a developer feature. You will need to write code to use this functionality.
Personalisation allows you to customise form content based on the user opening the form. This can be used to:
- Pre-fill form data
- Change the form elements shown to the user
Personalisation requires an API endpoint that returns the updated content for the form. A request is made to this endpoint each time a user opens the form.
TABLE OF CONTENTS
- Request
- Response
- Adding a Personalisation Endpoint
- Use Case: Pre-fill Based on a Previous Submission
- Getting Help
Request
The request will use the HTTP POST method with the following headers:
Content-Type: application/json
Authorization: Bearer token
The Authorization header is only included if the user is logged in.
The request payload will be a JSON object in the following format:
{
  "formsAppId": 1,
  "formId": 1,
  "externalIdUrlSearchParam": "external-id-set-in-url",
  "draftId": "89705a1c-b28f-4d18-9dd8-8e2ecd058777",
  "preFillFormDataId": "72b11a5d-d1e5-4b69-a4ba-7de7d4c1e318",
  "jobId": "077e4335-9f33-4fd4-bb14-7a632813917b",
  "previousFormSubmissionApprovalId": "b41b6356-8607-4485-b8b6-534c274dcdb5"
}
Request Properties
formsAppId: The identifier for the App.
formId: The identifier for the Form.
externalIdUrlSearchParam: Your identifier provided through the URL when opening the form. This will be set to null if it is not specified.
draftId: The identifier for the draft if the user is attempting to resume a draft. This will be set to null if it is not specified.
preFillFormDataId: The identifier for the pre-fill data if the user is attempting to load pre-fill form data. This will be set to null if it is not specified.
jobId: The identifier for the job if the user is attempting to complete a job. This will be set to null if it is not specified.
previousFormSubmissionApprovalId: The identifier for the previous approval step if the user is attempting to complete a request for clarification as part of an approval flow. This will be set to null if it is not specified.
Response
The endpoint response should be returned in JSON format. The properties you include in the response payload will depend on how you want to personalise the form.
Pre-fill Form Data
To pre-fill form elements with dynamic data, return a submission property.
The keys inside the submission object must match the name properties of the form elements you want to pre-fill.
For example, if you have a form element with the name email, you could return:
{
  "submission": {
    "email": "user@domain.com"
  }
}
Change Form Elements
To dynamically replace the form elements, return an elements property:
{
  "elements": [
    // form elements go here
  ]
}
You must return all elements for the form, not just the elements you want to add or change.
You can also return both submission and elements in the same Personalisation endpoint to pre-fill form data and change form elements at the same time.
Adding a Personalisation Endpoint
To add a Personalisation endpoint, navigate to the form you want to use.
Step 1: Open the form.
Step 2: Open the Summary menu.
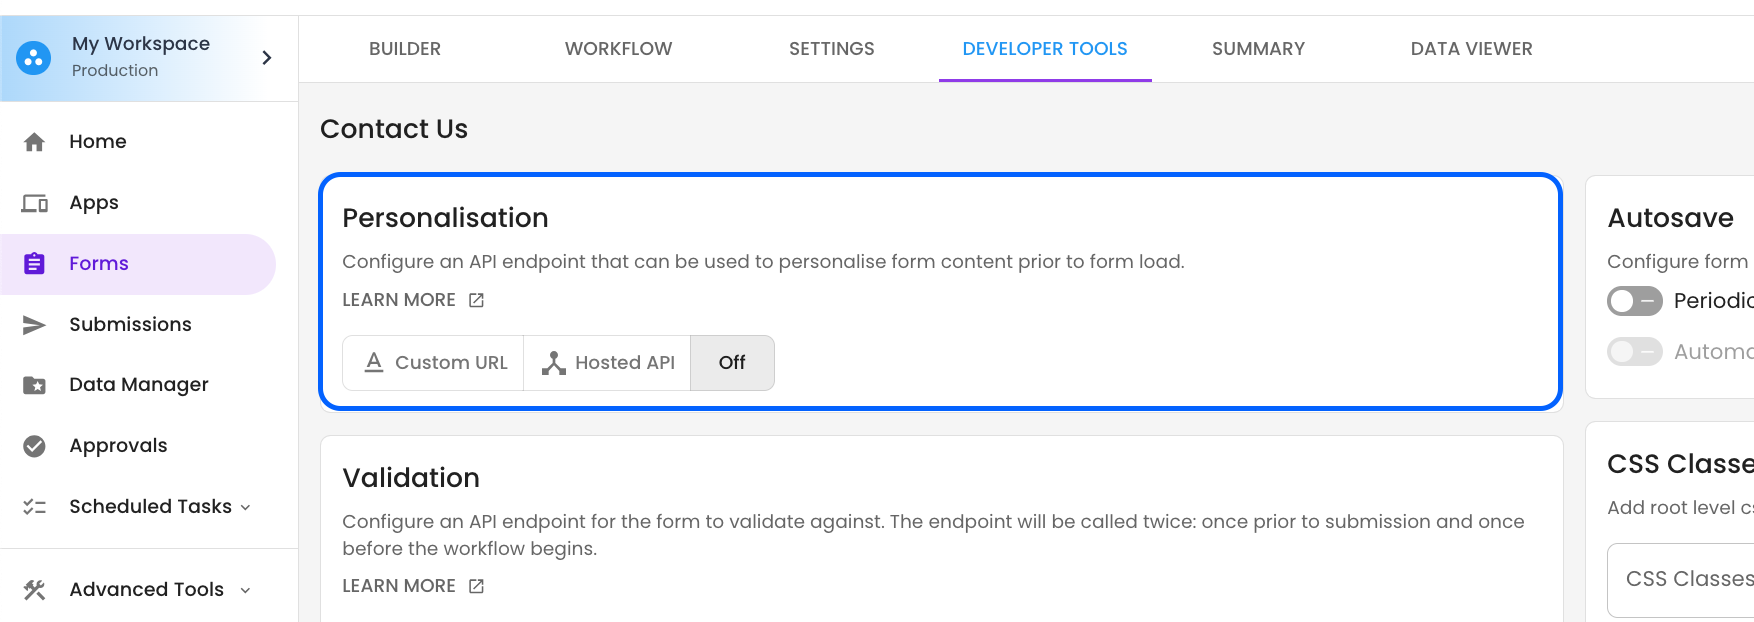
Step 3: Scroll to the Personalisation card.
Step 4: Choose one of the available implementation options:
- Custom URL
- Hosted API
We recommend using the Hosted API option with OneBlink API Hosting.
Step 5: Add your API endpoint.
Use Case: Pre-fill Based on a Previous Submission
If an inspection form requires personal contact details, you can use Personalisation to retrieve the requesting inspector’s last submission and pre-fill those details before they start the form.
This means inspectors do not need to enter the same information each time they complete the form.
Retrieving the requesting inspector’s previous submission can be done using the OneBlink SDK.
Getting Help
If you need any assistance with Personalisation, please reach out through the Report Issue menu or email support@oneblink.io.
Was this article helpful?
That’s Great!
Thank you for your feedback
Sorry! We couldn't be helpful
Thank you for your feedback
Feedback sent
We appreciate your effort and will try to fix the article