Custom PDFs allow form builders to capture form data and structure it in a PDF format that works for them. This often replaces the need to use the out-of-the-box PDF report that is generated as part of the forms workflow.
TABLE OF CONTENTS
- Creating a Custom PDF
- Workflow
- Success Message
- Allowing Fields on PDF to be Editable
- Mapping Repeatable Set Elements
- Tips & Tricks
- Current Limitations
Creating a Custom PDF
Prerequisite
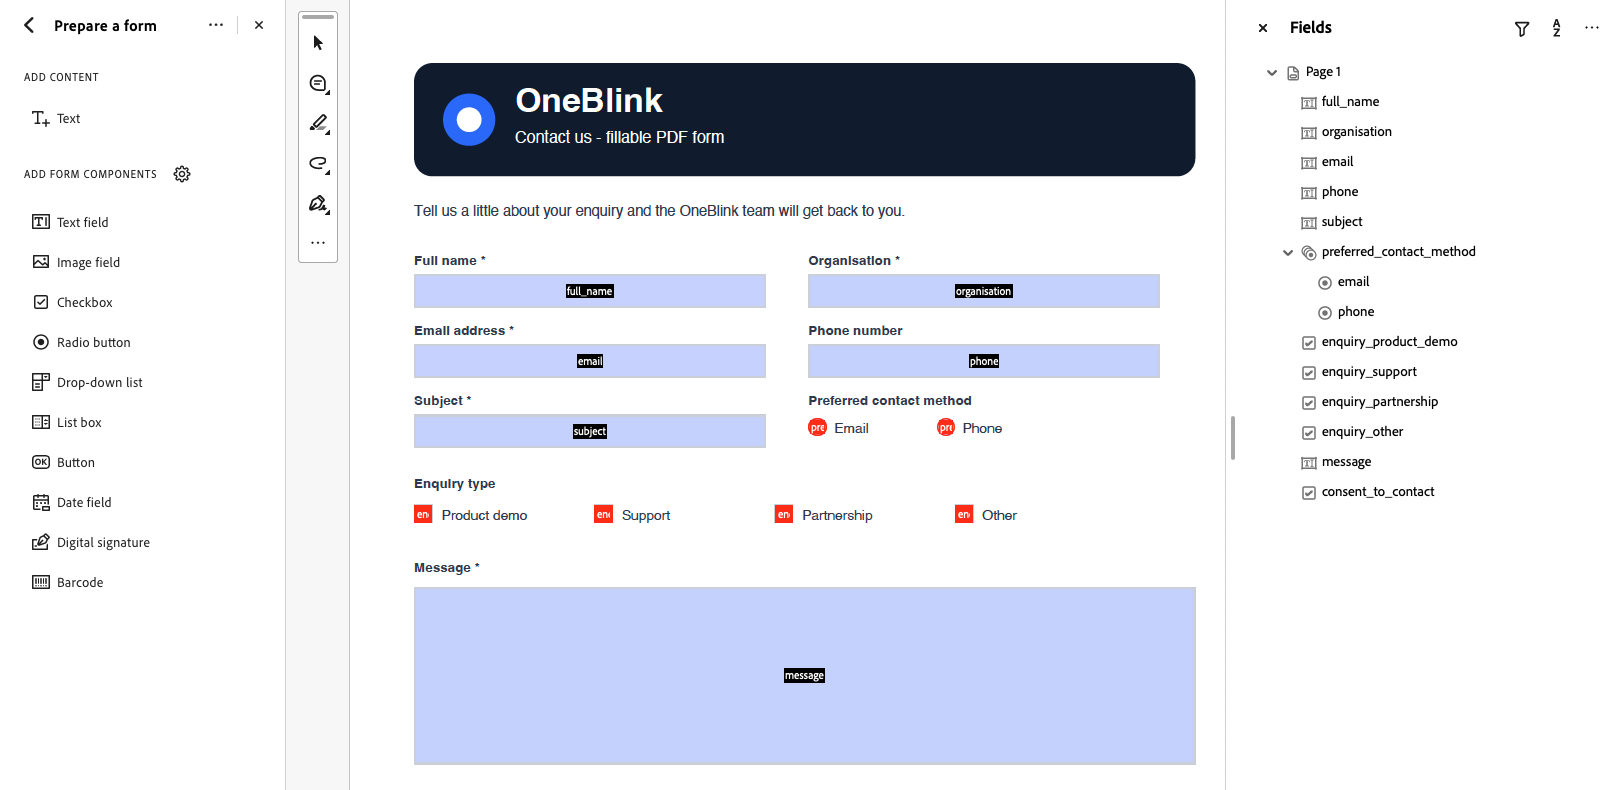
To use the Custom PDFs feature, you will need to have a PDF with fillable form fields. Ensure that these fields have informative names so that you know which PDF fields to map to OneBlink form elements.
Step 1: Navigate to the form you want to use and open the Settings tab.
Step 2: Click the Add Custom PDF button.
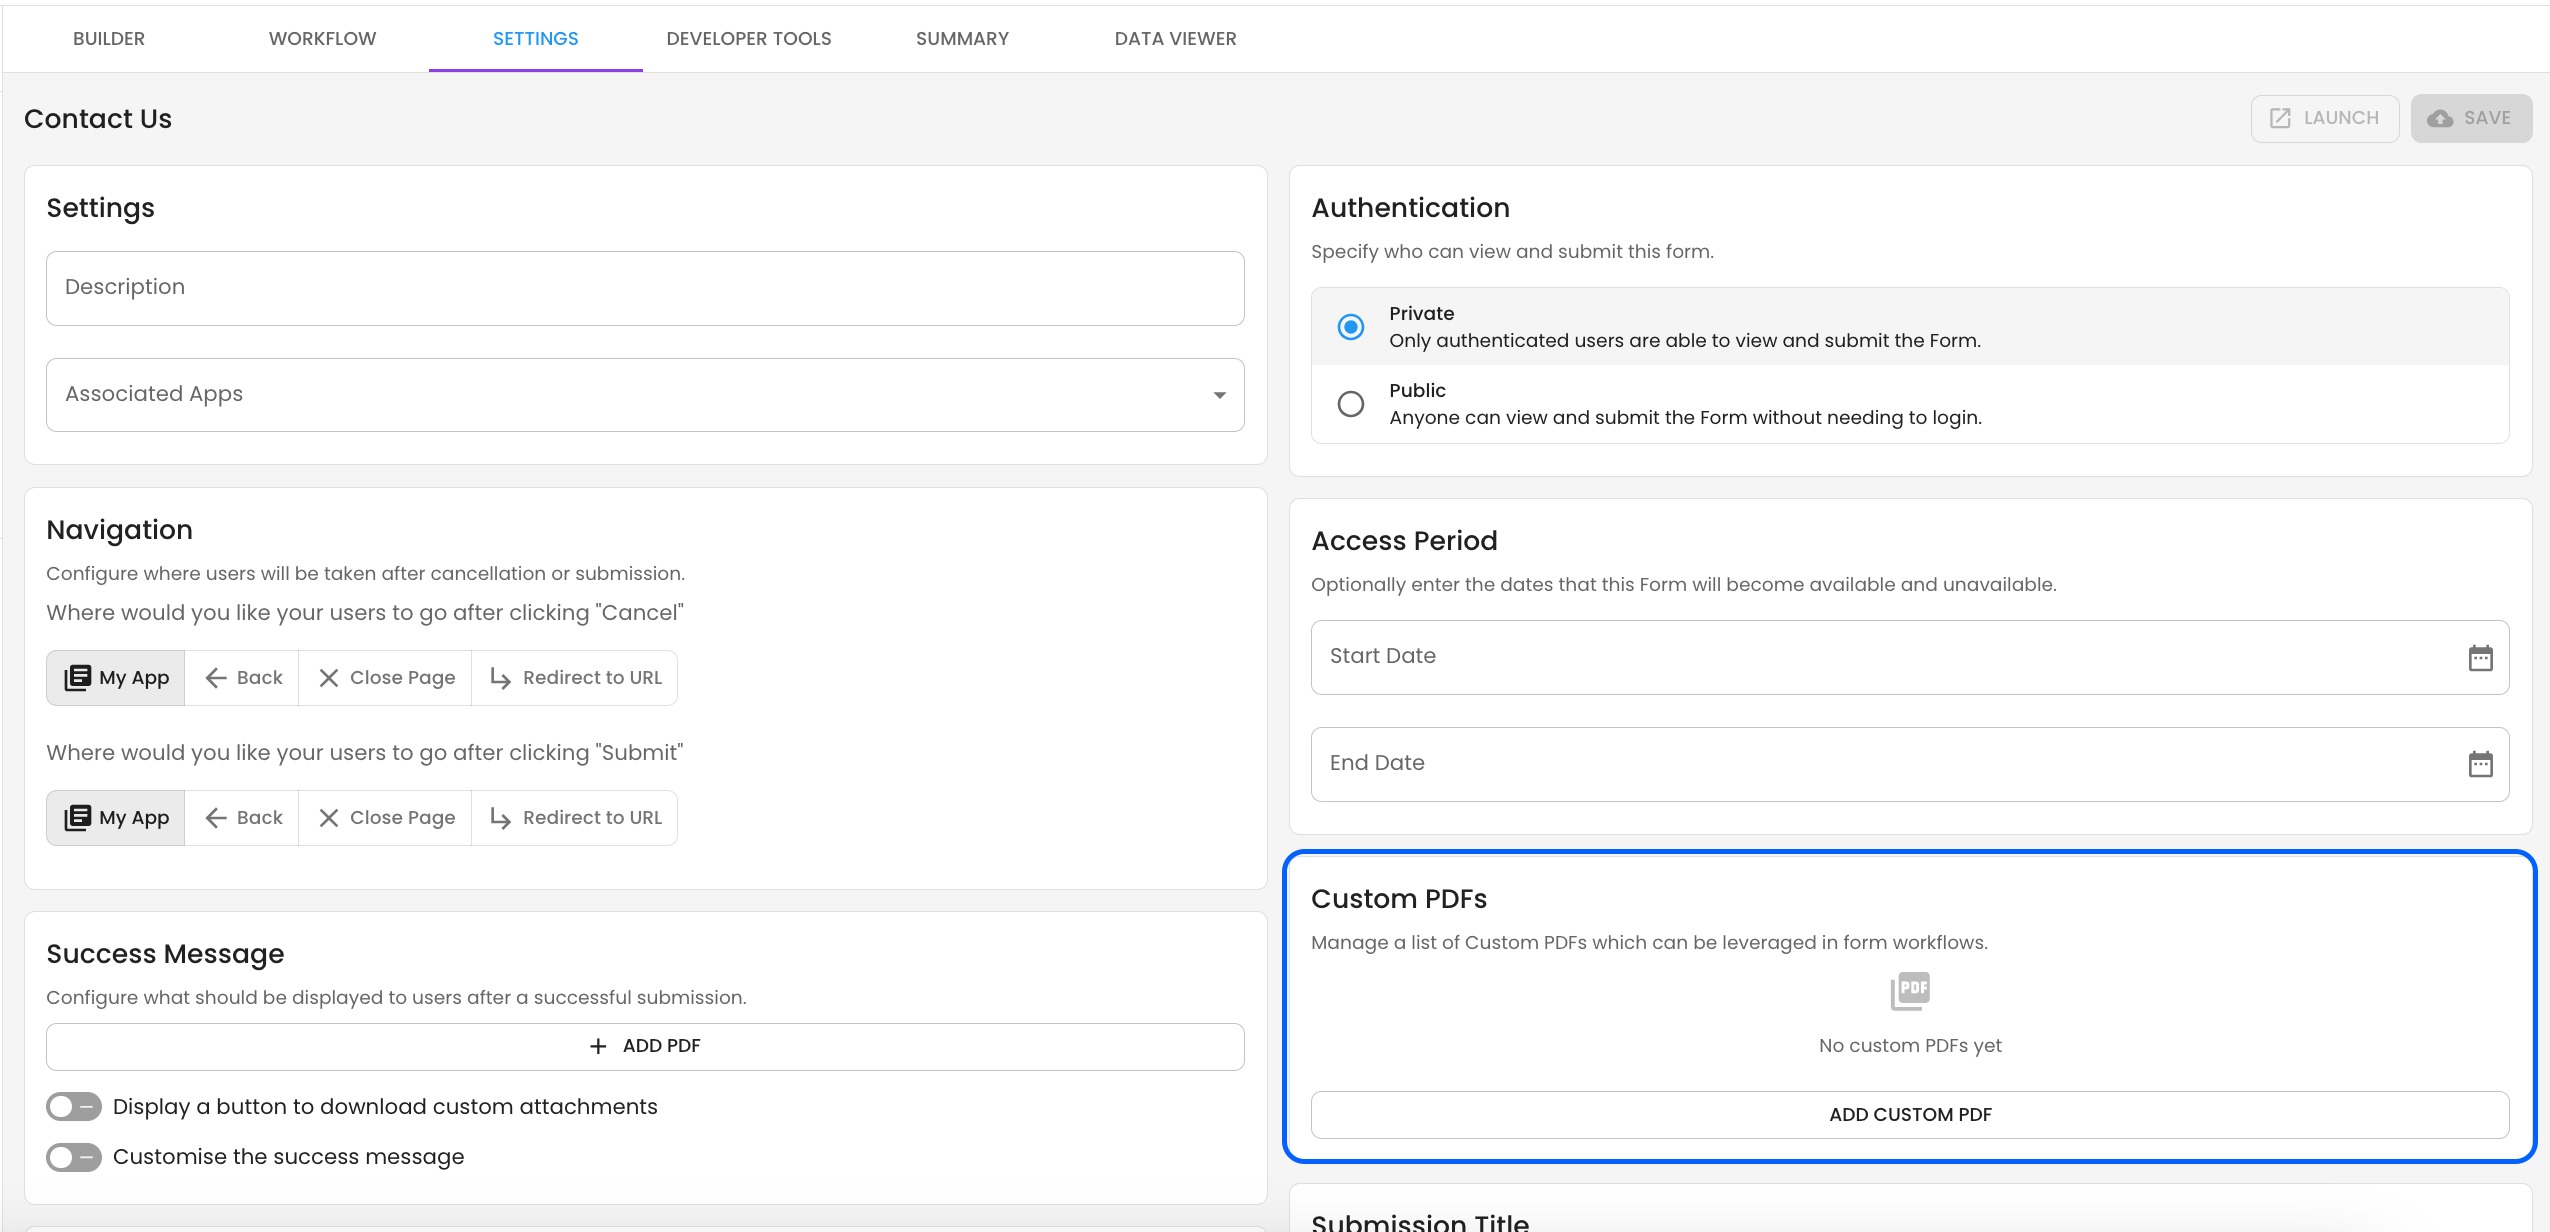
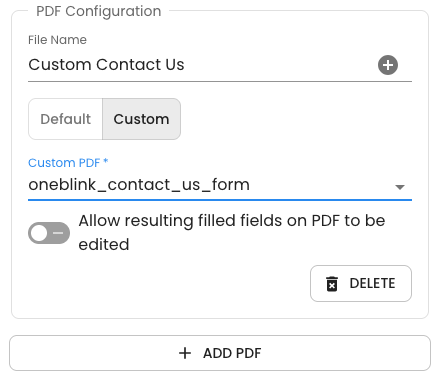
Step 3: Add a label and upload your PDF.

Step 4: Map the PDF form fields to the relevant OneBlink form elements. You can optionally modify the font of the text content being added to the PDF.
Note: If you have any payment events configured on your form workflow, you will also be able to map specific payment information to your custom PDF, depending on the Payment integration being used.
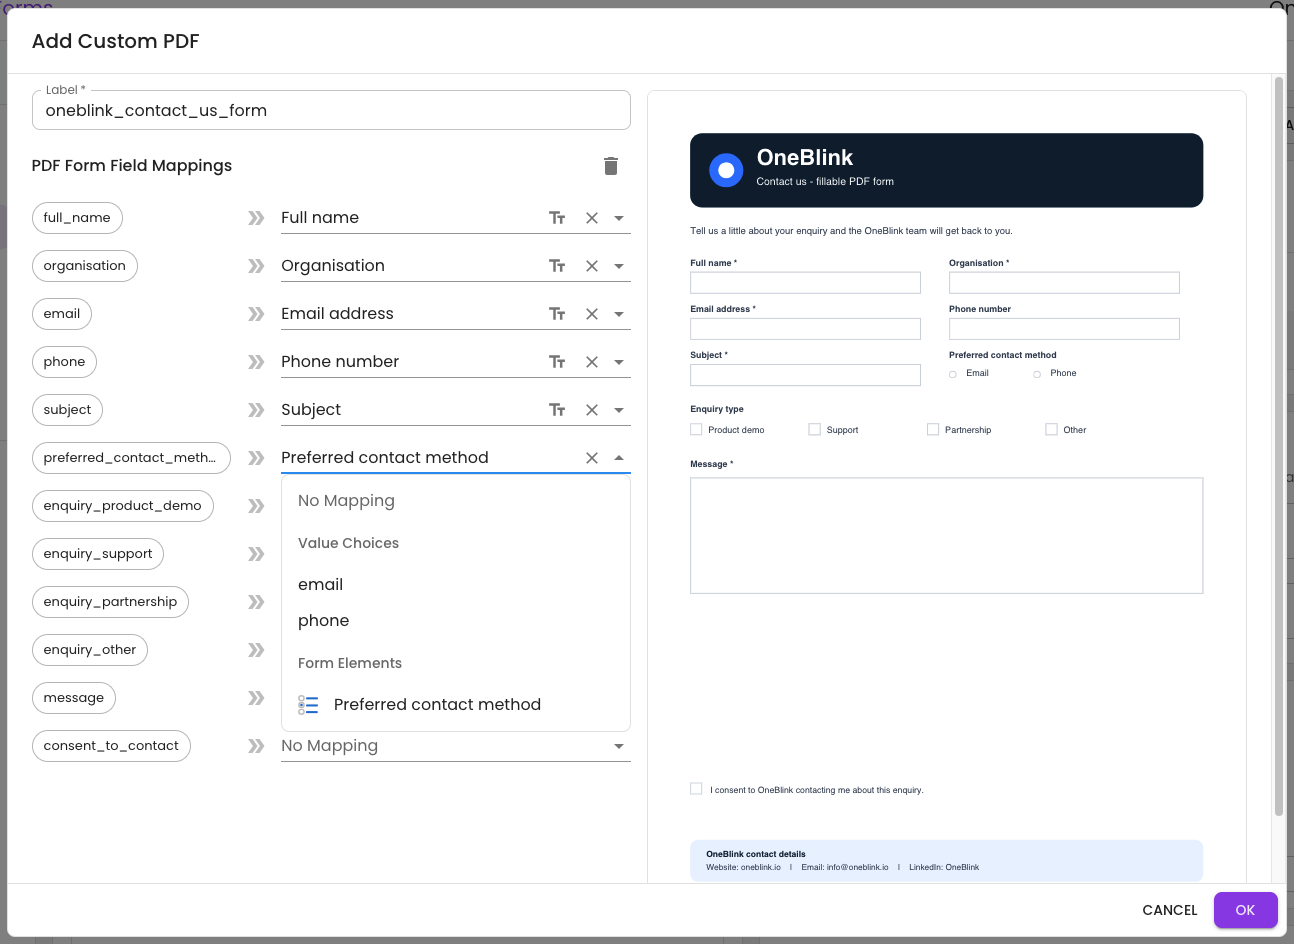
Step 5: Click the OK button and SAVE the form.
Step 6: Now that the custom PDF has been created, it can be added to your Workflow Events or the Success Message.
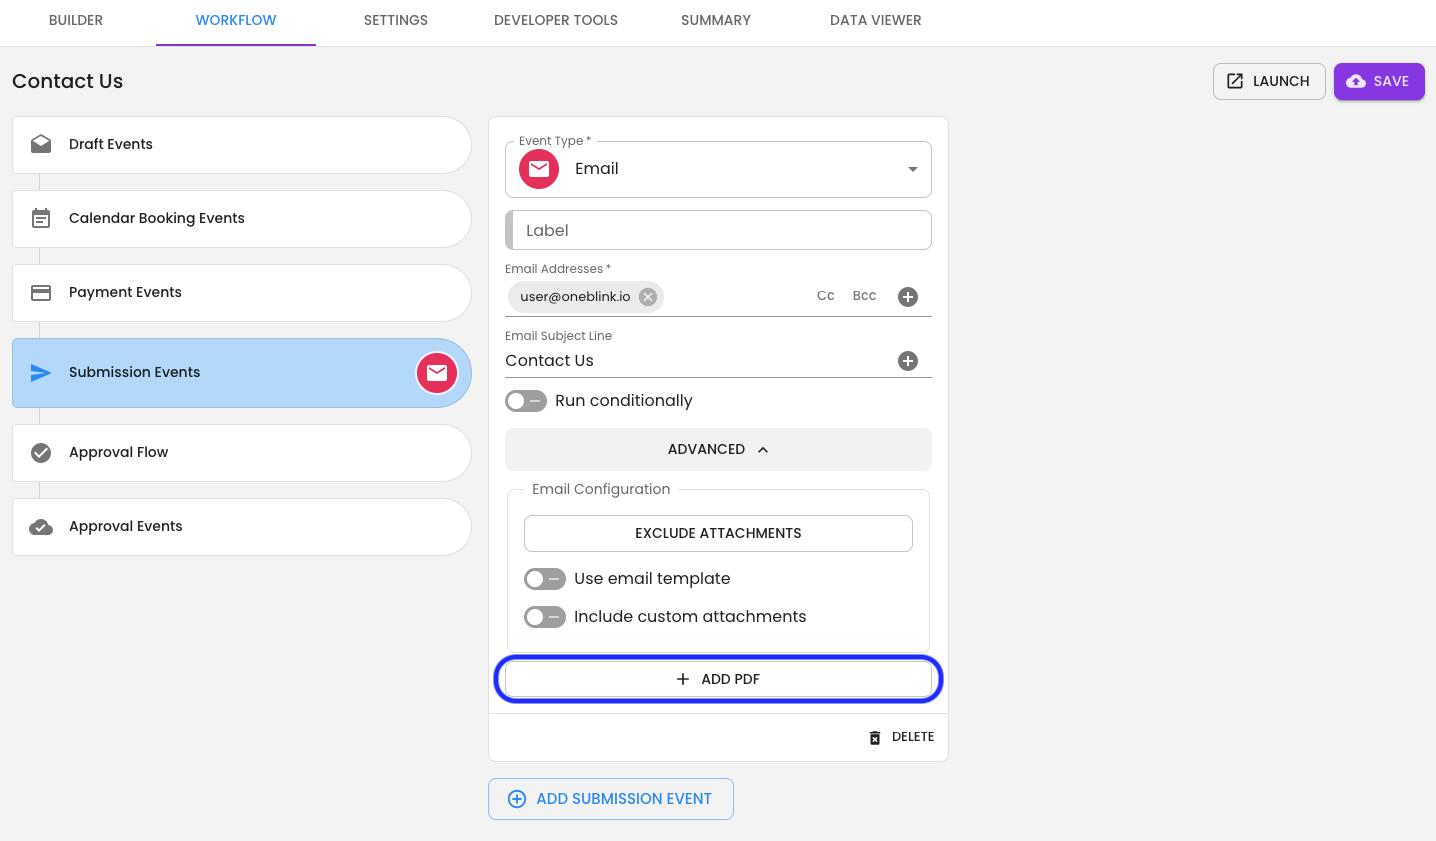
Workflow
Many of the out-of-the-box workflow events have the option to generate a PDF. Each of these can now be modified to add your Custom PDF.
- SharePoint: Store PDF
- Micro Focus Content Manager
- Authority Civica
Step 1: Open the Workflow tab on your form.
Step 2: Add a Workflow event that generates a PDF (see the list above) to your form and open the 'ADVANCED' section.
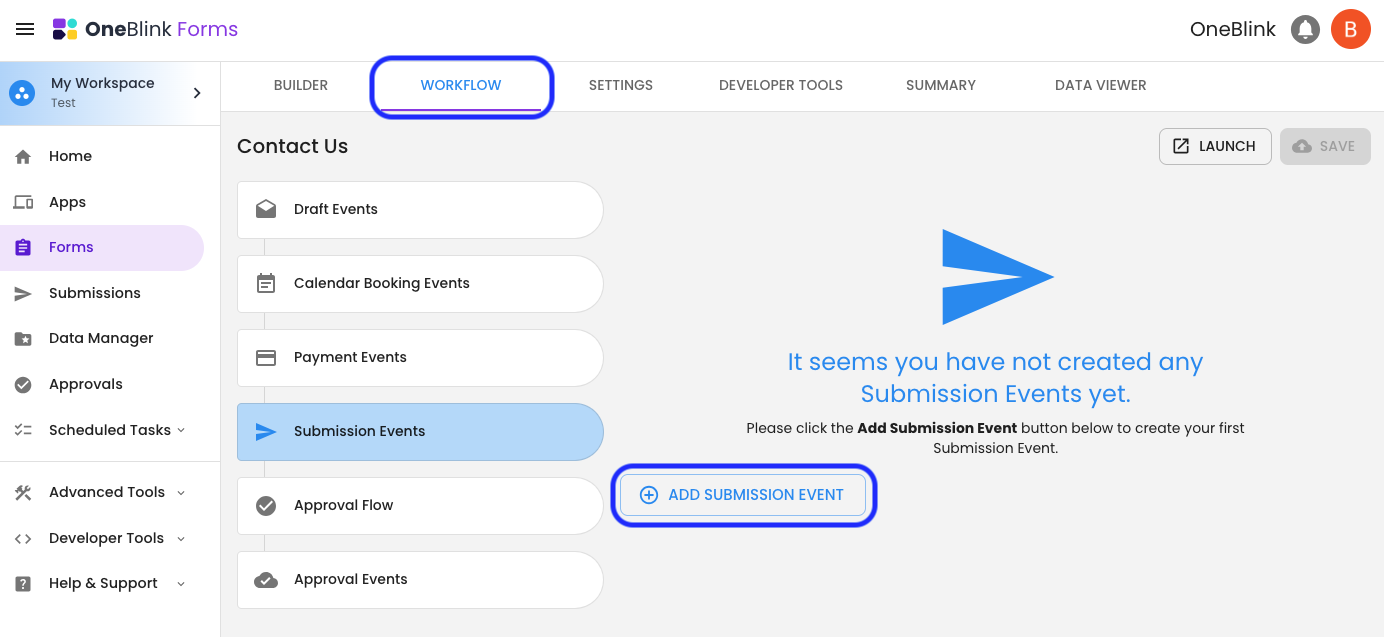
Step 3: Click the 'Add PDF' button, select Custom and choose your Custom PDF.
Success Message
As part of the submission, the user is presented with the success message. This message can include a button to download the submission PDF.
Step 1: Navigate to the Settings tab and click the 'Add PDF' button.
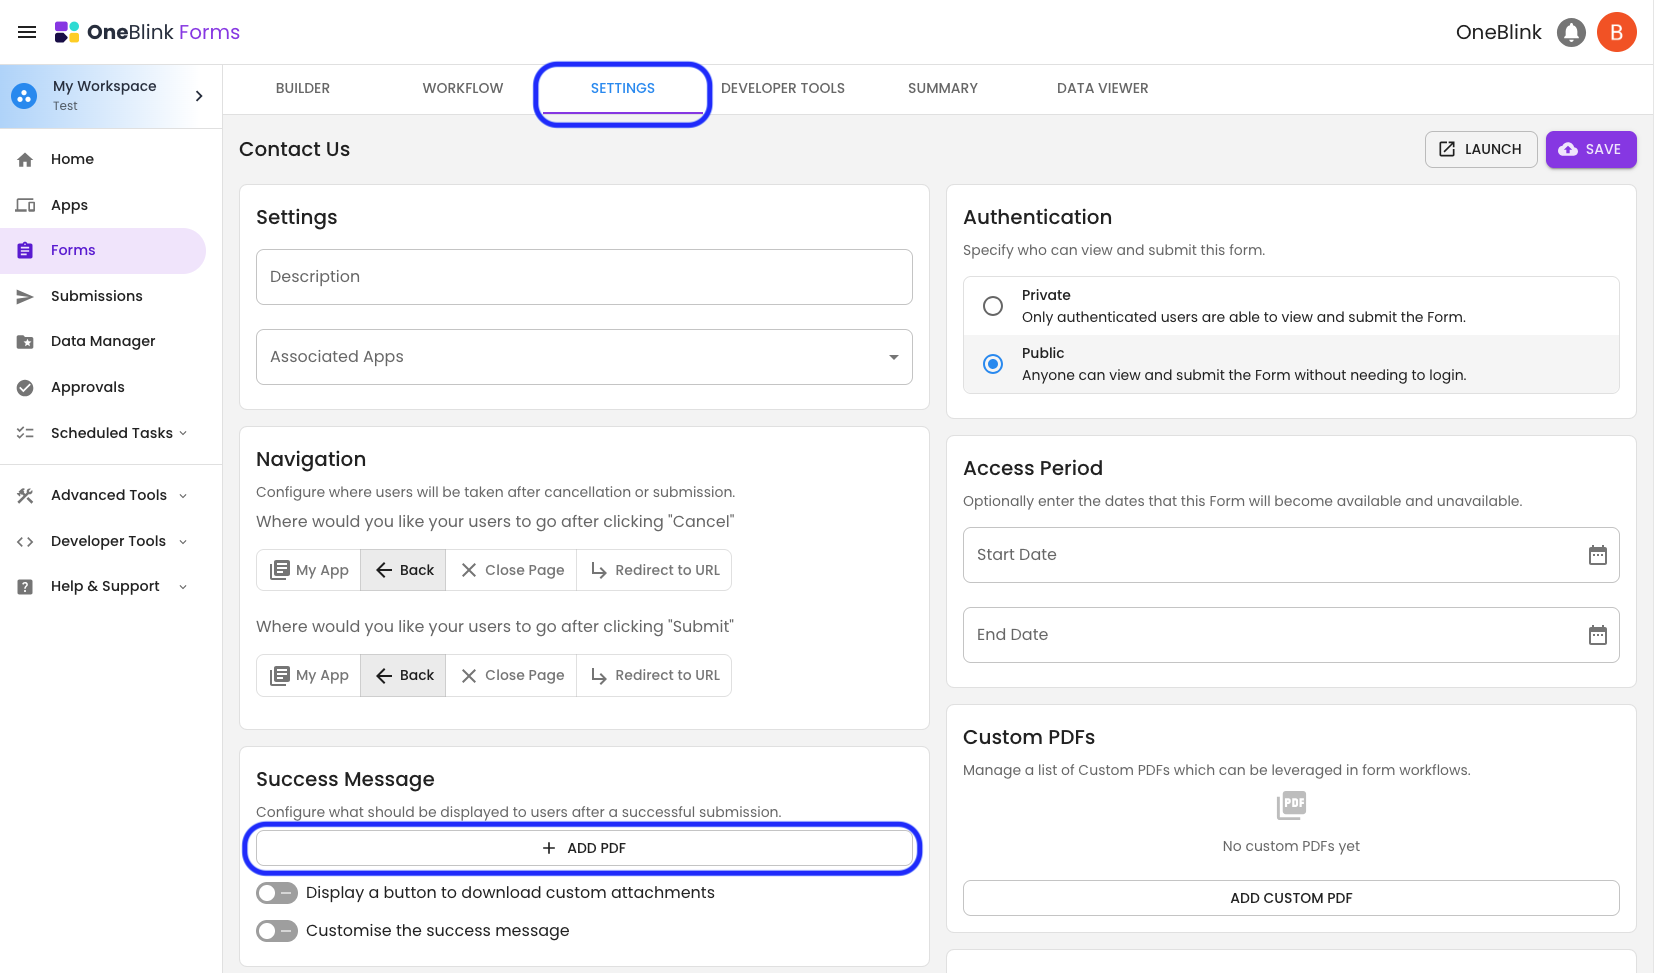
Step 2: In the PDF Configuration Settings, select Custom and choose your Custom PDF.

Allowing Fields on PDF to be Editable
If you want to allow your users to modify the fillable fields on the Custom PDF, then you can enable the 'allow resulting filled fields on PDF to be edited' switch. This will ensure that the fillable fields on your Custom PDFs remain fillable after they have been populated with form content.

Mapping Repeatable Set Elements
If you have a table in your form that requires you to map to an element within a repeatable set, you will need to specify which repeatable set entry number you want to use for that specific PDF mapping. In the example below of a Kindergarten application form, the first child's first and last name will need to be mapped to Entry number 1, that being the first row of the table. For the second child, you will want to map to the second repeatable set entry, and so on.
Note that when creating your repeatable set element, you should include a maximum based on the number of rows in your PDF. For example, if your PDF table only includes 5 rows, you should add a maximum to your repeatable set of 5.

Tips & Tricks
With the custom PDF configured, after a submission is completed, the form data will be used to populate the Custom PDF.
- Font Size: Set a font size in your PDF editor, as this will be used when generating the content for the PDF. By default, this can be set to Auto, meaning the imported data will increase in font size until it fills the container.
- Multi-line: If you are populating a multi-line text box, make sure to enable the multi-line option within your PDF editor; this will ensure line breaks the user adds to the OneBlink form are respected within the PDF.
- Field Naming: Ensure the name of the PDF field is relevant, making the mapping process in the OneBlink LcS much easier.

Known Limitations
- Images: Images uploaded via the Camera or Files element cannot currently be embedded in the Custom PDF.
- Older Adobe Versions: Some PDF forms created on older versions of Adobe have had issues with being mapped in the platform.
Getting Help
If you have any questions or would like assistance with setting up Custom PDFs, please contact us via this support portal or email support@oneblink.io. We are happy to assist in any way we can.
Was this article helpful?
That’s Great!
Thank you for your feedback
Sorry! We couldn't be helpful
Thank you for your feedback
Feedback sent
We appreciate your effort and will try to fix the article