There are two types of users on the platform: Team Members and App Users.
Team Members can access the OneBlink Console. App Users can access one or more apps. For more information on App Users, check out the App Users article.
TABLE OF CONTENTS
- Creating a Team Member
- Roles
- Environment Restrictions
- Temporary Passwords
- Multi-Factor Authentication (MFA)
- Requiring MFA
- Removing Team Members
- Google Authentication
- Getting Help
Creating a Team Member
To add a new Team Member, follow the steps below:
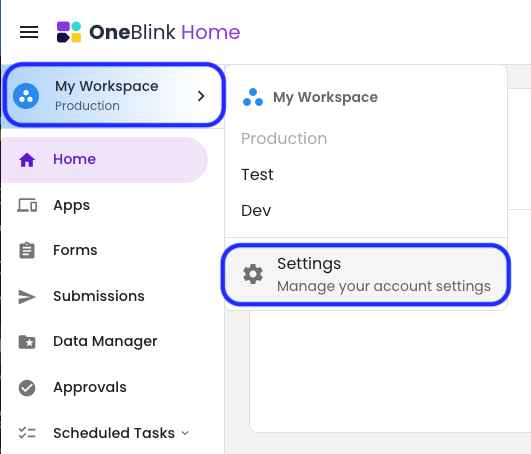
Step 1: Open the Environment Picker and click the Settings option.
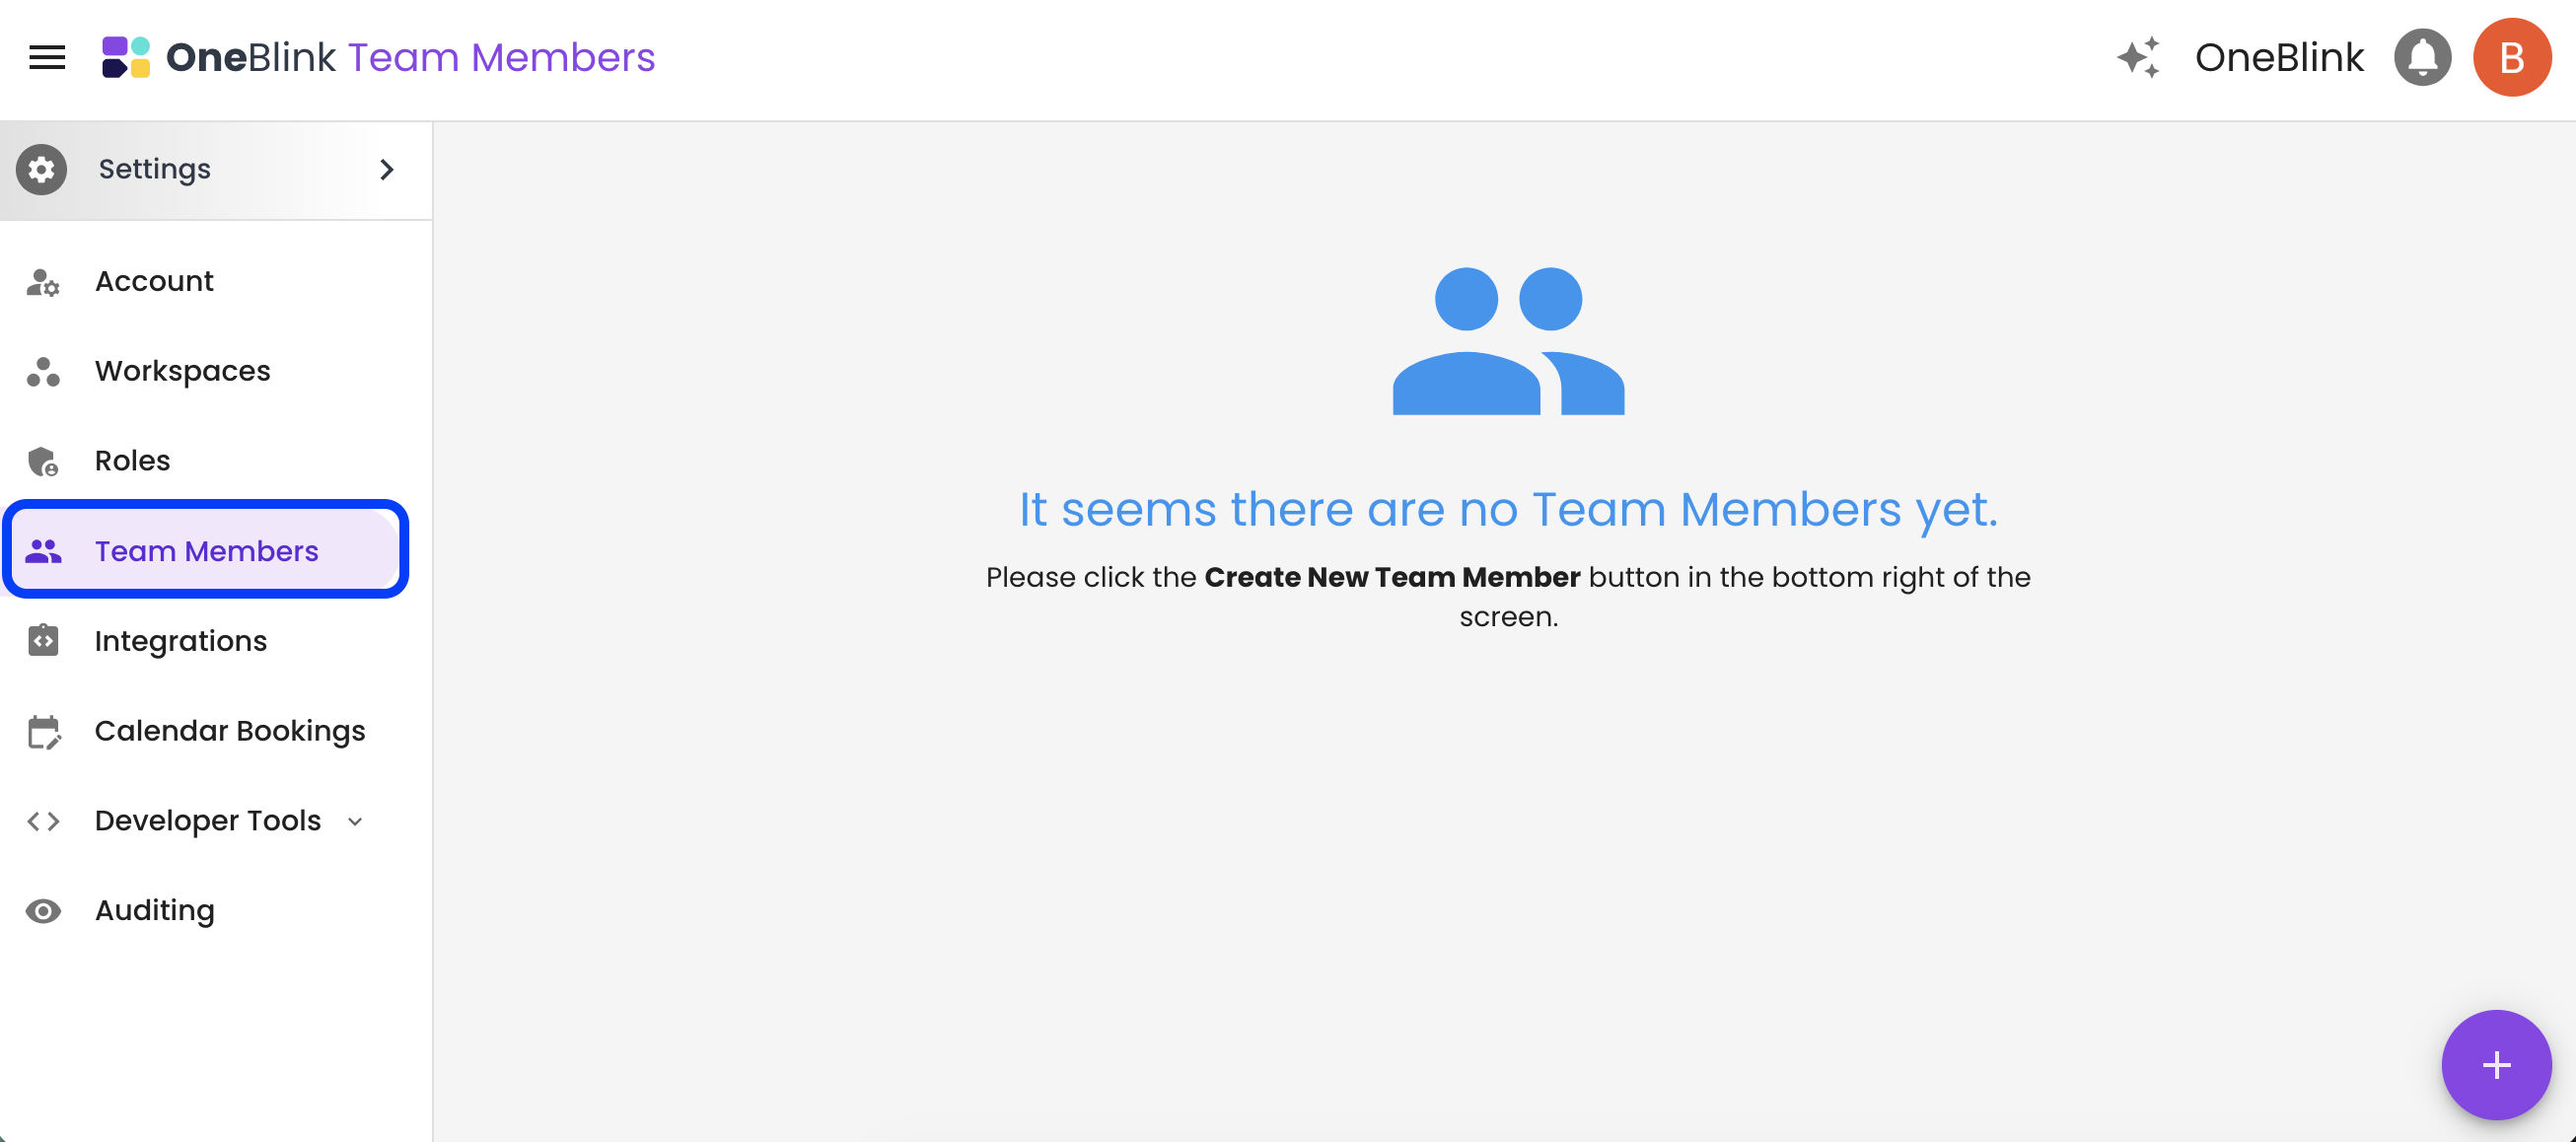
Step 2: Select the Team Members menu.
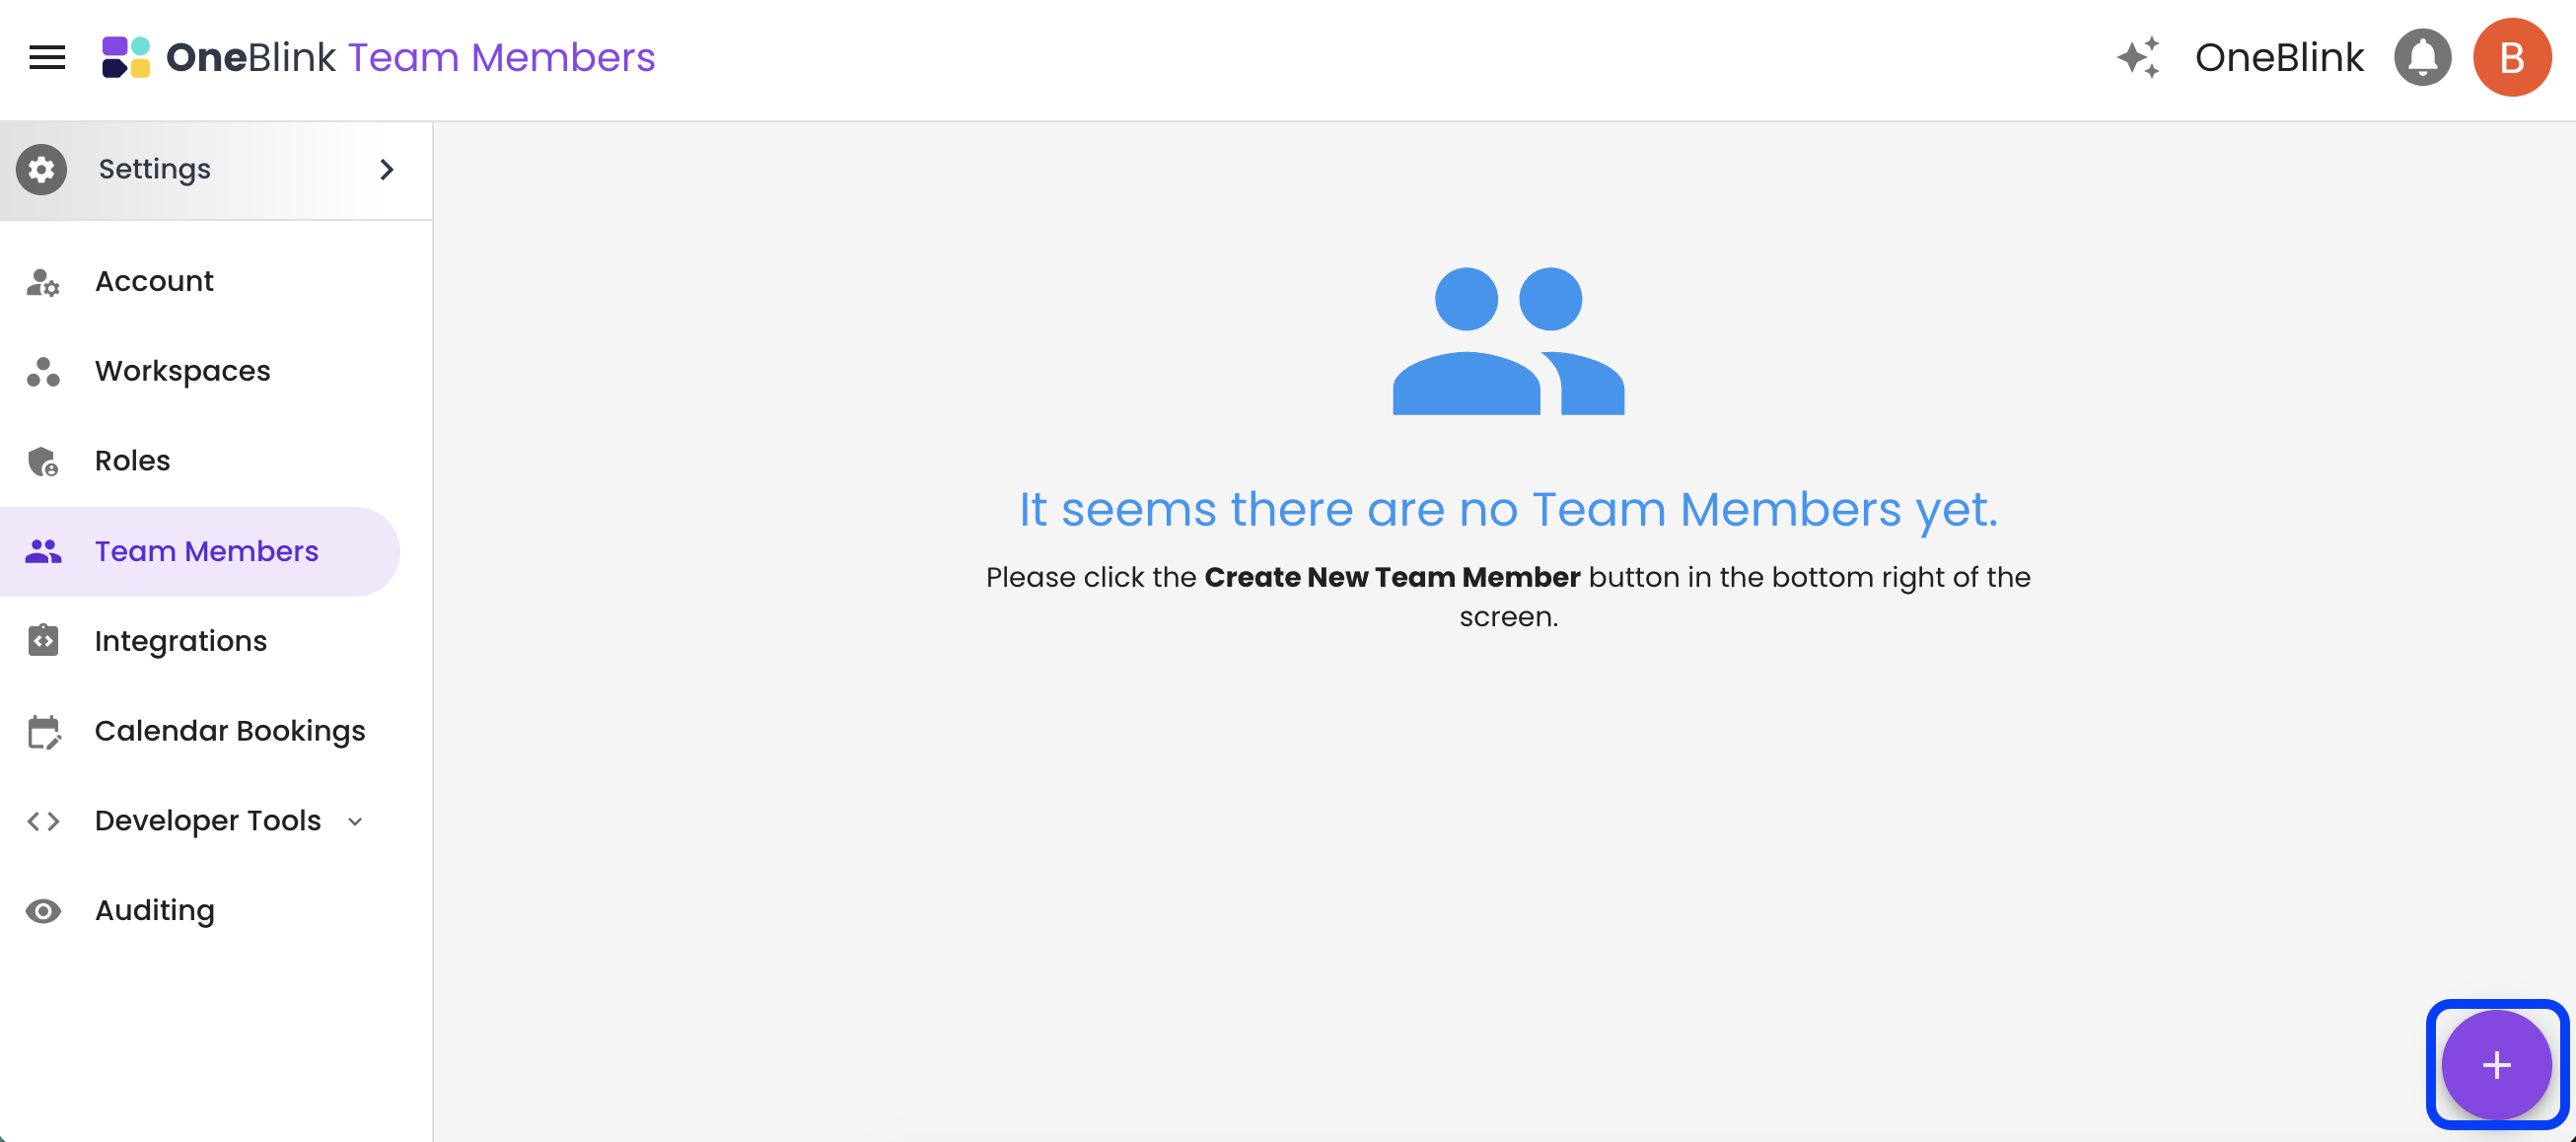
Step 3: Click the Add Team Member button at the bottom right of the page.
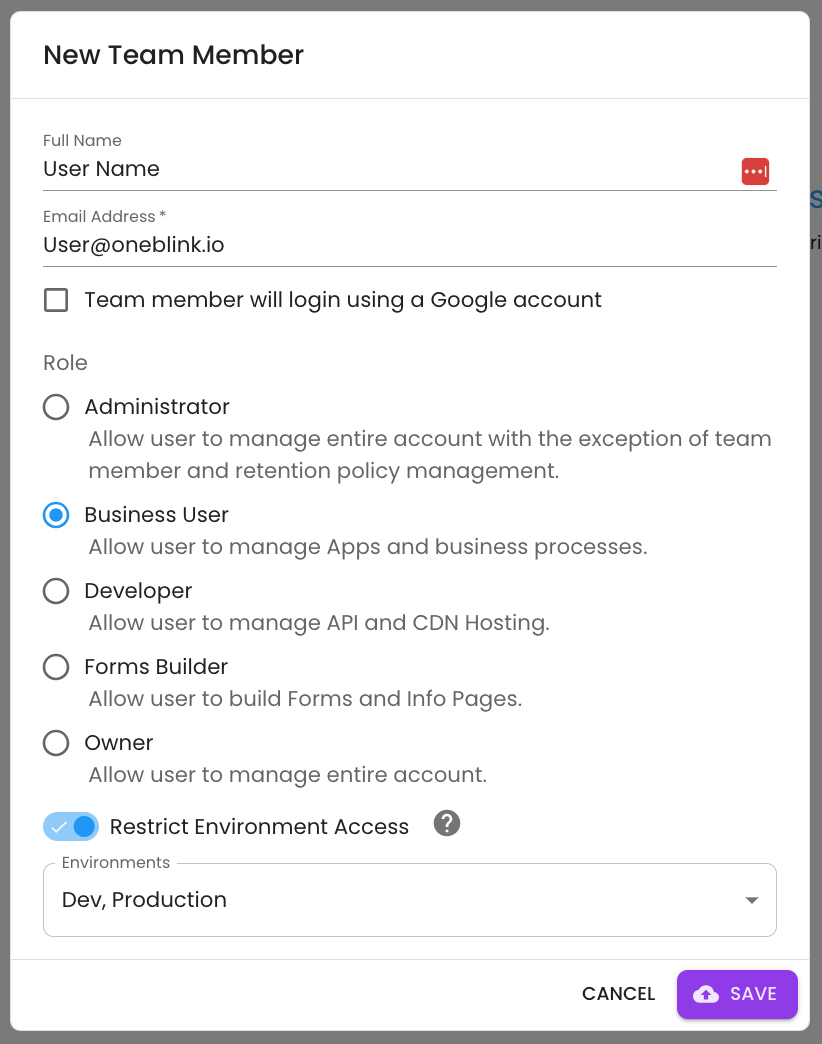
Step 4: Enter the Team Member’s full name and email address.
Step 5: Select the appropriate role for the Team Member and click Save.
Once the Team Member has been added, they will receive a welcome email. This email contains a generated temporary password and a link to log in to the OneBlink Console.
Roles
The LcS Console includes five Team Member roles by default:
- Owner
- Administration
- Developer
- Business User
- Form Builder
You can view these roles and their permissions from the Roles menu. From this menu, you can also view how many Team Members are assigned to each role, as well as add, edit, and remove roles.
For more information, check out the Roles article.
Environment Restrictions
Team Members can be restricted to specific environments.
To restrict a Team Member’s environment access, use the Restrict Environment Access switch when creating or editing a Team Member. Once this option is enabled, you can select the environments the Team Member should be able to access.
After environment restrictions have been configured, the Team Member will only be able to view, access, and modify the environments selected for their Team Member account.
For more information on environments, check out the Environments article.
Temporary Passwords
When a new Team Member is added, they are provided with a temporary password. This password is used when they first log in to the Console.
After using the temporary password to log in, the Team Member will be prompted to set a new password.
Temporary passwords last for 14 days. If the temporary password is not used within 14 days, it will expire, and a new temporary password will need to be sent to the Team Member.
Temporary Password Status
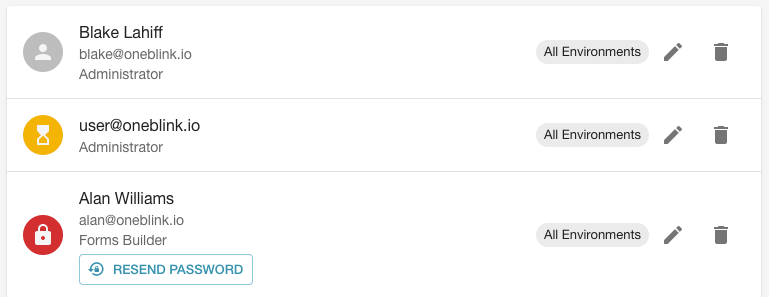
When a new Team Member is added to the Console, an orange hourglass icon will appear next to their user details.
This means the Team Member has not logged in and their temporary password has not expired.
If the temporary password expires, the icon will change to a red padlock. When this happens, the Team Member will not be able to log in until a new temporary password is sent.
To send a new temporary password, click the Resend password button. This will send the Team Member an email with a new temporary password that is valid for another 14 days.
Alternatively, the Team Member can use the password reset process. This will send them a verification code that can be used to reset their password.
Multi-Factor Authentication (MFA)
Multi-factor authentication (MFA), also known as two-factor authentication (2FA), is a best practice that requires a second authentication factor in addition to a username and password.
We strongly recommend enabling MFA to improve account security.
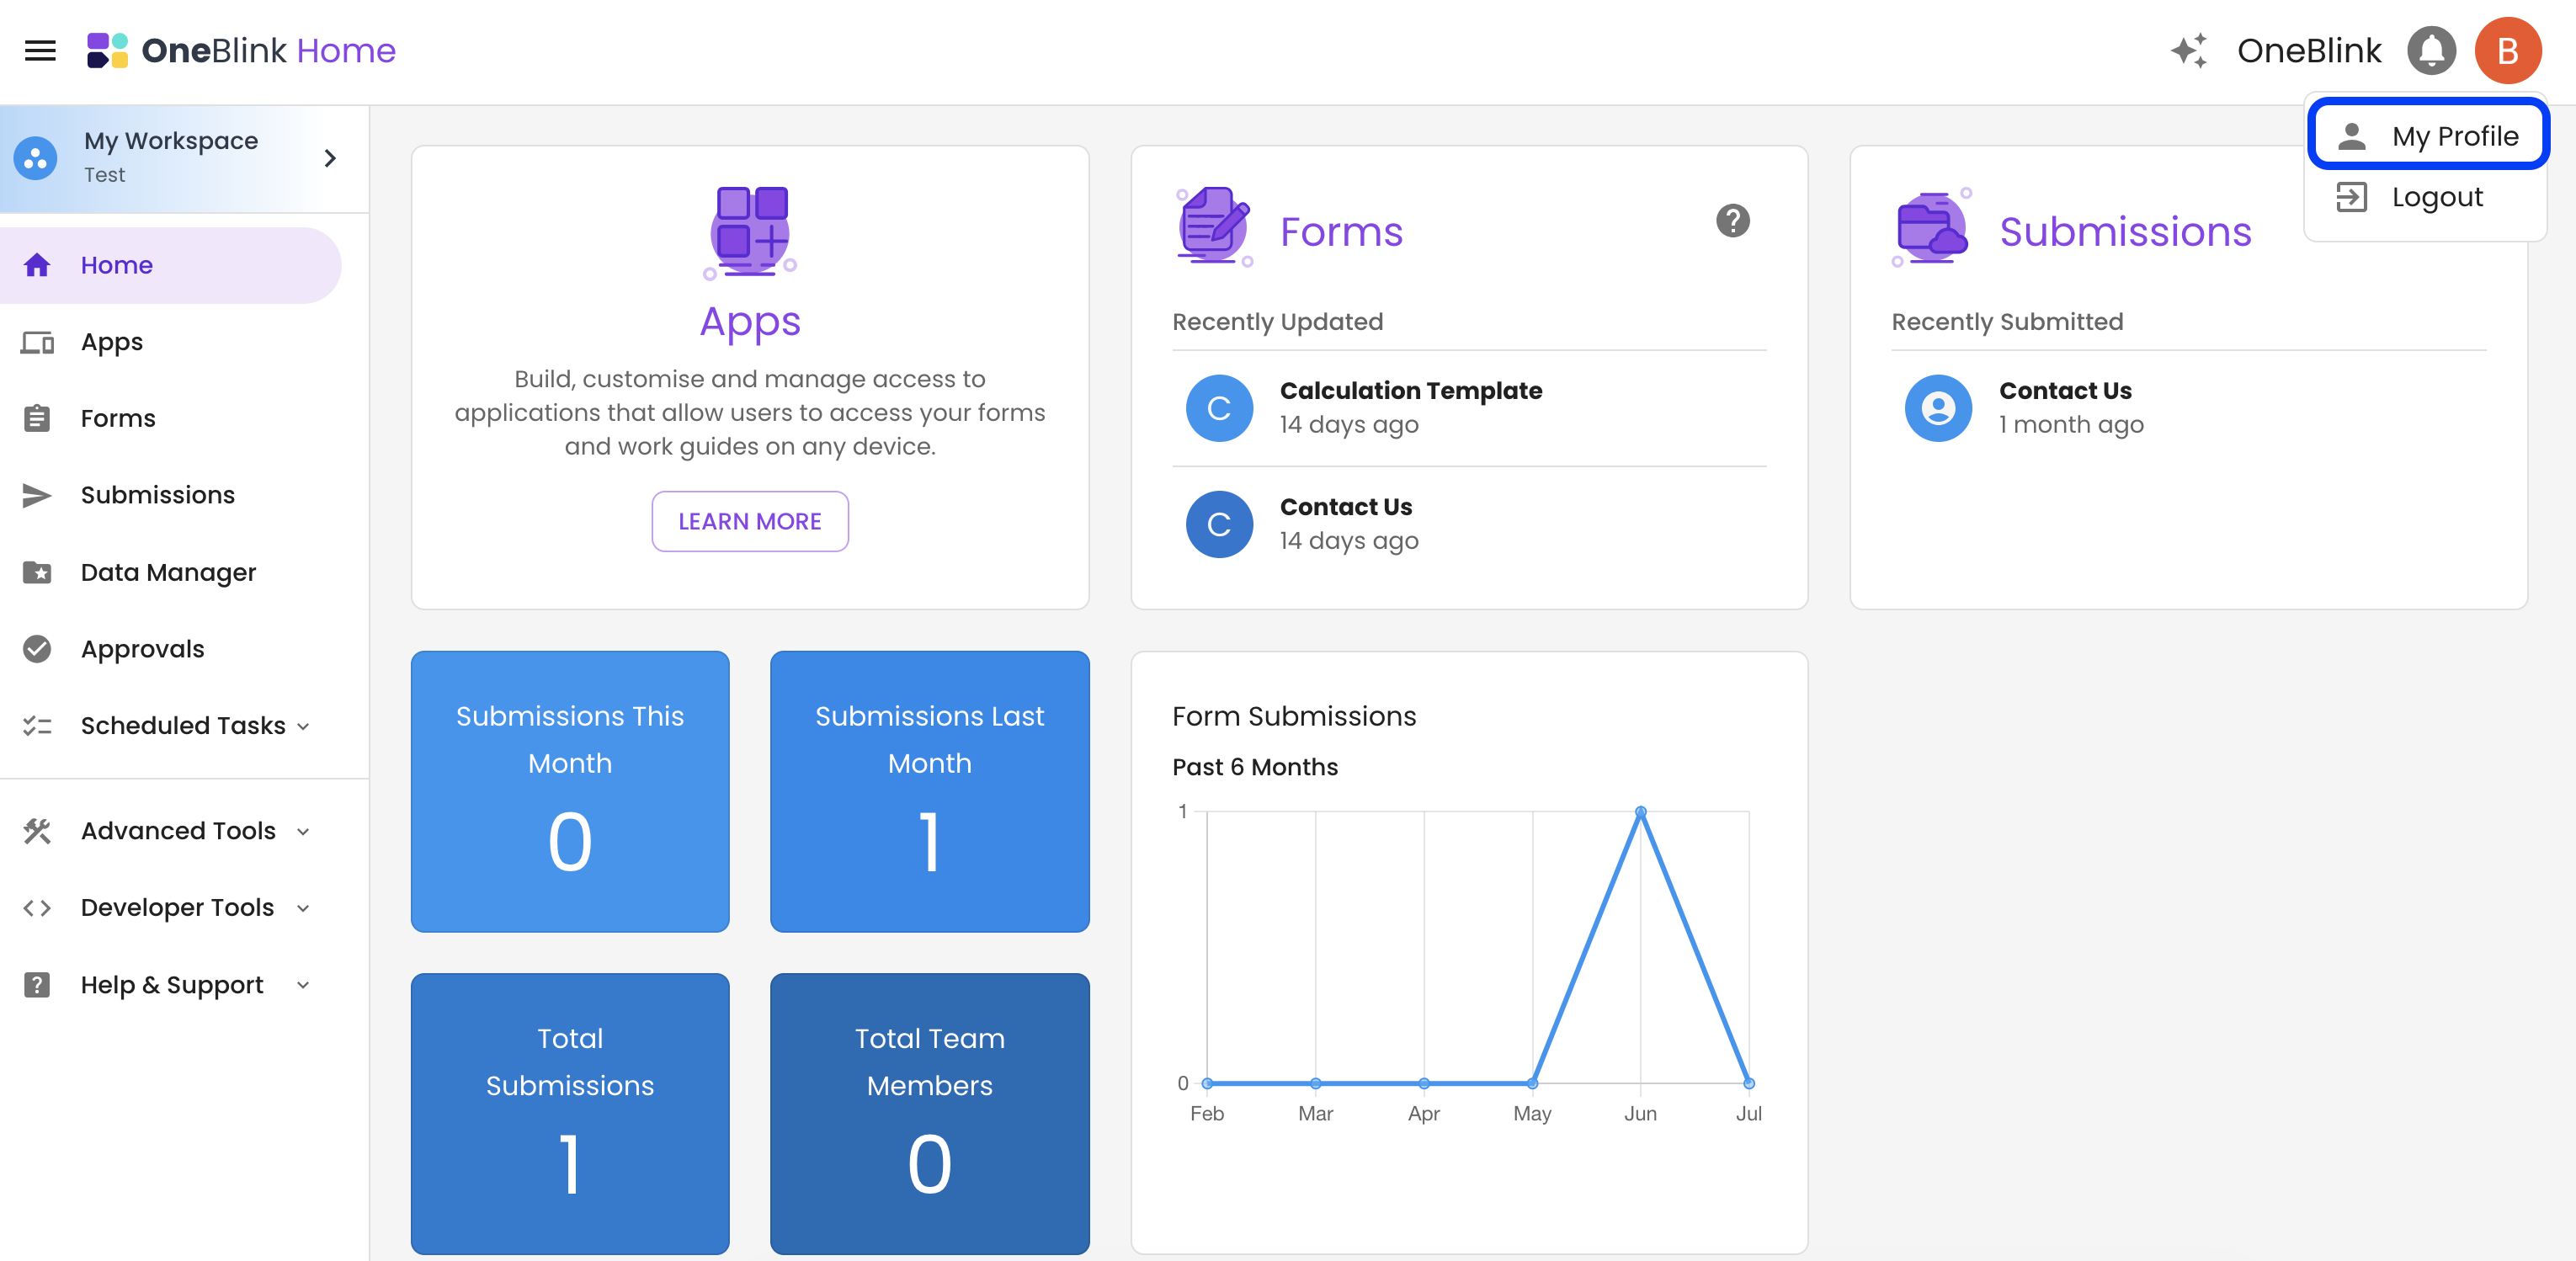
To enable MFA, open the Profile screen by clicking the person icon in the top right corner of the Console.
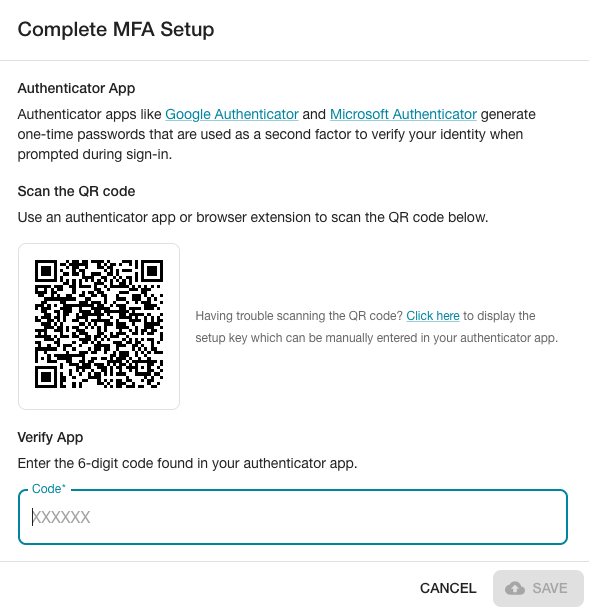
MFA uses an authenticator app, such as Google Authenticator or Microsoft Authenticator, to generate one-time passwords. Follow the steps in the MFA setup process to configure your authenticator app and start using MFA when logging in to the platform.
Requiring MFA
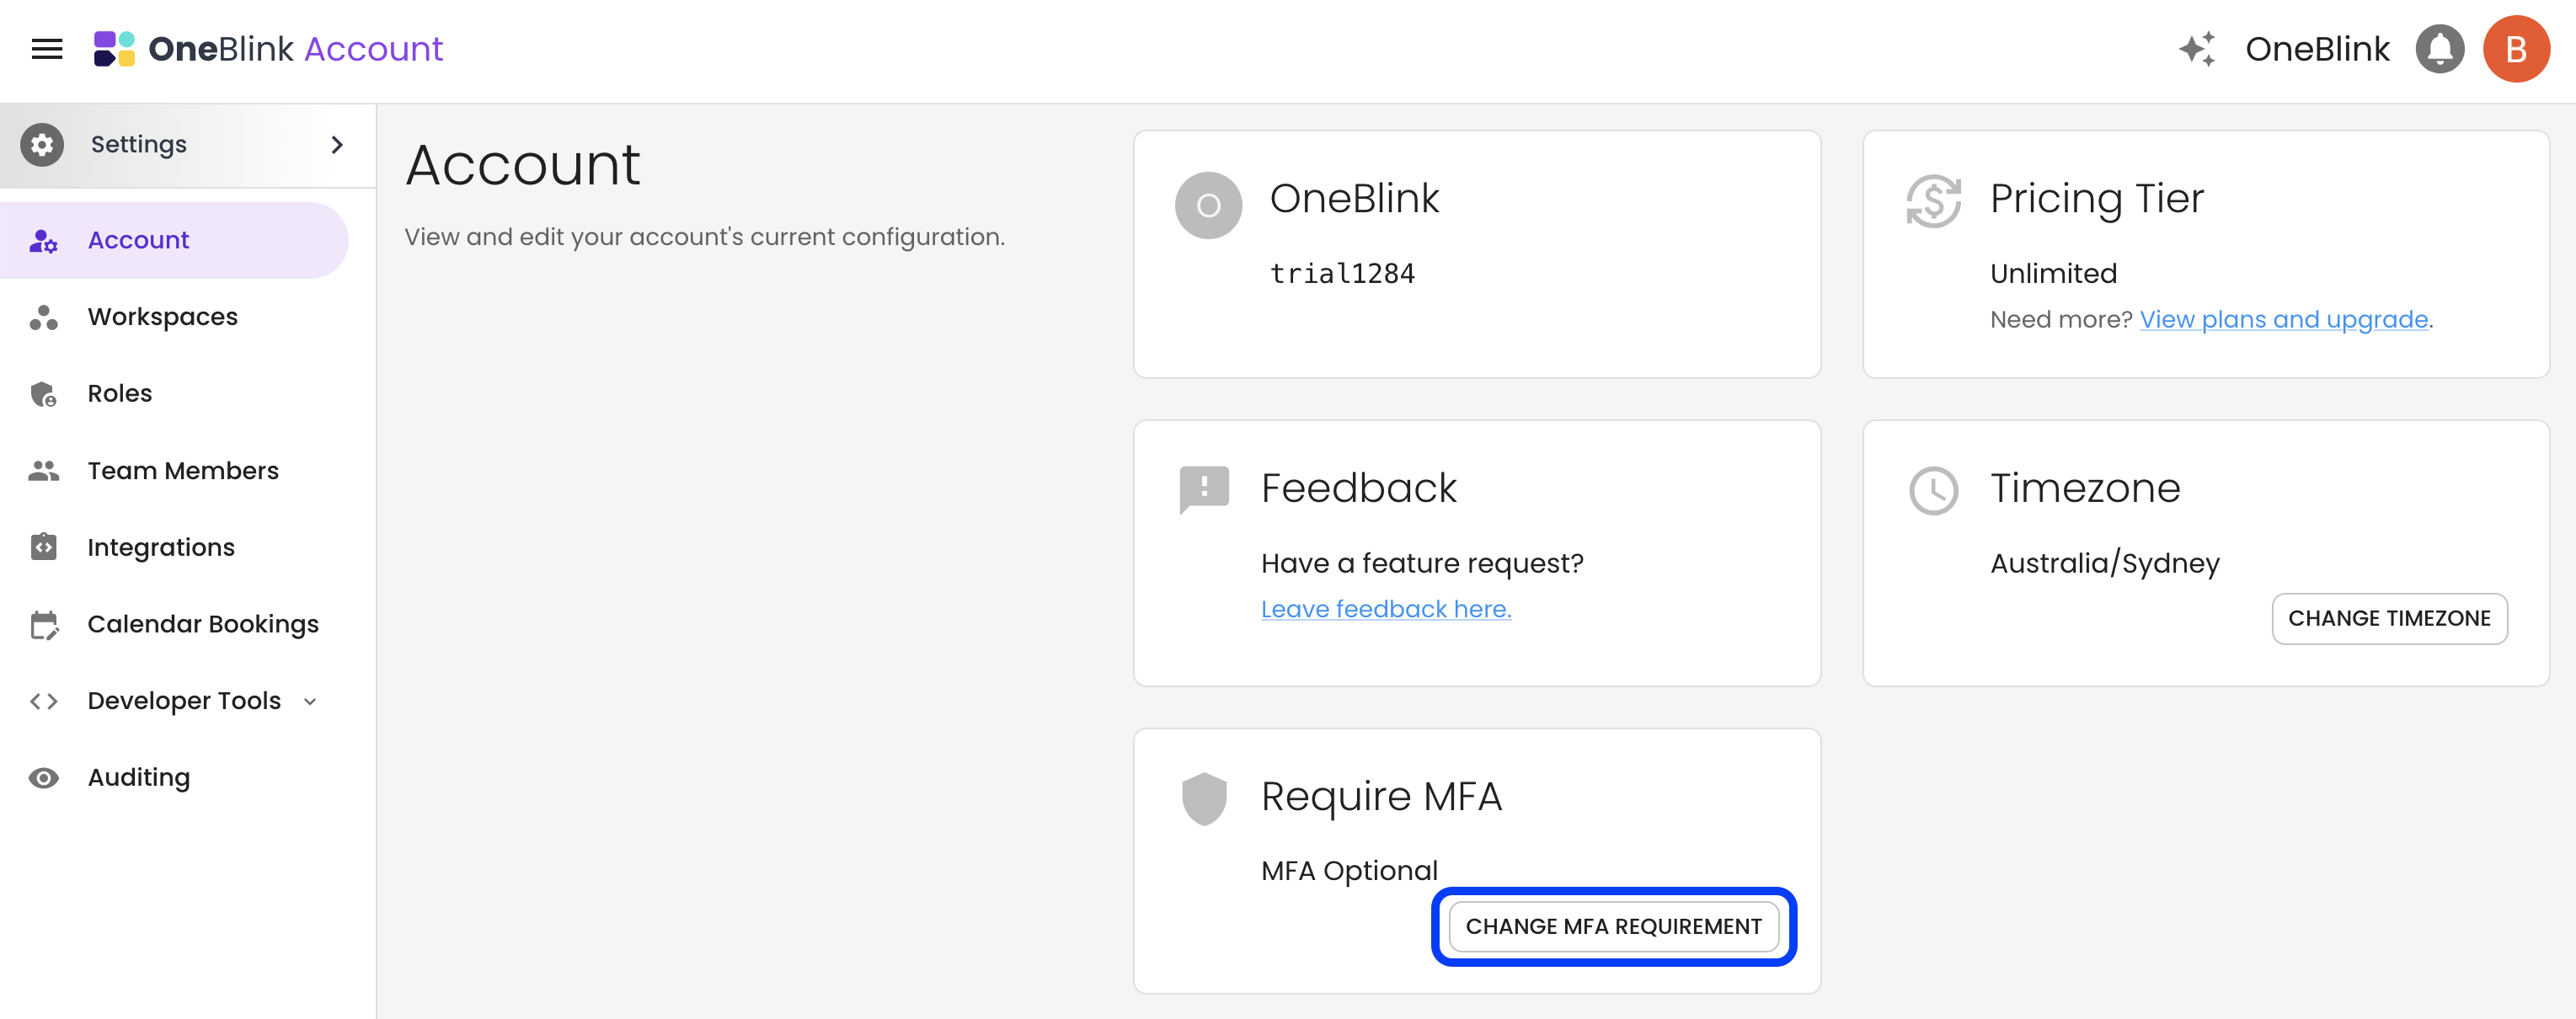
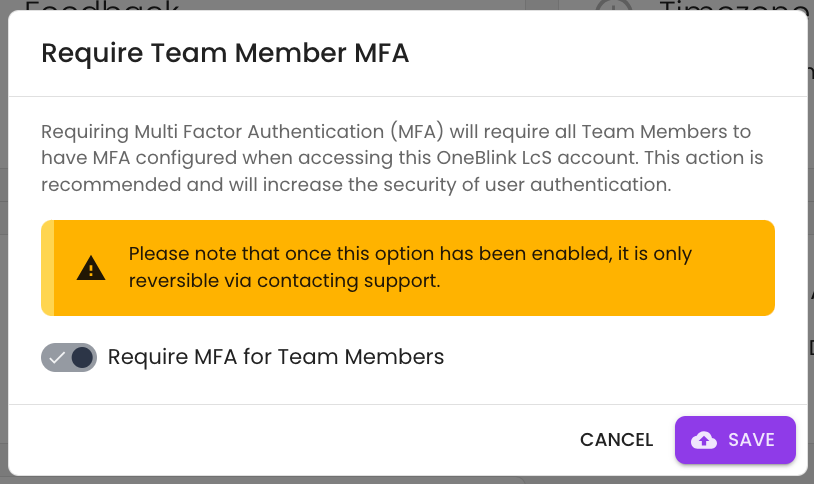
Requiring MFA ensures that all Team Members in the account must have MFA configured.
This setting is available in the Account menu of the Console. To configure this setting, you will need the Team Member: Manager permission.
Please note that once MFA has been required, you will need to contact support to disable this setting.
Removing Team Members
To remove a Team Member, click the trash icon to the right of their email address. You will be prompted to confirm before the Team Member is deleted.
When adding and removing users, you will need the user management permission enabled. For more information, check out the Roles article.
Google Authentication
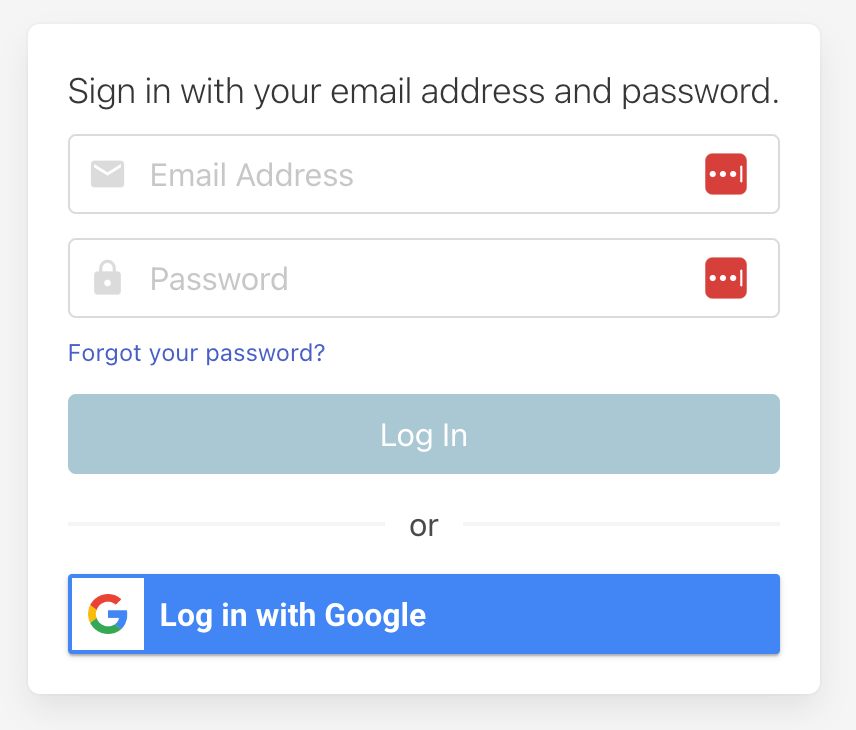
Team Members can also authenticate using Google.
When adding a new Team Member, select the Login with Google option. This ensures the Team Member is not sent a temporary password and can log in using Google instead.
Getting Help
If you need any assistance with Team Members, please reach out through the Report Issue menu or email support@oneblink.io.
Was this article helpful?
That’s Great!
Thank you for your feedback
Sorry! We couldn't be helpful
Thank you for your feedback
Feedback sent
We appreciate your effort and will try to fix the article